
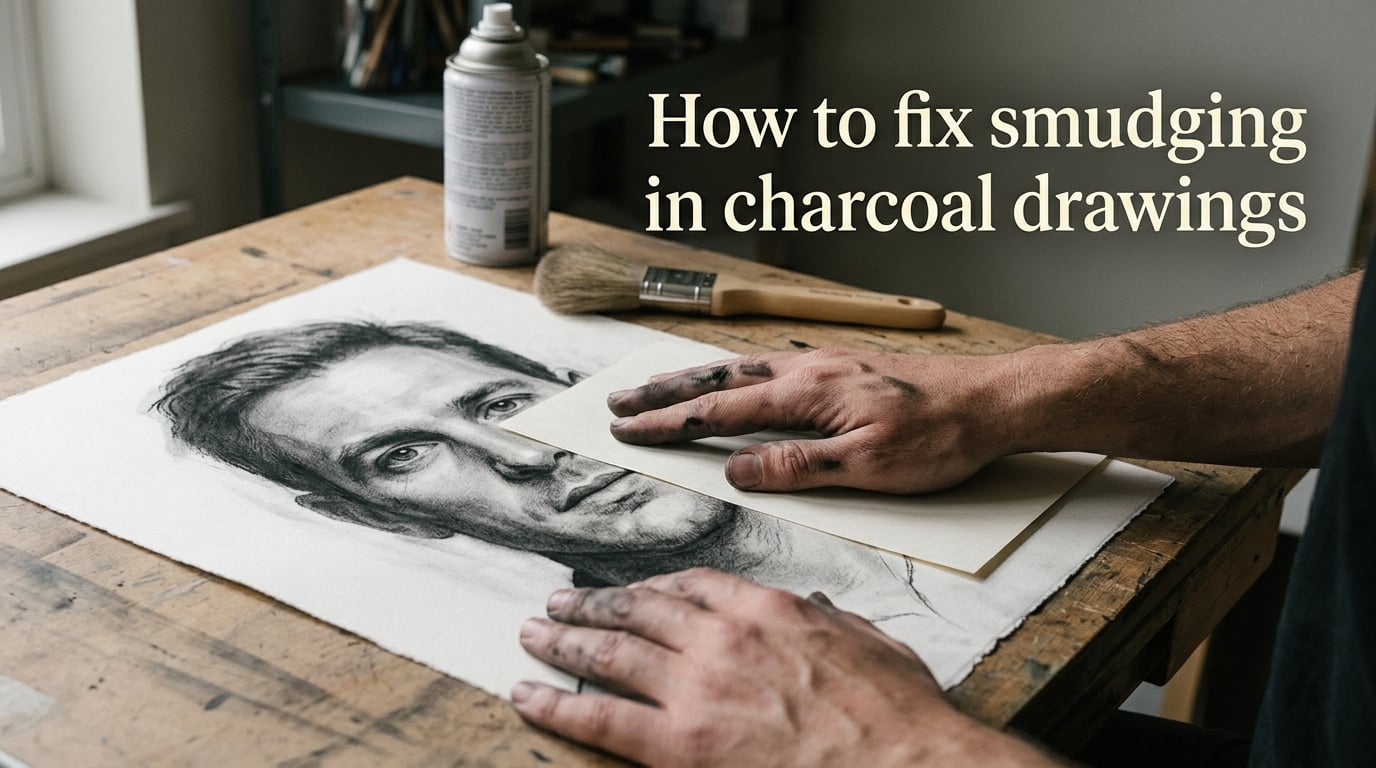
If you have ever finished a charcoal drawing only to find your hand has smeared the highlights, you already know how to fix smudging in charcoal drawings. The trick is a layered approach: prevent smudges while you work, recover any that still happen, and seal the finished piece so it survives handling, storage, and mailing. I have spent years working with charcoal and have ruined more drawings than I would like to admit. This guide is everything I wish someone had told me when I started.
Here are the seven core methods we will cover, in order of when to use them:
- Use a paper or cellophane guard under your drawing hand.
- Plan your drawing order from top to bottom.
- Fix any existing smudges with a kneadable eraser or Blu-Tak.
- Choose sanded paper so charcoal particles grab instead of sitting loose.
- Apply fixative spray in thin, even coats once the drawing is done.
- Interleave finished drawings with glassine sheets for storage.
- Frame with acid-free mat board and UV-protective glass for display.
If you only have a minute, start with step 1 and step 5. Those two habits solve 90 percent of the smudging problem. The rest of this article goes deeper on each method, plus the techniques that work when fixative is not an option.
Table of Contents
Why Charcoal Drawings Smudge in the First Place
Charcoal is just ground carbon pressed into sticks or pencils. Unlike graphite, charcoal particles do not bond to the paper fibers when you draw. They sit on top of the paper surface, held in place by tiny tooth (texture) in the sheet. The moment anything rubs across the surface, those loose particles transfer to the rubbing object.
That is why your hand, a sheet of tracing paper, or even the inside of a frame can all become smudge culprits. The smudge is not a defect in your technique. It is the natural behavior of the medium.
A few factors make smudging worse. Smooth paper has less tooth to hold charcoal in place, so more particles stay loose. Vine charcoal smudges more easily than compressed charcoal because compressed sticks deposit denser, stickier pigment. Beginners tend to smudge more because their hands brush across the paper without realizing it. Even experienced artists deal with it. The goal is to manage it, not eliminate it.
Once you understand that smudging is friction-driven, every technique below starts to make sense. We are either reducing friction, locking particles in place, or cleaning up the mess that friction leaves behind.
How to Prevent Charcoal Smudging While You Draw
Prevention is the most reliable way to keep a charcoal drawing intact. The methods below are what professional artists use in real studios every day. Pick two or three that fit your workflow and stick with them.
Place a Paper Guard Under Your Hand
This is the single most effective in-progress technique. Slide a clean sheet of scrap paper, tracing paper, or a piece of glassine under your drawing hand as you work. Your hand rests on the guard instead of the drawing. The barrier catches stray particles before they can transfer back into your work.
Move the guard as your hand moves. Keep it positioned between your hand and the area you just shaded. Many artists keep a stack of scrap sheets nearby and swap them out as they fill with charcoal dust.
Try a Cellophane Sheet for Full Coverage
Cellophane (the clear, glossy sheets sold in art supply stores) takes the paper guard idea further. You lay a sheet of cellophane over the entire drawing and rest your hand on top of it. You can see through the cellophane to place your strokes, but it blocks direct contact between your skin and the charcoal.
Cellophane is especially useful in the final stages of a drawing, when you are adding small details and your hand naturally drifts back over already-shaded areas. It is cheaper than a mahlstick and works on large areas where a mahlstick is impractical.
Use a Mahlstick for Fine Detail Work
A mahlstick is a long, padded stick that artists use as a hand rest for detailed work. You brace the padded end on the drawing (away from the area you are working on) and rest the heel of your hand on the shaft. Your hand is supported without touching the paper.
You can buy a mahlstick at any art supply store, or make a DIY version by wrapping a wooden dowel with a small towel and taping it in place. Mahlsticks are not just for oil painters. They are excellent for charcoal detail work, especially around faces and small highlights.
Work Top to Bottom, Left to Right
Planning your drawing order reduces how often your hand passes over finished areas. Most right-handed artists work top to bottom and left to right. Left-handed artists usually reverse the horizontal direction. The exact order matters less than the principle: avoid reaching across shaded areas whenever possible.
For portraits, I work the forehead and hair first, then the eyes and nose, then the mouth and chin, then the neck and shoulders. That keeps my hand moving downward and out of the frame, not back across the face.
Choose Charcoal Pencils for Detail Areas
Charcoal pencils deposit more controlled pigment than sticks. You can sharpen them to a point and lay down crisp lines without the broader smearing that comes from a stick dragged across the paper. Use sticks for big shapes and broad shading, pencils for edges and details.
This switch alone dramatically reduces smudging because the pencil tip touches the paper in a small area, not a broad face of charcoal.
Switch to Sanded Paper for Better Adhesion
Sanded papers (like Pastelmat or UART) have a gritty surface that grips charcoal particles. The particles lock into the tooth instead of sitting loosely on top. The result is a drawing that resists smudging far better than the same drawing on smooth drawing paper.
If smudging is a constant battle for you, switching paper is one of the most effective long-term fixes. You will use less charcoal, get richer blacks, and the finished drawing holds up better to handling.
Keep Your Hands Clean
Charcoal-covered hands will smudge anything they touch. Keep a damp cloth or a pack of wet wipes nearby and wipe your hands frequently during a drawing session. Clean hands pick up fewer particles and leave fewer smudges.
How to Fix Charcoal Smudges That Already Happened
Even with great prevention, smudges happen. The good news is that charcoal is one of the most forgiving drawing media when it comes to corrections. Here is how to recover without ruining the rest of your work.
Use a Kneadable Eraser for Gentle Pickup
A kneadable eraser (also called a putty rubber) is soft, pliable, and lifts charcoal by pressing into the paper and rolling off loose particles. It is the safest tool for smudge removal because it does not abrade the paper surface.
Knead the eraser until it is soft, then dab it gently onto the smudge. Do not rub. Dabbing lifts the smudged charcoal without disturbing the layers underneath. You can shape the eraser to a fine point for tight spots.
Try Blu-Tak for Precision Lifting
Standard Blu-Tak (the sticky putty used to hang posters) is a favorite trick for charcoal correction. Press a small piece onto the smudged area, pull it off, and the charcoal comes with it. Repeat as needed.
Blu-Tak picks up slightly more than a kneadable eraser and is excellent for restoring highlights in the middle of a dark area. It also conforms to textured paper better than a rigid eraser.
Use a Battery or Electric Eraser for Highlights
A battery-powered eraser (like the Derwent Electric Eraser) spins a soft eraser tip at high speed. It removes charcoal cleanly and lets you draw crisp, bright highlights back into a dark area. These are not cheap, but they are the closest thing to a “delete button” for charcoal.
Use the electric eraser last, on the areas where the kneadable eraser and Blu-Tak were not enough. They are aggressive and can leave a faint mark on the paper if you linger too long in one spot.
Sweep Away Loose Particles with a Drafting Brush
Before any erasing or fixative, sweep the drawing with a soft drafting brush. Loose particles on the surface are smudge fuel. Brushing them away (gently, with the brush held at an angle so you do not smear) clears the deck and makes your next step more effective.
Always brush before spraying fixative. If you spray over loose particles, the fixative locks them into the paper in whatever position they are sitting in, and you cannot remove them later.
Know When to Leave the Smudge
Sometimes a soft smudge is not a problem. Atmospheric backgrounds, soft shadow gradients, and blurred edges all benefit from slight smudging. If you are aiming for a soft, painterly effect, the smudge is part of the look.
Save aggressive erasing for places where you genuinely want crisp edges or bright highlights. Trying to “fix” every smudge often flattens the drawing and makes it look overworked.
How to Seal a Charcoal Drawing with Fixative Spray
Fixative is the most common way to lock a finished charcoal drawing in place. It is a spray that deposits a thin layer of resin or casein over the charcoal, bonding the particles to the paper. Used correctly, it stops smudging almost completely.
Pick the Right Type of Fixative
There are three main choices, and they matter.
Workable fixative lets you keep drawing on top after spraying. Use it when you want to add more layers after a fixative pass. The downside is it does not lock the charcoal down as firmly as a non-workable product.
Non-workable (final) fixative locks the drawing permanently. Use it once the drawing is finished and you do not plan to add more charcoal.
Matte vs gloss finish affects the look of the drawing. Matte fixative preserves the natural charcoal appearance and does not add shine. Gloss fixative adds a slight sheen and tends to darken the values a little. For most charcoal work, matte is the safer choice.
Step-by-Step Fixative Application
Follow this process and you will get a smooth, even seal without drips or value shifts.
- Let the drawing dry completely. If you used any blending stumps with moisture, give it at least an hour.
- Place the drawing on a flat surface in a well-ventilated area, or work outside. Fixative fumes are not something you want to breathe.
- Hold the can 12 to 18 inches away from the drawing. Too close causes drips. Too far and the spray drifts.
- Spray in a slow, side-to-side sweeping motion. Start each pass off the edge of the drawing and finish off the other edge so you do not pool fixative in one spot.
- Apply a light first coat. Let it dry for five minutes.
- Apply a second light coat at a different angle (top to bottom this time) to catch any spots the first pass missed.
- Let it dry fully before handling. Most fixatives set in 15 to 30 minutes.
Always test on a scrap drawing first. Fixative sprays behave differently depending on brand and paper, and you want to know how yours will react before you commit a finished piece to it.
Why Hairspray Is Not Recommended
You will see hairspray recommended as a charcoal fixative in a lot of older forum posts. I have tried it. I would not recommend it. Here is why.
Hairspray is not archival. It yellows over time, sometimes within a year. It is not designed to bond charcoal to paper, so the seal it provides is uneven. It can shift your values (darken mid-tones more than darks). It also leaves a slight residue that can damage the paper over time.
Real fixative costs a few dollars more and protects your drawing for decades. The trade is not worth it for finished work.
Best Fixative Characteristics to Look For
When shopping for fixative, the qualities that matter most for charcoal are: archival quality (will not yellow), non-yellowing formula, fine mist spray (not a coarse stream), quick drying, and low odor or indoor-safe if you do not have outdoor ventilation. Brands like Krylon Workable Fixatif, Winsor & Newton Fixative, and SpectraFix are widely used by charcoal artists. Test any new brand on scrap before using it on a finished piece.
How to Protect Charcoal Drawings When Storing or Mailing
Fixative helps, but storage and display are where drawings get ruined long-term. Here is how to keep them safe.
Use Glassine Sheets Between Drawings
Glassine is a smooth, semi-transparent archival paper that does not stick to charcoal. Place a sheet of glassine over the drawing surface before stacking or filing. Unlike plastic sleeves, glassine will not lift particles off the drawing. Use glassine over glassine, not plastic sleeves.
Interleave Sketchbook Pages with Wax Paper or Glassine
If you work in a sketchbook, slipping a piece of wax paper or glassine between your finished page and the next blank page prevents the charcoal from transferring when you close the book. This is one of the most common problems sketchbook artists run into, and the fix is just a sheet of paper.
Frame with Conservation Materials
For drawings you want to display, use acid-free mat board, acid-free backing, and UV-protective (museum) glass. A double or triple mat creates an air gap between the glass and the drawing, which prevents the glass from pressing against the charcoal and causing transfer over time.
Mail Artwork Rigid and Flat
To mail a charcoal drawing, sandwich it between two pieces of rigid foam board or cardboard, tape the boards together so nothing shifts, and place the whole thing in a flat mailer. Do not roll charcoal drawings. The bending will crack the charcoal layer and create smudges you cannot fix.
Spray the drawing with fixative before mailing even if you have sealed it already. Mailing creates a lot of vibration and friction, and an extra fixative coat provides insurance.
Avoid Touching the Drawing
This sounds obvious, but every touch leaves a mark. When you handle a finished drawing, hold it by the edges or use clean cotton gloves. When you lean it against a wall, make sure nothing rests against the drawing surface. When you set it on a table, put a clean sheet of paper underneath.
Frequently Asked Questions
How to stop charcoal drawings from smudging?
The most effective method is to place a clean sheet of paper or cellophane under your drawing hand as you work, then seal the finished piece with a light coat of archival fixative spray. Working top to bottom and using charcoal pencils instead of sticks for details also dramatically reduces smudging during the drawing process.
How to fix mistakes in charcoal drawings?
For smudges you want to remove, dab gently with a kneadable eraser or press a small piece of Blu-Tak onto the area and lift it off. For highlights you want to restore in a dark area, use a battery-powered eraser. Always sweep the drawing with a soft drafting brush before any erasing or fixative to clear loose particles.
How to fix charcoal drawings without fixative?
Use a paper or cellophane guard under your hand while drawing, work top to bottom to avoid crossing finished areas, switch to sanded paper so charcoal particles grip instead of sitting loose, and store finished drawings between glassine sheets. These four habits together prevent most smudging without any spray at all.
Can you use hairspray to fix charcoal drawings?
Hairspray is not recommended. It yellows over time, does not bond charcoal to paper as reliably as archival fixative, can darken your values unevenly, and leaves residue that may damage the paper. A real fixative spray costs slightly more and protects the drawing for decades.
What is the best fixative for charcoal drawings?
For most charcoal work, a matte, non-workable, archival fixative gives the best results. Look for non-yellowing formulas with a fine mist spray. Popular choices among charcoal artists include Krylon Workable Fixatif for in-progress layering and Winsor and Newton or SpectraFix for final sealing. Always test on scrap paper first.
How to spray fixative on charcoal drawing?
Let the drawing dry fully, work in a well-ventilated area or outside, hold the can 12 to 18 inches from the paper, and spray in slow side-to-side sweeps that start and end off the edge of the drawing. Apply two light coats instead of one heavy coat, allowing five minutes of drying between them. Spray at multiple angles to catch spots the first pass may miss.
Final Thoughts
Learning how to fix smudging in charcoal drawings is really about building a few small habits into your workflow. A paper guard under your hand, a soft brush sweep before sealing, two light coats of fixative, and a sheet of glassine in storage will solve almost every smudge problem you will ever run into. None of these steps take long, and they get easier with practice.
The medium is forgiving. Even when a smudge happens, kneadable erasers and Blu-Tak will recover most mistakes without a trace. Keep drawing, keep experimenting, and do not let the fear of smudging stop you from finishing a piece you are proud of.