
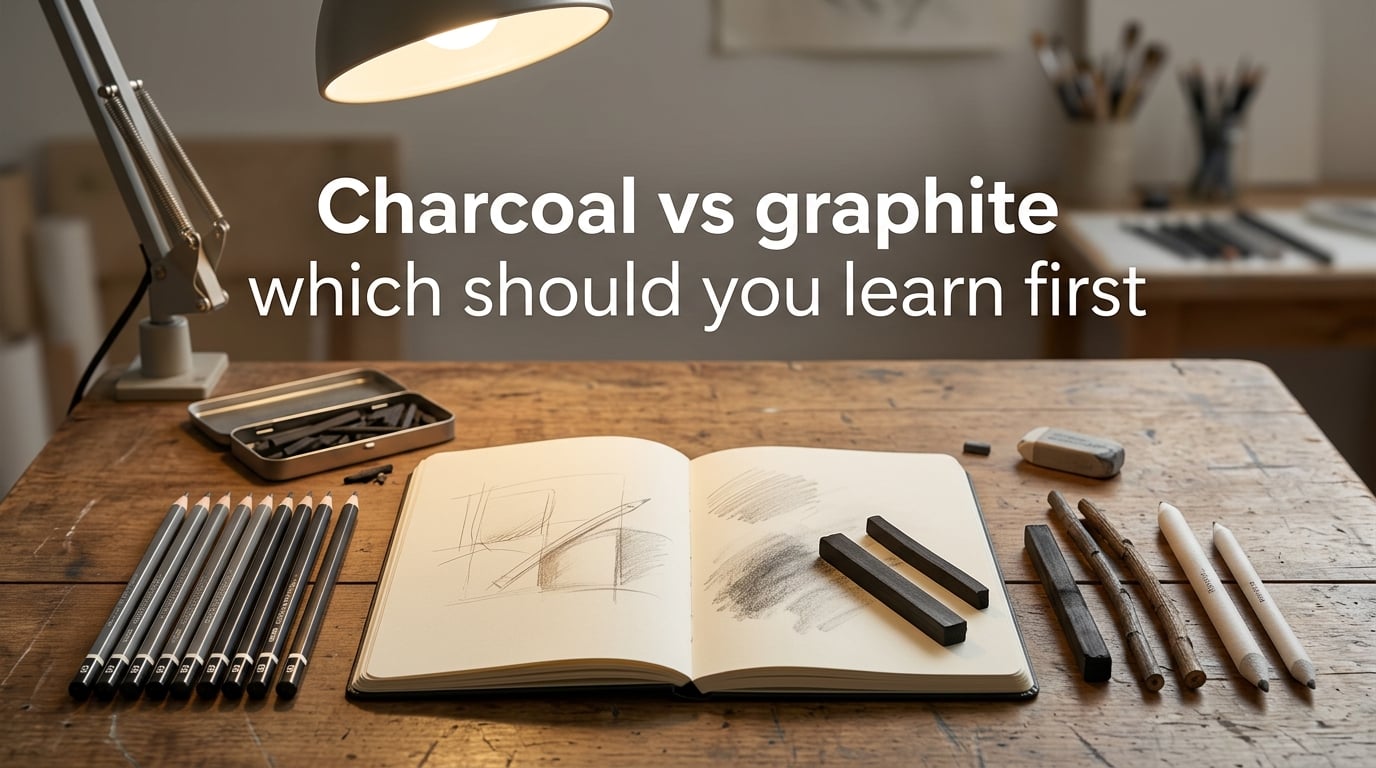
Graphite is the best starting point for most beginners. It’s more forgiving, easier to control, less messy, and widely available in familiar pencil form.
In this guide, I’ll break down the charcoal vs graphite debate from every angle—the science behind each material, the tools available, when to reach for one over the other, and exactly how to progress as a beginner. By the end, you’ll know which medium fits your goals and how to get started.
Table of Contents
Charcoal vs Graphite: Which Should You Learn First?
If you’re standing in an art supply store wondering which to buy, start with graphite pencils. Here’s why: graphite offers more control, erases cleanly, costs less, and doesn’t create a cloud of dust on your workspace.
Charcoal produces stunning, dramatic results—but it has a steeper learning curve. The material is powdery, smudges easily, and requires more intentional technique from the start. Many experienced artists recommend mastering graphite fundamentals before adding charcoal to your toolkit.
That said, charcoal isn’t inherently harder—it’s just different. If you’re drawn to bold, expressive marks and don’t mind some mess, charcoal can be incredibly rewarding from day one. The real question isn’t which medium is “better,” but which one matches your current goals and comfort level.
Here’s the honest breakdown: if you want to learn realistic shading, proportion, and control, graphite builds those skills faster. If you want to loosen up, work expressively, and embrace happy accidents, charcoal teaches a different but equally valuable set of instincts. Most professional artists recommend starting with graphite simply because its forgiving nature lets you focus on observation and technique rather than fighting the material.
What Is Graphite?
Graphite is a naturally occurring form of carbon with a layered atomic structure. Layers of carbon atoms stack like sheets of paper, and when you drag a pencil across paper, those layers slide off and stick to the surface. This process is called cleavage—graphite cleaves along its weak planes, depositing smooth, flat particles that create even, controlled marks.
This layered structure is what makes graphite feel smooth. It also explains the characteristic sheen—when you press hard or layer heavily, the flat graphite particles reflect light, creating that slightly shiny finish many artists recognize. Some artists love this effect; others find it distracting, which is one reason they eventually explore charcoal.
Graphite has been used as a drawing material since the 1500s, when a large deposit was discovered in Borrowdale, England. Early artists wrapped sticks of graphite in string or sheepskin to keep their hands clean. The modern pencil—graphite encased in wood—was invented in the late 18th century and has remained essentially unchanged since.
The Grading System
Graphite pencils come in grades from 9H (hardest, lightest marks) to 9B (softest, darkest marks). HB sits in the middle as a general-purpose grade. H pencils create fine, light lines ideal for technical work, while B pencils lay down rich, dark marks perfect for shading.
The “H” stands for hard, and “B” stands for black (or soft). The higher the number, the more extreme the effect—a 9H pencil feels like scratching glass and produces barely visible lines, while a 9B pencil is buttery soft and lays down deep, rich tones. Most beginners start with an HB, 2B, and 4B pencil. This trio covers light sketching, general drawing, and darker shading without overwhelming you with options.
What Is Charcoal?
Charcoal is made by burning organic materials—typically wood, vine, or bone—in a low-oxygen environment. This incomplete combustion leaves behind porous carbon particles with an irregular, rough texture. The resulting material is almost pure carbon, similar in chemical composition to graphite but vastly different in physical structure.
Unlike graphite’s smooth, layered structure, charcoal particles are jagged and absorbent. They grip paper’s tooth (the tiny bumps on the surface) and deposit rich, matte black marks. This is why charcoal produces deep, velvety blacks without any reflective sheen—exactly what many artists crave for dramatic, high-contrast work.
Humans have been drawing with charcoal for tens of thousands of years. Some of the oldest known cave paintings, dating back over 28,000 years, were created with charcoal. It’s one of the most primal and intuitive drawing materials available—you literally burn wood and draw with what remains.
Why Charcoal Feels Different
If you’ve only used pencils before, charcoal will surprise you. It’s lighter in your hand, crumbles under pressure, and produces a satisfying range from whisper-soft grays to intense blacks—all from the same stick. The trade-off is that it smudges easily and creates dust, so many artists work with a rag or paper towel nearby.
Charcoal also responds to pressure differently than graphite. Where graphite requires consistent pressure to maintain a line, charcoal is more forgiving—light touches create soft grays, and heavy pressure builds rich darks without the scratchy resistance you sometimes feel with hard graphite. This responsiveness makes charcoal feel almost alive in your hand.
Types of Graphite Drawing Tools
Graphite comes in more formats than most beginners realize. Each has distinct advantages depending on your drawing style and project. Understanding these options helps you build a versatile toolkit without overspending.
Graphite Pencils
The standard wood-cased pencil is where most artists begin. Available in every grade from 9H to 9B, they’re affordable, portable, and familiar. Brands like Staedtler, Faber-Castell, and Derwent offer reliable options at every price point. A good starter set of 6–12 pencils covers the most useful grades and will last months of regular practice.
Woodless Graphite Pencils
These are solid graphite sticks coated in lacquer instead of wood. They wear down faster but offer a wider range of mark-making—from thin lines with the tip to broad strokes with the side. Great for expressive sketching and covering large areas quickly. They also sharpen differently, typically with sandpaper rather than a standard sharpener, giving you more control over the tip shape.
Graphite Sticks and Blocks
Larger than pencils, graphite sticks and blocks are ideal for big-scale work and loose, gestural drawing. You can use the flat side for broad shading or the edge for sharp lines. They’re popular in life drawing classes where speed matters. Graphite blocks are especially useful for filling large background areas quickly, something that would take much longer with a standard pencil.
Water-Soluble Graphite
This type dissolves when you add water, creating washes similar to watercolor. You can draw with it dry for standard graphite marks, then activate it with a wet brush for painterly effects. It’s versatile and great for mixed-media work. Some artists use water-soluble graphite for preliminary sketches in watercolor paintings, since the lines dissolve and blend seamlessly with subsequent washes.
Mechanical and Clutch Pencils
These hold thin graphite leads (typically 0.3mm to 2mm) and offer consistent line width without sharpening. They’re popular for technical drawing, architectural sketches, and detailed work where precision matters. The 2mm clutch pencils are particularly useful for artists—they accept thicker leads that can be sharpened to a chisel point for varied mark-making.
Types of Charcoal Drawing Tools
Charcoal tools range from primitive sticks to refined pencils. Each type produces a different character of mark, and understanding the differences will help you choose the right tool for your project.
Vine and Willow Charcoal
These are thin sticks made from burned grapevine or willow branches. They’re the softest and most delicate charcoal type—perfect for initial sketches, gesture drawing, and building up light tonal layers. They erase almost completely with a cloth, making them ideal for underdrawings you plan to refine later. Vine charcoal is the most forgiving charcoal medium—its marks are light enough that you can build up layers gradually without committing to dark values too early.
Compressed Charcoal
Made by grinding charcoal and mixing it with a gum or wax binder, compressed charcoal comes in sticks or blocks. It’s denser and darker than vine charcoal, producing intense blacks that are harder to erase. Available in soft, medium, and hard grades, it’s the go-to for bold, dramatic drawings. The binder makes compressed charcoal more durable and less crumbly than vine charcoal, but it also means the marks are more permanent and harder to adjust.
Charcoal Pencils
These encase charcoal in a wood casing, giving you the control of a pencil with the matte, rich marks of charcoal. They’re less messy than loose sticks and allow for finer detail work. Great for artists who want charcoal’s look without the dust. The main trade-off is that charcoal pencils can’t achieve the same broad, sweeping marks as loose sticks—you lose some of the medium’s spontaneous, expressive quality.
Powdered and Liquid Charcoal
Powdered charcoal comes in jars and can be applied with brushes, rags, or fingers for smooth, even tones. Liquid charcoal is a suspended charcoal solution that behaves like ink. Both are excellent for large-scale work, backgrounds, and experimental techniques. Powdered charcoal is particularly useful for creating smooth, even backgrounds—something that’s difficult to achieve with sticks or pencils alone.
Graphite vs Charcoal: Key Differences
This side-by-side comparison covers the features that matter most when choosing between these two mediums. Understanding these differences helps you pick the right tool for your specific project and working style.
Texture: Graphite is smooth and silky. Charcoal is gritty and textured. Graphite glides across paper with minimal resistance, while charcoal grabs the surface and responds to every bump in the paper’s tooth. This textural difference fundamentally changes how each medium feels to use.
Finish: Graphite creates a reflective, slightly shiny surface when layered. Charcoal stays completely matte with no glare under any lighting. This is the single biggest visual difference—graphite drawings can look different depending on viewing angle and lighting, while charcoal drawings remain consistent.
Blendability: Both blend well, but differently. Graphite blends smoothly with stumps or tortillons for seamless gradients, creating clean, even transitions. Charcoal blends with fingers, rags, or brushes for softer, more atmospheric effects—often with a slightly grainy quality that adds character.
Erasing: Graphite erases cleanly with a standard eraser. Charcoal is harder to erase completely—vine charcoal lifts off easily, but compressed charcoal leaves ghost marks that can haunt your drawing. This difference in erasability makes graphite more forgiving for experimentation.
Darkness: Charcoal reaches deeper, richer blacks than graphite. Even the softest graphite pencil (9B) can’t match the intensity of compressed charcoal. If your work demands true blacks and maximum contrast, charcoal wins decisively.
Mess Level: Graphite is relatively clean. Charcoal produces fine dust that gets on your hands, clothes, and everything nearby. A dedicated workspace or drawing board helps contain the mess. Many charcoal artists keep a damp cloth nearby for frequent hand-wiping.
Durability: Graphite marks are stable and long-lasting without any additional treatment. Charcoal smudges easily and typically requires a fixative spray to preserve the finished drawing. This adds an extra step and cost to charcoal work, but it’s essential for preventing accidental damage.
Cost: Graphite pencils are cheaper—a basic set costs just a few dollars and lasts months. Charcoal sticks are inexpensive too, but you’ll also need fixative, a drawing board, and often heavier paper, adding to the overall cost. For true beginners on a budget, graphite is the more economical starting point.
Learning Curve: Graphite is more forgiving for beginners. You can erase mistakes easily and build up tones gradually without committing to dark values. Charcoal demands more confident mark-making from the start—its deep blacks and easy smudging mean mistakes are harder to hide or correct.
Best For: Graphite excels at detailed, precise work—portraits, technical drawings, and small-scale sketches where control matters. Charcoal shines in expressive, large-scale work—life drawing, dramatic landscapes, and gestural sketches where bold marks and rich values are the goal.
When to Use Graphite vs Charcoal
The right medium depends on your project, your environment, and your personal style. Here’s when to reach for each one—and why context matters more than preference.
Choose Graphite When
You need precision and fine detail. Graphite is the better choice for intricate drawings, technical illustrations, and anything requiring sharp, clean lines. It’s also ideal when you’re working in a shared space, traveling, or sketching in public—graphite is far less messy than charcoal and won’t leave residue on tables or clothing.
If you’re a beginner building foundational skills, graphite lets you practice shading, proportion, and line control without fighting the medium. The easy erasability means you can experiment freely without frustration. Graphite is also the better choice for small-scale work—anything under 11×14 inches where charcoal’s broad marks would feel oversized.
Choose Charcoal When
You want drama, depth, and expressiveness. Charcoal’s rich matte blacks and easy smudging make it perfect for moody portraits, atmospheric landscapes, and bold gestural drawings. Life drawing classes frequently use charcoal because it encourages quick, confident marks that capture the energy of a pose rather than getting lost in details.
Charcoal is also the better choice when working large-scale. Its broad marks and tonal range translate beautifully to big canvases where graphite would feel tight and fussy. If you’re working on newsprint or cheap sketch paper, charcoal is actually more forgiving—its marks look intentional on almost any surface, while graphite can look scratchy on rough paper.
Can You Use Charcoal and Graphite Together?
Yes—and many artists do. Combining charcoal and graphite gives you the best of both worlds: graphite’s precision for details and charcoal’s rich darkness for shadows and bold areas. This mixed-media approach opens up possibilities that neither medium achieves alone.
The trick is layering order. Start with charcoal for your dark values and broad shapes, then add graphite on top for fine details and highlights. Going the other direction—charcoal over graphite—creates a muddy, unpredictable result because the graphite’s smooth surface doesn’t grip charcoal well.
Always finish with a light coat of workable fixative between layers to prevent unwanted smudging. This locks in the charcoal without making the surface too slick for the next layer. Workable fixative is different from final fixative—it dries to a slightly tacky surface that still accepts new marks, making it perfect for multi-layer work.
A practical example: lay in your darkest shadows and background tones with compressed charcoal, spray with workable fixative, then use graphite pencils to render fine details like facial features, textures, or intricate patterns. The contrast between charcoal’s matte darkness and graphite’s subtle sheen creates visual interest that draws the eye to your focal points.
Beginner’s Progression Path
If you’re brand new to drawing, here’s a practical roadmap for building skills with both mediums. This progression is designed to build confidence gradually while introducing each material’s unique strengths.
Start with Graphite (Weeks 1–4)
Begin with an HB pencil and a sketchbook. Practice basic shapes, line control, and simple shading exercises. Once comfortable, add a 2B and 4B to explore darker values. Focus on controlling pressure—light pressure for light tones, heavier pressure for darks.
Simple subjects like fruit, cups, and household objects are perfect for building confidence. The goal isn’t perfection—it’s learning how graphite responds to your hand. Spend at least 15–20 minutes daily sketching anything that catches your eye. Consistency matters more than duration.
Move to Charcoal (Weeks 5–8)
Once you’re comfortable with graphite fundamentals, introduce vine charcoal. Start with gesture drawings—quick 30-second to 2-minute sketches that capture the essence of a subject without worrying about detail. This trains you to work boldly and loosely, a mindset shift from graphite’s precision.
Gradually add compressed charcoal for darker values and charcoal pencils for finer work. Don’t fight the mess—embrace it as part of the medium’s character. Working on larger paper (at least 12×18 inches) helps charcoal feel more natural, since small paper constrains the broad marks charcoal does best.
Combine Both (Weeks 9+)
Now experiment with mixed-media pieces. Lay in broad charcoal shapes for your darks, then add graphite details on top. This combination creates drawings with a depth and complexity that neither medium achieves alone. Try drawing the same subject twice—once in pure graphite, once in pure charcoal—to see which approach feels more natural for different subjects.
First Projects for Each Medium
Knowing what to draw first removes the blank-page paralysis. Here are beginner-friendly projects tailored to each medium’s strengths.
With Graphite: Draw a single piece of fruit with full shading. Focus on capturing the light source and creating a smooth gradient from highlight to shadow. Then try a simple portrait study—an eye or a mouth—where fine detail and precision matter. These subjects reward graphite’s controlled, precise nature.
With Charcoal: Start with a tonal landscape—sky, trees, ground—using only vine charcoal. The goal is to cover the entire page with a full range of values from white to near-black. Then try a self-portrait using compressed charcoal, embracing bold, expressive strokes rather than precise lines. Charcoal’s loose, forgiving nature makes these subjects feel less intimidating than they would in graphite.
The easiest thing to sketch for beginners is simple geometric objects—a sphere, a cube, or a cylinder. These basic forms teach you about light, shadow, and form without the pressure of drawing something recognizable. Place a single light source (a desk lamp works perfectly) next to a white object and practice capturing the gradation from highlight to shadow.
Other beginner-friendly subjects include crumpled paper (interesting folds and shadows), a draped piece of fabric (teaches you about flowing forms), and your own hand (always available, surprisingly challenging). The key is choosing subjects that interest you—motivation matters more than difficulty level when you’re starting out.
Frequently Asked Questions
Should I use charcoal or graphite?
Start with graphite if you’re a beginner. It’s more forgiving, erases cleanly, costs less, and offers more control for learning fundamental skills. Switch to charcoal once you’re comfortable with basic drawing techniques and want to explore bolder, more expressive mark-making.
Is charcoal or graphite better for beginners?
Graphite is better for most beginners. Standard graphite pencils feel familiar, erase easily, and don’t create mess. Charcoal has a steeper learning curve because it smudges easily, produces dust, and is harder to control. However, if you’re drawn to expressive, loose drawing, charcoal can be surprisingly accessible.
Can I use charcoal on top of graphite?
You can, but it’s not ideal. Graphite’s smooth, slightly waxy surface doesn’t grip charcoal well, often resulting in muddy, uneven marks. For best results, lay down charcoal first for dark values, then add graphite on top for details and lighter areas.
How difficult is charcoal drawing?
Charcoal drawing has a moderate learning curve. The main challenges are controlling the powdery material, preventing excessive smudging, and achieving fine details. Most beginners find it easier than expected for broad, gestural work but challenging for precise, detailed drawings. Practice with vine charcoal first—it’s the most forgiving.
What is the easiest thing to sketch for beginners?
Start with simple geometric shapes—spheres, cubes, and cylinders. These teach fundamental concepts like light direction, shadow casting, and form without the pressure of drawing recognizable objects. After that, try single pieces of fruit or a crumpled piece of paper, which offer interesting shapes and shadows to practice with.
Final Verdict: Start with Graphite
The charcoal vs graphite question comes down to where you are in your drawing journey. If you’re just starting out, graphite gives you the best foundation—it teaches control, shading, and proportion in a forgiving, affordable package. Those fundamentals transfer directly to every other medium you’ll ever use, including charcoal.
Once those fundamentals feel natural, introduce charcoal. Its expressive qualities and rich tonal range will expand your artistic vocabulary in ways graphite alone cannot. You’ll discover a looser, more gestural approach to drawing that complements graphite’s precision.
And remember—there’s no permanent choice here. Most working artists use both, reaching for whichever medium fits the project. The real answer to “which should you learn first” is simply: pick one and start drawing. Graphite is the safer first step, but charcoal is equally rewarding if you’re willing to embrace its mess and spontaneity.
Whichever you choose, the most important thing is consistency. Fifteen minutes of daily practice beats three-hour sessions once a week. Buy a sketchbook, pick up a pencil or stick of charcoal, and start making marks. The medium matters far less than the habit of drawing regularly.