
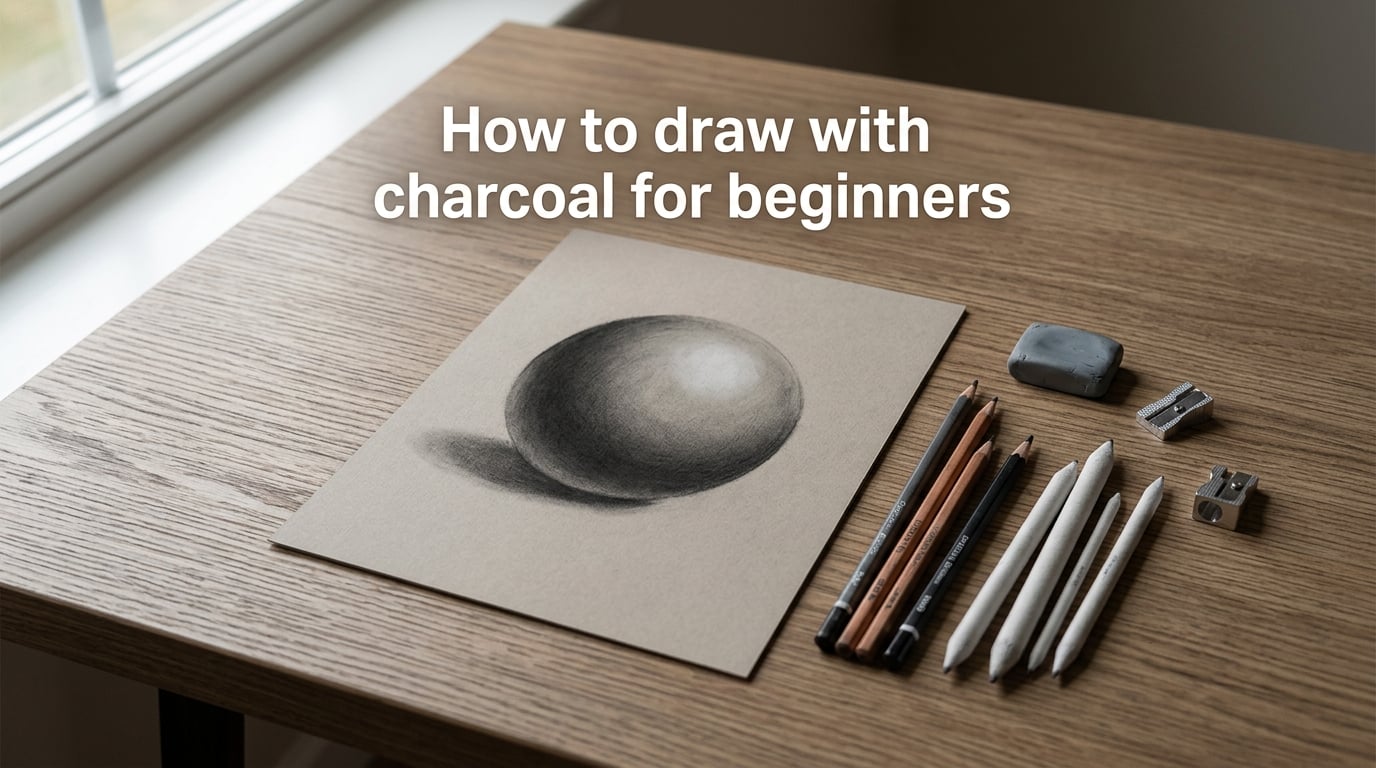
Learning how to draw with charcoal for beginners is one of the most rewarding ways to build your drawing skills fast. Charcoal is bold, expressive, and surprisingly forgiving, which makes it perfect for anyone who feels intimidated by the precision that pencil drawing demands. I picked up my first vine charcoal stick three years ago after years of pencil sketches, and I wish someone had given me this guide back then.
Charcoal drawing teaches you to see values, the range from light to dark, more quickly than any other medium. It forces you to loosen up and make confident marks rather than timid, scratchy lines. For many artists, charcoal becomes a turning point in their creative development because it strips away the false comfort of outlines and puts light and shadow at the center of everything.
In this walkthrough, I’ll cover everything you need to get started: the right materials, core techniques, your first project, and the mistakes I made early on so you can skip past them. Whether you want to draw portraits, landscapes, or just explore a looser art style, charcoal opens up a range of expressive possibilities that pencil alone rarely reaches.
Table of Contents
What You Need to Start Drawing With Charcoal
Before you touch paper, gather these essential supplies. The good news is that charcoal drawing requires fewer materials than most art forms, and you can get started with a modest budget.
Charcoal Sticks and Pencils
You will need at least two types of charcoal: vine (or willow) charcoal for initial sketching and light shading, and compressed charcoal for darker values and details. Charcoal pencils offer more control for fine lines and are worth adding once you feel comfortable with loose charcoal. Vine charcoal is lighter and easier to erase, making it ideal for mapping out your drawing before committing to darker marks.
Paper
Paper tooth is the single most important factor in charcoal drawing. A medium-tooth paper grips the charcoal particles and allows for smooth blending. Look for toned papers (gray or tan) or heavier drawing paper in the 80-100 lb range. Regular printer paper is too smooth and will not hold charcoal well at all.
Blending and Erasing Tools
A kneaded eraser is essential for charcoal work. Unlike a standard eraser, a kneaded eraser lifts charcoal off the paper rather than rubbing it away, which lets you create clean highlights. Blending stumps and tortillions help you smooth out shading for soft transitions. A chamois cloth is another useful tool for broad, even blending across larger areas.
Fixative Spray
Fixative spray seals your charcoal onto the paper and prevents smudging. Use workable fixative between layers so you can keep building up values without disturbing what is underneath. Final fixative goes on once the drawing is complete. Always spray in a well-ventilated area or outdoors.
Types of Charcoal: Which One Should You Use?
Not all charcoal works the same way. Each type has distinct strengths, and choosing the right one for each stage of your drawing will make a noticeable difference in your results.
Vine and Willow Charcoal
Vine charcoal is made from burnt grapevine or willow branches. It produces a soft, light gray mark that erases easily, which makes it the go-to choice for initial sketches, gesture drawings, and laying in broad tonal areas. Because it wipes off with a brush, you can make changes without damaging the paper surface. Many artists consider vine charcoal the starting point for every charcoal drawing.
Compressed Charcoal
Compressed charcoal is ground charcoal bound with a gum or wax binder, then pressed into sticks. It creates darker, denser marks than vine charcoal and is much harder to erase. Use compressed charcoal when you need rich darks, strong contrast, or want to push the deep end of your value range. The tradeoff is that mistakes are harder to correct, so work up to compressed charcoal gradually.
Charcoal Pencils
Charcoal pencils enclose charcoal in a wood casing, giving you fine control similar to a regular pencil. They are ideal for detailed areas, small drawings, and when you want cleaner edges than a loose stick allows. They come in soft, medium, and hard grades. A soft charcoal pencil works well for dark accents; a hard one is better for preliminary line work.
White Charcoal
White charcoal is not actually charcoal at all but a chalk-based pencil or stick. You use it for highlights on toned paper, creating light marks on dark backgrounds. It pairs beautifully with dark charcoal for dramatic contrast and is a favorite among artists working on mid-toned surfaces.
Charcoal vs Pencil: What’s the Difference?
Charcoal and pencil feel like different worlds once you try them side by side. Understanding the differences helps you decide when to use each one and how thinking in charcoal can actually make you a stronger artist overall.
Tonal Range
Charcoal produces much richer blacks than graphite pencil. While pencil struggles to go beyond a dark gray without excessive pressure, compressed charcoal can reach a deep, velvety black with relatively light pressure. This expanded tonal range means charcoal drawings often have more dramatic contrast and visual impact.
Erasability and Forgiveness
Vine charcoal is extremely forgiving. You can wipe away mistakes with a cloth or brush and rework the area without damaging the paper. Graphite pencil can be erased too, but it tends to leave impressions in the paper and ghost marks. Compressed charcoal, on the other hand, is harder to erase, so you want to build up carefully.
Mark Quality and Expression
Charcoal marks are naturally broader and more expressive than pencil. The texture of a charcoal stick produces varied, organic lines that add energy to a drawing. Pencil gives you fine, controlled lines. Both have their place, but charcoal encourages a looser, more gestural approach that many beginners find liberating.
A single sweep of vine charcoal can create a mark that would take pencil several passes to replicate. This speed is part of charcoal’s appeal. You can block in an entire composition in minutes and spend your time refining values rather than building up tone layer by careful layer. For artists who tend to overthink, charcoal is a natural corrective.
Mess Factor
Charcoal is undeniably messier than pencil. It smudges easily, transfers onto your hands, and can get everywhere if you are not careful. Pencil keeps things tidy. This mess factor is the main reason some beginners hesitate, but with the right workspace setup, it is entirely manageable.
Setting Up Your Workspace (Managing the Mess)
Charcoal dust gets on everything. This is the number one complaint from beginners, and it is the one thing no tutorial seems to address well. Here is how to keep your workspace functional and your clothes clean.
Lay down a large sheet of newsprint or scrap paper under your drawing area. This catches loose charcoal dust and gives you a clean edge to brush into. Keep a small bowl or container next to you for sharpening waste. Sharpen your charcoal over this bowl frequently rather than letting crumbs scatter across the table.
Wear an old shirt or apron. Charcoal transfers onto fabric easily and does not wash out of lighter materials without effort. Keep a damp rag nearby for wiping your hands periodically instead of using your fingers to blend (more on that mistake later).
Position your drawing surface at a slight angle. A flat surface encourages charcoal dust to settle on your paper. A tilted easel or board lets particles fall away from the drawing naturally. If you work at a desk, a tabletop easel that holds your paper at 20-30 degrees makes a noticeable difference.
Keep a clean area away from your charcoal workspace for food and drinks. Charcoal dust travels further than you expect, and it will end up on anything left nearby. Most experienced charcoal artists designate one part of a room for charcoal work and keep everything else covered or out of reach. Once you establish a routine, the mess becomes second nature to manage.
Essential Charcoal Drawing Techniques for Beginners
Once you have your workspace set up and materials ready, it is time to learn the fundamental techniques that form the backbone of every charcoal drawing. These five techniques will take you from blank paper to finished piece. Master each one individually before combining them, and you will progress much faster than trying to learn everything at once.
Blocking In
Blocking in means laying down loose, general shapes and tonal areas before adding details. Use the side of a vine charcoal stick to cover broad regions with light shading. This gives you a foundation to build on and prevents the common beginner mistake of jumping straight into details before the overall composition is established. Think of blocking in as the skeleton of your drawing. Every detail you add later depends on having this foundation in place first.
Blending
Blending creates smooth value transitions. Use a blending stump, tortillion, or chamois cloth to soften edges and merge adjacent tones. Work in small circular motions and keep your blending tool clean by rubbing it on scrap paper between passes. Avoid using your fingers for blending because the oils on your skin can create uneven patches that resist charcoal later.
A blending stump gives you precise, small-area blending control. A tortillion, which is tighter and more pointed, is perfect for very small details. A chamois cloth handles larger areas efficiently and produces a soft, even tone that is hard to achieve with smaller tools. Many experienced charcoal artists keep all three within reach during a session.
Building Value
Value is the range from light to dark, and it is the foundation of realistic charcoal drawing. Start with your lightest values using vine charcoal, then gradually introduce compressed charcoal to deepen shadows. A common beginner mistake is pressing too hard to get dark tones instead of layering softly. Building up in layers gives you more control and a richer result.
Creating Highlights with a Kneaded Eraser
Your kneaded eraser is a drawing tool, not just a mistake fixer. Shape it into a point to lift out precise highlights, or press it flat for broader light areas. For the brightest highlights, clean the eraser and press it repeatedly into the charcoal until the desired brightness emerges. This technique works especially well on toned paper.
Cross-Hatching and Stippling
Cross-hatching uses intersecting lines to build value and texture. Stippling uses small dots. Both techniques give you more control over value buildup than blending alone. Try cross-hatching with a charcoal pencil for areas where you want a visible, textural quality rather than smooth gradation.
Your First Charcoal Drawing: Step-by-Step Sphere
Drawing a sphere is the classic first charcoal project because it teaches you everything about light, shadow, and form in one simple shape. Every complex subject you draw later, whether a portrait or a landscape, relies on the same value principles you will learn here. Take your time with this exercise. It is worth doing several times until the process feels natural.
Step 1: Draw the Circle
Use the side of a vine charcoal stick to lightly sketch a circle. Do not aim for perfection at this stage. The rough shape is enough to guide you, and you can refine it as you work. Hold the charcoal stick loosely, not like a pencil, and use your arm rather than your wrist to make the arc. A stiff wrist creates tight, unnatural curves.
Step 2: Block In the Shadows
Identify your light source. Imagine a light coming from the upper left. The lower right of the sphere will be in shadow. Use the side of your vine charcoal to lay in the shadow side with broad, even strokes. Keep this layer light and even for now.
Step 3: Add the Core Shadow and Cast Shadow
The core shadow is the darkest band on the sphere, sitting just before the form turns away from the light entirely. Use compressed charcoal to gently deepen this area. Below the sphere, add a cast shadow that follows the shape of the base, darker closest to the sphere and lighter as it moves away. The cast shadow grounds the sphere on the surface and makes it look three-dimensional.
Pay attention to the edge quality between the core shadow and the lit side. A soft edge suggests the form is turning gradually, while a hard edge would indicate a sharp crease. On a sphere, nearly every edge should be soft and gradual. This is where blending earns its importance.
Step 4: Blend for Smooth Transitions
Use a blending stump to smooth out the transition from light to dark across the sphere’s surface. Work in gentle circular motions, following the curve of the form. Blend the edge of the cast shadow outward to soften it. The goal is a gradual, believable shift from highlight to shadow.
Step 5: Lift Out the Highlight
Shape your kneaded eraser to a fine point and gently lift charcoal from the highlight area, which sits at the top of the sphere closest to the light. Build the highlight by pressing and lifting repeatedly until it reaches a clean, bright tone. Clean the eraser frequently as it picks up charcoal.
Step 6: Refine and Add Details
Step back from your drawing and squint at it. Squinting simplifies the values and helps you spot areas that need darkening or lightening. Add the reflected light along the shadow edge using your eraser to gently lift just a little charcoal. Refine the cast shadow edge. When you are satisfied, spray with fixative to preserve the drawing.
Common Beginner Mistakes and How to Fix Them
I made all of these mistakes when I started. They are easy to avoid once you know what to look for, and fixing them will immediately improve your charcoal drawings.
Pressing Too Hard
Applying heavy pressure creates dark marks that are nearly impossible to erase or lighten. Charcoal responds better to layering than force. If you need a darker tone, add more layers of compressed charcoal gently rather than bearing down. Your paper will thank you, and you will retain more control over the value range.
Heavy pressure also damages the paper surface. Once the tooth of the paper is crushed flat, it can no longer hold new layers of charcoal. You end up with a shiny, overworked patch that will not accept more value. Light, gradual layering is the path to rich darks that still look alive on the surface.
Using Fingers to Blend
Finger blending seems natural, but it transfers oils from your skin onto the paper. These oily spots resist charcoal and create uneven patches that are difficult to fix. Use a blending stump, tortillion, or chamois cloth instead. If you must use your fingers in a pinch, wash and dry them first.
Starting with Details
Jumping straight into details before blocking in the overall composition leaves you with a drawing that looks disjointed. Always start with loose shapes and broad tonal areas. Build from general to specific. The details should come last, once the structure and values are working.
Not Using Fixative Between Layers
Without fixative between layers, each new layer of charcoal disturbs the layer beneath it. This creates muddy, overworked areas that look flat and lifeless. Spray a light coat of workable fixative after establishing your first few layers. The fixative gives the next layer something to grip onto.
Avoiding Dark Values
Many beginners stay in the light-to-medium range and never push their darks far enough. A drawing without strong dark values looks washed out. Do not be afraid of compressed charcoal. Embrace the full range from white paper to the deepest black for drawings that pop off the page.
Practice Exercises to Improve Your Charcoal Drawing
Consistent practice is the fastest path to improvement. These exercises build on each other and give you a clear progression to follow in your first weeks of charcoal drawing.
Value Scale Exercise
Draw a long rectangle and divide it into 10 equal boxes. Fill the first box with pure white (leave it blank) and the last box with the darkest black you can achieve with compressed charcoal. Gradually fill in the middle boxes, creating an even step from light to dark. This exercise trains your hand pressure control and teaches you to see subtle value differences.
Texture Practice Sheet
Fill a sheet of paper with different textures using only charcoal. Try wood grain, fabric folds, rough stone, soft cloud, and smooth glass. This teaches you to vary your mark-making and shows how different tools and techniques create different surface effects.
Still Life Sketches
Set up simple objects, an apple, a mug, a crumpled piece of paper, and draw them quickly. Focus on capturing the overall shape and shadow pattern rather than perfect accuracy. Spend no more than 15 minutes per sketch. Quick studies force you to work broadly and make confident decisions without overthinking.
Gesture Drawings
Use vine charcoal for timed gesture drawings. Set a timer for 1-2 minutes and try to capture the energy and movement of a pose, an animal, or a tree. Gesture drawing with charcoal is especially freeing because vine charcoal is easy to wipe away, so there is no pressure to get it right on the first pass.
Gesture drawing trains you to see the overall action and flow of a subject rather than getting caught up in surface details. It builds your confidence with mark-making and teaches your hand to respond quickly to what your eyes see. After a few weeks of regular gesture practice, you will notice your drawings feeling more dynamic and less stiff.
Copy a Masterwork
Choose a charcoal drawing by an artist you admire and try to recreate it. Study how they handled values, edges, and texture. This exercise helps you internalize the approaches of experienced charcoal artists and develop your own technique by learning from the best.
Frequently Asked Questions
Is charcoal easy to draw with?
Yes, charcoal is one of the easiest drawing media to start with. Vine charcoal is especially forgiving because it erases easily and responds well to light, gentle pressure. The medium encourages loose, expressive mark-making, which many beginners find less intimidating than the precision pencil drawing requires.
What supplies do I need for charcoal drawing?
You need vine charcoal for sketching, compressed charcoal for darks, a kneaded eraser, blending stumps or tortillions, and medium-tooth drawing paper. Optional but useful supplies include charcoal pencils, a chamois cloth, and workable fixative spray. A tabletop easel or drawing board tilted at a slight angle also helps.
How do you fix charcoal drawings?
Use a workable fixative spray between layers to seal charcoal and prevent smudging. Once the drawing is complete, apply a final fixative coat. Always spray in a well-ventilated area. Fixative preserves your drawing, keeps layers from mixing, and allows you to build up values without disturbing previous work.
Is it better to draw with charcoal or pencil?
Charcoal offers a much wider tonal range with rich, velvety blacks that pencil cannot match. It encourages expressive, loose drawing and teaches strong value skills. Pencil is cleaner and more precise. For beginners wanting to build fundamental drawing skills quickly, charcoal is often the better starting point.
How do you erase charcoal drawings?
Use a kneaded eraser to lift charcoal off the paper. Shape it to a point for precise highlights or press it flat for broader areas. For heavier charcoal marks, press the eraser into the charcoal repeatedly, cleaning the eraser between presses. Vine charcoal can also be wiped away with a clean cloth or brush.
What paper is best for charcoal drawing?
Paper with medium tooth works best for charcoal. Heavier papers in the 80-100 lb range hold charcoal particles well and allow smooth blending. Toned paper in gray or tan is popular because it gives you a mid-tone base to work from, meaning you can push both highlights and shadows from the same starting point.
Conclusion
How to draw with charcoal for beginners comes down to understanding your materials, learning a handful of core techniques, and practicing deliberately with simple subjects. Start with vine charcoal for your first sketches, build your value range gradually, and do not be afraid of the mess that comes with this beautifully expressive medium.
Set up your workspace with newsprint and a bowl for sharpening waste. Practice value scales and texture sheets before jumping into finished pieces. The more comfortable you get with charcoal’s unique character, the more you will appreciate its ability to produce dramatic, high-contrast artwork with a loose, confident feel.
Charcoal is one of the oldest drawing materials in human history, and for good reason. It connects you directly to your subject through bold, immediate marks that pencil simply cannot replicate. Once you feel the way a compressed charcoal stick glides across a medium-tooth paper, or the satisfaction of lifting a bright highlight from a dark field with your kneaded eraser, you will understand why so many artists call charcoal their favorite drawing medium.