
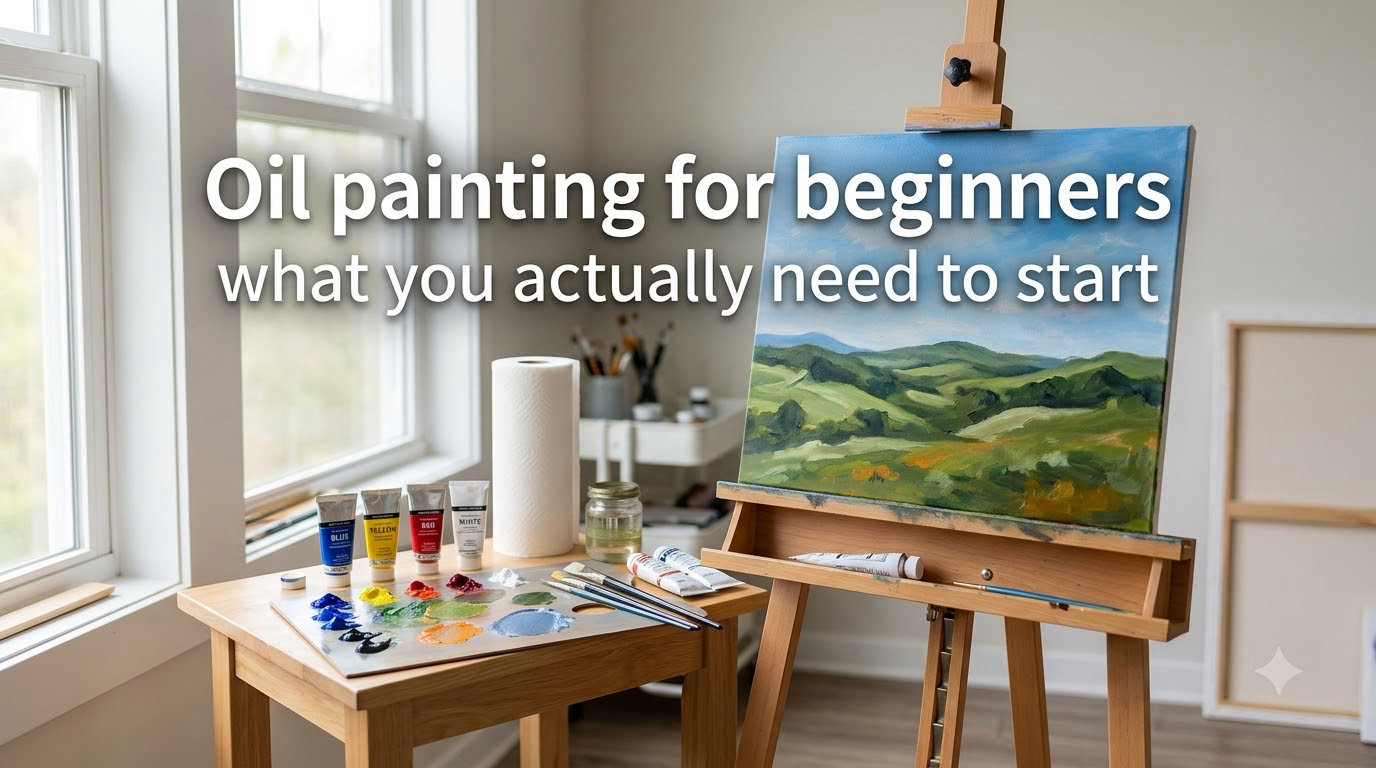
Starting oil painting feels overwhelming when you walk into an art store and see hundreds of tubes, brushes, and mysterious bottles. The good news is you only need six basic supplies to begin: oil paints, brushes, canvas panels, a medium, a palette, and cleanup supplies. That’s it. Everything else is optional until you develop your own preferences.
I remember standing in that exact spot years ago, convinced I needed to spend hundreds before making my first brushstroke. After helping dozens of beginners get started, I can tell you that understanding what actually matters saves money, reduces frustration, and gets you painting faster.
This guide covers exactly what you need to start oil painting, what you can skip, and how to avoid the mistakes that waste both money and motivation.
Table of Contents
The 6 Essential Supplies You Actually Need to Start Oil Painting
You can start oil painting with surprisingly few supplies. Here’s the short list before we go deeper into each one.
- Oil paints — A student-grade set of 6 to 8 colors
- Brushes — 3 to 5 brushes in varied shapes and sizes
- Canvas panels — Cheap, pre-primed panels for practice
- A medium — Linseed oil or walnut oil, plus odorless mineral spirits
- A palette — Disposable paper pads work great for beginners
- Cleanup supplies — Paper towels, a bar of soap or brush cleaner, and a palette knife
That six-item list is all you need to start painting today. You don’t need an easel, a pochade box, or expensive professional paints right now. Let’s look at why each of these matters and how to choose wisely.
Oil Paints: Student Grade vs Professional Grade
Oil paints come in two grades: student grade and professional grade. Student-grade paints use less pigment and more filler, which means they cost less but are still perfectly workable for learning. Professional-grade paints have higher pigment concentration and better lightfastness, but they are significantly more expensive.
For beginners, student-grade paints are the right choice. You’ll get comfortable mixing colors and building brushwork skills without worrying about wasting costly materials. Two brands consistently recommended by instructors are Gamblin 1980 and Winsor & Newton Winton. Both offer reliable quality at reasonable prices.
A tube labeled “hue” (like Cadmium Yellow Light Hue) indicates a mixed pigment that approximates the named color without using the actual expensive pigment. These are perfectly acceptable for practice and learning. You won’t notice the difference until you’ve been painting for months, so don’t let the naming conventions intimidate you.
Start With a Limited Palette
Rather than buying every color available, start with a limited palette of 6 to 8 colors. A split-primary palette works well: warm and cool versions of each primary color, plus white. Here’s a solid starting set:
- Cadmium Yellow Light (warm yellow)
- Yellow Ochre (cool yellow / earth tone)
- Cadmium Red (warm red)
- Alizarin Crimson (cool red)
- Ultramarine Blue (warm blue)
- Phthalo Blue (cool blue)
- Titanium White (largest tube — you’ll use a lot)
- Burnt Umber (optional, useful for darkening mixes)
With these colors, you can mix nearly any hue you need. Buying individual tubes is more cost-effective than a large set with colors you’ll rarely touch.
How to Organize Your Palette
Arrange your paints in the same order every session. A standard layout places warm colors on one side and cool colors on the other, with white at the top corner (or wherever your thumb goes through the palette hole). Consistency matters because your brain starts to remember where colors are, letting you mix faster without looking.
Squeeze paint along the outer edge of your palette, leaving the center open for mixing. Start with smaller amounts — you can always add more. A common beginner mistake is squeezing out too much paint, which dries out and gets wasted. Fresh paint from the tube has the best consistency.
Water-Mixable vs Traditional Oil Paints
Water-mixable oil paints (sometimes called water-soluble) behave like regular oil paints but clean up with water instead of solvents. Brands like Winsor & Newton Artisan and Cobra make quality water-mixable options.
These paints are a great choice if you paint in a small apartment without good ventilation. You avoid solvent fumes entirely. The trade-off is that water-mixable oils can feel slightly different in texture and may not layer as smoothly as traditional oils. For most beginners, either option works fine — the painting skills transfer either way.
Choosing Your First Brushes: Hog Bristle vs Synthetic
Oil painting brushes come in two main types: natural hog bristle and synthetic fibers. Hog bristle brushes are stiffer and hold more paint, making them ideal for impasto techniques and visible brushstrokes. Synthetic brushes are softer, more affordable, and work well for smoother blending and detail work.
For starting out, a mix of both works best. Experienced artists on Reddit frequently recommend using bigger brushes than you think you need. Beginners tend to grab small brushes for control, but larger brushes encourage looser, more confident strokes and help you focus on shapes rather than details too early.
Essential Brush Shapes
Three brush shapes cover most oil painting techniques:
- Flat brushes — Great for blocking in large areas, sharp edges, and bold strokes. Get one large (1 inch) and one medium (1/2 inch).
- Round brushes — Versatile for both broad strokes and finer lines. A medium round handles most work.
- Filbert brushes — A rounded flat that blends beautifully. Excellent for organic shapes and soft edges. Many artists consider filberts the most useful shape for beginners.
Start with 3 to 5 brushes total. You don’t need a full set of 15. As you paint more, you’ll discover which shapes you reach for most and can expand from there.
Taking Care of Your Brushes
Good brushes last years when properly maintained. After each painting session, wipe excess paint with a paper towel, rinse in odorless mineral spirits, then wash with brush cleaner and warm water. Reshape the bristles with your fingers and lay them flat or hang them bristle-down to dry. Never leave brushes sitting in solvent or water for extended periods — it ruins the ferrule (the metal band) and loosens the bristles.
Canvas and Painting Surfaces for Beginners
Your painting surface matters less than you think when starting out. The key is using a surface primed for oil paint — raw canvas or paper will absorb the oil and deteriorate over time.
Canvas panels are the best beginner option. They’re thin boards with primed canvas glued to the surface. They’re inexpensive, easy to store, and perfect for practice studies. A pack of 9×12 inch canvas panels costs very little and gives you plenty of space to learn.
Stretched canvas is what most people picture when they think of painting. It’s canvas stretched over a wooden frame. It looks finished and ready to hang, but it costs more per painting and takes up more storage space. Save stretched canvases for pieces you want to display, not for daily practice.
Hardboard panels (like Gessobord or multimedia art boards) provide a smooth, rigid surface that some artists prefer for detailed work. They’re a good middle ground between cheap panels and stretched canvas.
For your first 10 to 20 paintings, stick with canvas panels. They reduce the anxiety of “ruining” an expensive surface, which is a common concern beginners mention. Once you’re confident in your process, upgrade to stretched canvas for finished work.
Understanding Gesso
Gesso is a white primer applied to surfaces before painting. It seals the material so oil doesn’t soak in and deteriorate the canvas or board. Most store-bought canvases and panels come pre-primed with gesso, so you don’t need to buy it separately at first. However, applying an extra coat of gesso to cheap canvas panels improves their surface quality — it fills the weave texture and gives you a smoother painting experience.
Mediums and Thinners: What You Really Need
Oil paint straight from the tube works fine for many techniques, but a medium changes the paint’s consistency, drying time, and flow. For beginners, you need just two things: an oil medium and a thinner.
Your Oil Medium
Linseed oil is the most common painting medium. It thins paint slightly, increases flow, and extends drying time. It’s affordable and widely available.
Walnut oil is an alternative that yellows less over time and has a slightly different feel. Some artists prefer it for lighter color palettes. Both work well for beginners — choose whichever is easier to find.
Your Thinner
Odorless mineral spirits (like Gamsol or Turpenoid) are used to thin paint for initial washes and to clean brushes. They’re much less toxic than traditional turpentine, though you still need ventilation.
Solvent-free option: If you want to avoid solvents entirely, you can use walnut oil or linseed oil alone as your medium and clean brushes with vegetable oil followed by soap and water. This is slower but eliminates fume concerns completely. Many contemporary artists are moving toward this approach.
A small bottle of linseed oil and a container of odorless mineral spirits will last months. Don’t buy large quantities until you know how much you actually use.
How Long Does Oil Paint Take to Dry?
Oil paint dries slowly — a thin layer takes 2 to 5 days to become touch-dry, while thicker applications can take a week or more. The exact time depends on the pigment (earth tones like Burnt Umber dry faster than colors like Alizarin Crimson), the medium used, and the humidity and temperature of your workspace.
This slow drying time is actually a benefit for beginners. You can walk away from a painting and return the next day to continue blending. You can wipe off a passage you don’t like and repaint it. Unlike acrylics, which dry in minutes, oil paint gives you time to think and adjust.
The Fat Over Lean Rule
One technical principle worth understanding early: each successive layer of paint should contain more oil (more “fat”) than the layer below it. The bottom layer should be leaner — thinner, with less oil or more solvent. The top layers should be fatter — richer in oil.
Why does this matter? Oil paint dries through oxidation, not evaporation. A lean layer dries faster and becomes more rigid. If you put a fat (slow-drying, flexible) layer under a lean (fast-drying, rigid) layer, the bottom layer continues to expand as it dries while the top layer is already set. This causes cracking over time.
Practically, this means your first pass can use paint thinned with a bit of solvent. Subsequent layers use paint straight from the tube or mixed with a touch of medium. You don’t need to memorize complex formulas — just remember that each layer should be a little richer in oil than the one beneath it.
The Three Basic Rules of Oil Painting
While oil painting has many techniques, three fundamental rules guide the process from start to finish:
- Fat over lean — Each layer should contain more oil than the one below to prevent cracking.
- Thick over thin — Apply thicker paint layers over thinner initial layers. Thin paint over thick can crack as the bottom layer moves.
- Slow-drying over fast-drying — Use slower-drying pigments and mediums in upper layers. Fast-drying layers on top of slow-drying ones are prone to splitting.
All three rules serve the same purpose: ensuring your painting remains structurally sound as it ages. Paintings that follow these principles can last centuries. Paintings that violate them often develop visible cracks within a few years.
Palette Options for Oil Painting
You need a non-porous surface to mix paint on. Here are the three most common options for beginners:
- Disposable paper palettes — Pads of coated paper you tear off and discard after each session. The easiest cleanup option and the one I recommend for starting out.
- Glass palettes — A sheet of glass (often with a white or gray backing) that you scrape clean with a palette knife. Durable and easy to maintain, but heavier.
- Wooden palettes — The traditional oval palette. They look classic but require seasoning with oil and can be harder to clean.
Start with a disposable paper palette pad. They’re inexpensive and remove the cleanup burden entirely. If you find yourself wanting something reusable later, glass is the most practical upgrade.
Cleanup and Safety Essentials
Oil painting cleanup is different from acrylic painting. You can’t just rinse brushes under the tap. Here’s what you need and what you need to know about staying safe.
Essential Cleanup Supplies
- Paper towels or rags — You’ll go through a lot. Keep a roll within arm’s reach.
- A palette knife — Used to mix paint on the palette and to scrape off excess. A medium-sized trowel-shaped knife is the most versatile.
- Brush cleaner — A bar of mild soap (like Ivory) works. Specialized brush cleaners like The Masters Brush Cleaner and Preserver are worth the small investment because they condition the bristles.
- A brush cleaning jar — Fill with odorless mineral spirits for rinsing brushes between colors. A jar with a coil screen at the bottom helps remove paint residue.
Fire Safety With Oily Rags
This is a safety warning that most beginner guides skip. Rags or paper towels soaked with linseed oil can spontaneously combust. This isn’t theoretical — it causes real house fires.
The chemistry is straightforward: linseed oil polymerizes as it dries, generating heat. When oily rags are bunched together, the heat has nowhere to escape and can reach ignition temperature.
The solution is simple: spread used rags flat to dry outdoors, or store them in a sealed metal container with water. Never ball up oily rags and toss them in a trash can. This applies to any oil-soaked materials, including paper towels used for brush cleanup.
Also, always paint in a well-ventilated area. Even odorless mineral spirits release fumes that can cause headaches with prolonged exposure. An open window and a small fan pointing outward make a significant difference.
What Is the 70/30 Rule in Painting?
The 70/30 rule states that roughly 70 percent of your painting should be one color temperature (warm or cool) while 30 percent is the opposite. This creates visual contrast and prevents the composition from feeling flat or evenly distributed.
For example, a landscape dominated by warm sunset oranges (70%) with cool blue shadows (30%) reads as harmonious and dynamic. A portrait with mostly warm skin tones and a cool background follows the same principle.
This rule applies to color temperature, value (light vs dark), and even detail — you might leave 70% of a painting loosely rendered and concentrate detailed brushwork in the remaining 30%. Think of it as a guideline for creating visual interest through imbalance, not a strict formula.
Common Beginner Mistakes to Avoid
I’ve seen the same supply-related mistakes trip up new painters over and over. Here’s what to watch for:
Buying too much at once. Art stores are designed to make you feel like you need everything. You don’t. Start with the essentials and add supplies as your skills and preferences develop. A massive supply haul creates decision paralysis, not better paintings.
Choosing brushes that are too small. This is the number one complaint I hear from instructors. Small brushes make you focus on details before you’ve learned to see shapes and values. Buy brushes at least one size larger than your instinct says.
Buying dollar-store paints. Cheap supplies reduce anxiety about wasting materials, but there’s a limit. Extremely low-quality paints have poor pigment, strange texture, and unpredictable drying. Student-grade paints from reputable brands hit the sweet spot between affordability and usability.
Skip the solvents until you need them. Many beginners buy turpentine and solvent-based mediums right away without understanding ventilation requirements. If you’re painting in a bedroom or small studio, water-mixable oils or a solvent-free approach may serve you better from the start.
Not enough white paint. You’ll use more Titanium White than any other color. Buy the largest tube available. Running out of white mid-session is frustrating and common for beginners who start with a small tube.
Starting with too much detail. Beginners often zoom into eyes, leaves, or textures before establishing the overall composition and values. Work from general to specific — block in big shapes and values first, then refine. If the big shapes are wrong, perfect details won’t save the painting.
Painting without reference. Working entirely from imagination is harder than it looks, even for experienced artists. Use a photograph, a mirror reflection, or a physical object as your reference. This teaches you to observe accurately, which is the foundation of all representational painting.
Budget Breakdown: What It Actually Costs to Start
Here’s a realistic estimate for a complete beginner oil painting setup. Prices fluctuate, but this gives you a working range to plan around.
- Student-grade oil paint set (6-8 tubes) — $25 to $45
- Extra Titanium White (large tube) — $8 to $12
- Brush set (3-5 brushes) — $12 to $25
- Canvas panels (pack of 6-12) — $10 to $18
- Linseed oil (small bottle) — $5 to $8
- Odorless mineral spirits (small can) — $8 to $12
- Disposable palette pad — $5 to $8
- Palette knife — $4 to $7
- Paper towels — Already at home
- Brush cleaner soap — $5 to $8
Total: approximately $80 to $140 for everything needed to start painting. That covers your first 10 to 15 practice sessions. After that, you’ll only need to replenish paint colors you use most, canvas panels, and paper towels.
Compare that to a single structured art class, which often costs $150 to $300 for a few sessions. Teaching yourself with quality supplies and online resources is a genuinely affordable way to learn.
Setting Up Your Painting Workspace at Home
You don’t need a studio to oil paint. A corner of a room with good ventilation and a flat surface works perfectly. Here are practical tips for painting in small spaces:
Ventilation comes first. Position your setup near a window you can open. A small box fan pointing outward draws fumes away from your breathing zone. If you use water-mixable oils, ventilation is less critical but still helpful.
Protect your surfaces. Lay down a plastic drop cloth, an old sheet, or even a flattened cardboard box. Oil paint stains are permanent on most fabrics and difficult to remove from hard floors.
Lighting matters. Natural north-facing light (in the Northern Hemisphere) gives the most consistent, neutral illumination. If that’s not available, a daylight-balanced LED lamp (5000K-5500K color temperature) positioned to your left (if you’re right-handed) prevents your own shadow from falling on the canvas.
Storage is simple. Canvas panels stack flat in a closet. Keep paint tubes in a toolbox or plastic bin. Brushes stand upright in a jar or lay flat in a roll-up case. You can fit a complete beginner setup in a space the size of a large shoebox.
A tabletop easel is optional but helpful. You can prop a canvas panel against a stack of books, but an inexpensive tabletop easel adjusts the angle and keeps your painting stable. It’s worth the small investment if you plan to paint regularly.
If you eventually want a standing easel, an A-frame or H-frame studio easel holds larger canvases and lets you step back to evaluate your work. But for the first few months, a tabletop easel or even a clipboard propped at an angle does the job. Don’t let the absence of an easel stop you from starting.
Your First Oil Painting Exercise
Once you have your supplies, start with a simple exercise rather than trying to paint a masterpiece. Here’s a first painting session that teaches fundamental skills:
- Set up a simple still life. One object with clear light and shadow — an apple, a mug, or a lemon on a plain surface. Place a desk lamp to one side to create distinct light and shadow areas.
- Tone your canvas. Mix a thin wash of Yellow Ochre or Burnt Umber with mineral spirits and brush it over the entire canvas panel. This eliminates the intimidating white surface and gives you a warm mid-tone to work against.
- Sketch the basic shapes. Using a thin mixture of paint and mineral spirits, loosely draw the outline of your object. Focus on the overall shape, not details.
- Block in three values. Identify the lightest area, the darkest area, and the mid-tone of your subject. Mix three corresponding piles of paint and fill in those areas with flat color. Don’t blend yet.
- Blend and refine. Now soften the transitions between values using a clean, dry brush. Add details only at the end.
This five-step process teaches you to see values (light and dark) before color, which is the most important skill in painting. Do this exercise three to five times before attempting more complex subjects.
What to Paint After Your First Exercise
Once you’re comfortable with simple still life, try these progressive exercises to build your skills:
- A color mixing chart — Paint a grid showing what each pair of your palette colors produces when mixed. This teaches you your paints and serves as a reference for future sessions.
- A monochromatic painting — Paint a simple subject using only one color plus white. This forces you to focus purely on values without the complexity of color mixing.
- A three-color painting — Add two more colors (a warm and cool of your choice) and try to mix everything you see from just those three plus white.
- A copy of a painting you admire — Find a simple painting by a master (many public domain works are available online) and try to recreate it. This is one of the oldest and most effective ways to learn.
Each of these exercises builds a specific skill. Resist the urge to jump straight to complex scenes. The painters who improve fastest are the ones who master fundamentals before moving on.
Frequently Asked Questions
What does a beginner oil painter need?
A beginner oil painter needs six essential supplies: oil paints (student-grade), brushes (3-5 in varied shapes), canvas panels, a medium (linseed oil plus odorless mineral spirits), a palette (disposable paper pads work well), and cleanup supplies including paper towels and brush cleaner. That’s everything required to start painting.
What is the 70/30 rule in painting?
The 70/30 rule states that about 70 percent of your painting should use one color temperature (warm or cool) while 30 percent uses the opposite. This creates visual contrast and prevents the composition from feeling flat. It applies to color temperature, value (light vs dark), and even detail distribution across the canvas.
How do I start oil painting as a beginner?
Start by gathering six basic supplies: student-grade oil paints, brushes, canvas panels, a medium, a palette, and cleanup materials. Set up near a window for ventilation. Begin with a simple still life exercise — paint one object with clear light and shadow. Focus on values (light and dark) before worrying about details or color accuracy.
Can a beginner start with oil painting?
Yes, oil painting is an excellent medium for beginners. Its slow drying time allows you to blend and rework areas over hours or days, making it more forgiving than acrylics or watercolors. You don’t need prior art experience — just quality student-grade supplies and a willingness to practice basic exercises.
Is oil painting very hard?
Oil painting has a moderate learning curve. The basics — mixing colors, applying paint, understanding values — can be learned in a few weeks of regular practice. What takes longer is developing your eye for color relationships and composition. The slow drying time actually makes oil painting easier than faster-drying mediums because you can correct mistakes without pressure.
What materials do I need for oil painting?
You need oil paints (student grade, 6-8 colors), brushes (flat, round, and filbert shapes), canvas panels, linseed oil or walnut oil as a medium, odorless mineral spirits for thinning and cleaning, a disposable palette, a palette knife, paper towels, and brush cleaner. That covers everything for a complete beginner setup.
Can oil painting be self-taught?
Absolutely. Many successful oil painters are self-taught using books, YouTube tutorials, and structured online courses. The key is following a logical progression: learn to see values first, practice color mixing with a limited palette, then build up to more complex subjects. Consistent practice with intentional exercises matters more than formal instruction.
Wrapping Up
Oil painting for beginners comes down to starting with the right supplies and a willingness to practice. You need a limited palette of student-grade paints, a few quality brushes in the right shapes, canvas panels for practice, a basic medium, and a safe workspace with ventilation. That’s what you actually need to start — and you can have everything for under $150.
The biggest mistake I see is waiting until conditions feel “perfect.” You don’t need a dedicated studio, an easel, or every color on the shelf. You need six supplies, a flat surface near a window, and the courage to make your first imperfect brushstroke. Every oil painter started there. Pick up a brush this weekend — you’ll be surprised how much you can learn in a single afternoon.