
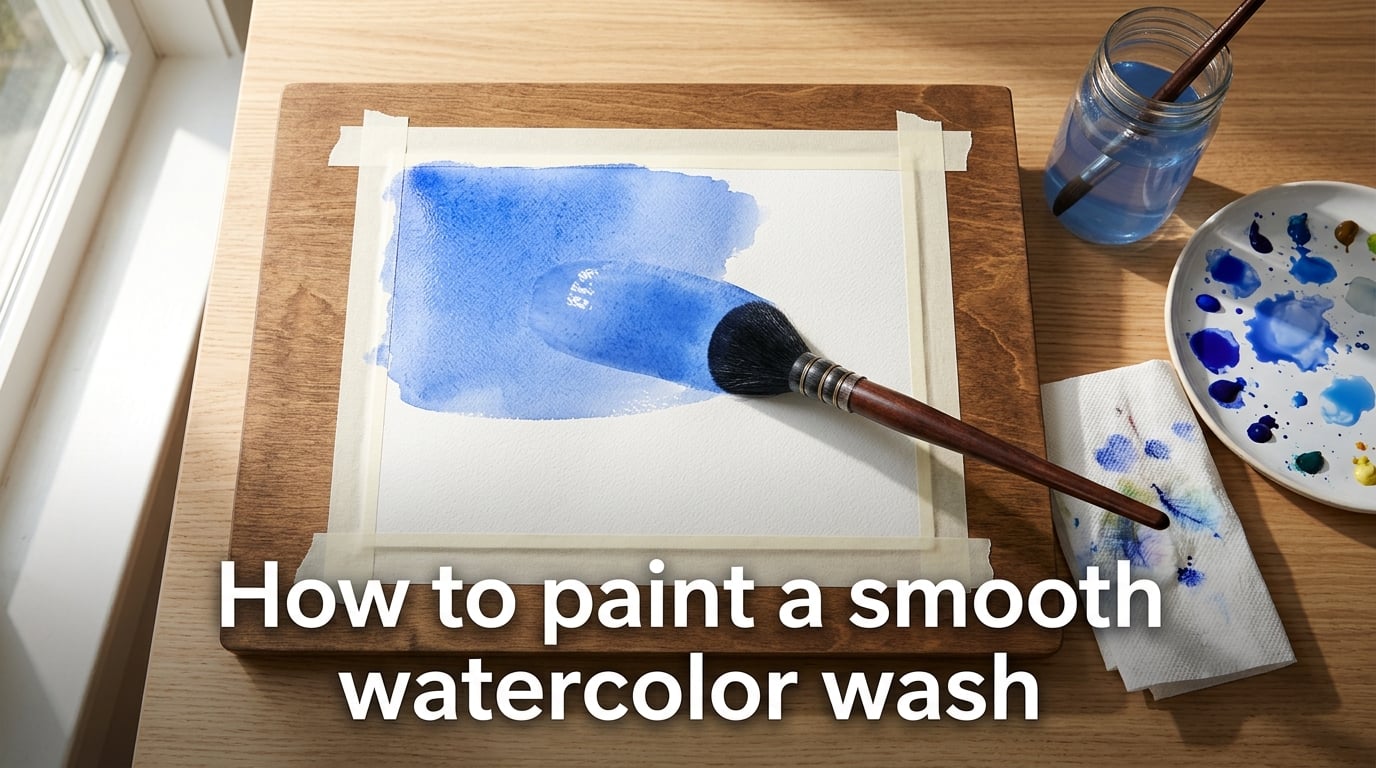
Learning how to paint a smooth watercolor wash is one of the most valuable skills any watercolorist can develop. A clean, even wash is the backbone of skies, water, walls, and backgrounds. It is also the technique that separates a confident painting from one that looks patchy or streaky.
In this guide, I walk you through the three core washes every artist should know: the flat wash, the graded wash, and the variegated wash. You will also learn which paper and brush make the job easier, how to handle wet-on-dry versus wet-on-wet approaches, and how to fix the streaky results most beginners hit on their first attempt.
By the end, you will have a complete step-by-step routine you can repeat on any sketchbook page. I have used each of these techniques in my own studio for years, and the drills below come straight from the practice sheets I still keep on my desk.
Table of Contents
What Is a Watercolor Wash and Why Smoothness Matters
A watercolor wash is a broad, transparent area of color laid down with diluted pigment and water. The word “wash” refers to the watery, flowing nature of the paint as it travels across the paper. A smooth wash shows no visible brush strokes, no streaks, and no hard edges. It looks even and luminous from one side to the other.
Smoothness matters because washes set the mood of a painting. A streaky sky reads as uneven and hurried. A glassy, even sky reads as calm and atmospheric. Most landscape, seascape, and abstract watercolor paintings begin with one or more washes, so mastering the wash technique pays off in every painting you make.
The two qualities that separate a smooth wash from a rough one are the consistency of the pigment-to-water ratio and the speed at which you lay down each stroke. Keep both steady and the surface stays uniform. Let either waver and streaks or blooms appear. That is the entire game, and the rest of this guide is about how to win it.
Washes also matter for transparency. Because watercolor is built up in translucent layers, a clean first wash gives you a strong foundation to glaze over later. A bumpy first wash only gets bumpier with each additional layer.
Equipment and Supplies You Need for Smooth Washes
You do not need a huge kit to get smooth results. The right paper and brush do most of the work for you. Here is the short list I keep on my studio table for every wash.
- Watercolor paper: Cold press, 100 percent cotton, 140 lb (300 gsm) is the gold standard. Cold press has enough tooth to slow the water down and let you blend. Hot press gives crisper edges but lets water run faster, which makes smooth results more challenging for beginners. Avoid sketching paper, which warps and buckles the moment it gets wet.
- Large mop or wash brush: A 1 inch or larger mop brush holds a huge reservoir of paint and lays down a wide stroke in one pass. Squirrel hair or a soft synthetic blend holds water well. A flat brush (about 3/4 inch) is the next best choice.
- Watercolor paint: Any artist-quality pan or tube color works. Transparent pigments like ultramarine, phthalo blue, quinacridone gold, and burnt sienna are ideal because they blend cleanly without going muddy.
- Two water jars: One for rinsing, one for clean water. Switching water often keeps colors true.
- Palette: A flat palette with large wells gives you room to mix generous puddles of color, which matters because you need a lot of liquid to cover a wash.
- Paper towel or sponge: For mopping up the bead at the bottom of each stroke and blotting your brush.
A tilting surface also helps. Many artists tape their paper to a board propped at a slight angle so the wash flows gently downward. Gravity becomes a silent assistant that helps the pigment settle evenly.
How to Paint a Flat Wash Step by Step
The flat wash is the foundation. It is a single, even color from edge to edge with no gradient, no streak, and no bloom. Master this first and every other wash becomes easier. Follow the numbered steps below for the cleanest result.
- Mix a generous puddle. Squeeze or pan-pick more paint than you think you need, then add water until the mix is the consistency of whole milk. Aim for a mid-tone of your target color. You will dilute later if needed, but a thin puddle dries patchy.
- Tilt your paper. Prop the board at a 10 to 20 degree angle so gravity pulls the wash gently downward.
- Load your brush. Dip your mop or large flat brush fully into the puddle. Tap off the excess on the rim of the palette so the brush is wet but not dripping.
- Paint the first stroke at the top. Lay a single horizontal stroke across the top edge of the area. Use the full width of the brush and finish each stroke in one pass. Do not go back over wet paint.
- Pick up the bead. When the stroke settles, a shiny bead of water and pigment will pool along the bottom edge. This bead is your lifeline. Without it, the next stroke will leave a hard line.
- Continue down the paper. Paint the next stroke just below the first, dipping your brush and picking up the bead in the same motion. The bead feeds the new stroke so the two blend seamlessly.
- Mop the final bead. When you reach the bottom, lift the bead with a paper towel or clean dry brush. A leftover bead dries as a darker line, so always mop it away.
- Let it dry flat. Leave the paper untouched until bone dry. Tilting or blowing on it can cause backruns.
The single most common error I see in beginner work is running out of paint mid-wash. Mix double what you think you need. Re-loading your brush halfway through a stroke is the number one cause of stripes.
If a streak does appear, you can sometimes rescue the wash by re-wetting the area with a clean brush and letting it settle again. But prevention beats correction every time, so take your time and trust the bead.
How to Paint a Graded Wash Step by Step
A graded wash fades smoothly from dark to light (or light to dark) across the paper. It is the wash you use for skies that melt into the horizon, for shadows that fade into walls, and for atmospheric backgrounds. The mechanics are nearly identical to a flat wash. The only difference is the water content changes from one end to the other.
- Mix two puddles. One puddle is your full pigment load, the color at full strength. The second puddle is the same color heavily diluted with water, almost clear but still tinted.
- Start with the dark color at the top. Load your brush with the strong puddle and lay your first stroke across the top of the area. Tilt the paper so the wash flows downward.
- Pick up the bead and add water on the brush. On the second stroke, dip your brush first into the strong puddle, then drag it through the light puddle to dilute it further. Pick up the bead from the first stroke as you go.
- Add more water each row. With each new stroke, add a little more clean water to the brush. The wash grows paler as you move down the paper.
- Finish with almost-clear water. Your final stroke is mostly water with a hint of pigment. Pick up the bead as usual.
- Mop and dry flat. Remove the bottom bead and let the wash dry without disturbing it.
The trick to a clean graded wash is to keep the ratio change very gradual. Adding a teaspoon of water every two strokes is too much. Instead, dip a corner of the brush into clean water for each new pass so the change is barely perceptible. The eye cannot catch a gradient it cannot see.
If you paint dark at the top of a sky, the result feels like late afternoon light. Reverse the direction and the wash reads as fog rolling in from below. The direction is part of the story.
How to Paint a Variegated Wash Step by Step
A variegated wash blends two or more colors while the paper is still wet. It is the wash behind sunset skies, autumn trees, and rainbows. Unlike a flat or graded wash, the colors mix on the paper rather than in the palette.
- Mix two colors separately. Prepare two puddles of paint at the same consistency as for a flat wash. Two transparent pigments work best. Try ultramarine blue and quinacridone gold for a classic sunset look.
- Pre-wet the paper (optional). For a soft blend, brush clean water across the area first. The paint will flow into a smooth gradient. Skip this step if you want crisper color transitions.
- Apply the first color at one end. Paint a stroke of color A across one end of the area, leaving a wet bead at the bottom edge.
- Apply the second color at the other end. Without reloading from the same puddle, switch brushes or rinse thoroughly. Then paint color B from the opposite end.
- Let them meet. Move toward the middle of the area. The two colors will bleed into each other where they meet, creating a third color. Do not overwork this. The paint does the blending for you.
- Mop and dry flat. Clean up the bottom bead and let the wash dry undisturbed.
Two tips make variegated washes sing. First, choose colors that mix to a pleasant third color, not mud. Blue and yellow mix to green. Blue and orange mix to a soft brown. Red and green mix to brown, but if you use a transparent red and a transparent green, the result stays luminous. Second, work fast. The wetter the paper, the more the colors flow; the dryer the paper, the more the colors stay put.
Wet on Dry vs Wet on Wet: When to Use Each Approach
Every watercolor wash is either wet-on-dry or wet-on-wet. The labels describe whether you apply wet paint to dry paper or to paper that is already damp. Each method produces a different look, and choosing between them is one of the first decisions you make when starting a painting.
Wet on Dry Washes
Wet on dry means your paper is bone dry when the brush touches it. The paint stays where you put it, edges stay crisp, and you control the result stroke by stroke. Flat washes, graded washes, and any wash where you want sharp edges should be wet on dry. Most beginner work is wet on dry because the technique is more forgiving. If you make a mistake, you can let it dry and glaze over the area.
Wet on Wet Washes
Wet on wet means the paper has been pre-wet with clean water, or the previous stroke is still damp. The new paint flows into the moisture, creating soft edges, blooms, and gentle blends. Variegated washes and atmospheric backgrounds rely on wet on wet. The trade-off is less control. If you add too much water or wait too long, the wash puddles or backruns.
As a rule of thumb, use wet on dry for crisp skies, geometric backgrounds, and any wash where you want defined shapes. Use wet on wet for soft sunsets, foggy forests, and blended color transitions. Many paintings combine both: a wet-on-wet sky that fades into a wet-on-dry foreground.
Common Mistakes and How to Fix Them
Every watercolorist hits these problems. Knowing the cause makes the fix fast.
- Streaky wash: Almost always caused by running out of paint, lifting the brush mid-stroke, or going back over a drying stroke. Prevention: mix double the puddle and finish each stroke in one pass. Fix: re-wet the area with a clean brush while the paper is still damp and let it settle.
- Backruns (also called blooms or cauliflower marks): A bead of water landed on a drying wash, pushing pigment outward. Cause: tilting or blowing on the paper while the wash was still wet. Fix: re-wet the entire area while it is still damp and re-distribute the pigment evenly.
- Cauliflower or uneven edges: Usually a sign that the wash dried too fast or the pigment load was inconsistent. Prevention: work in a cool room, mix a generous puddle, and keep your strokes parallel.
- Muddy colors: Mixing too many pigments in the palette or on the paper. Fix: limit yourself to two colors per wash and let them blend on the paper, not in the palette.
- Paper buckling: Thin paper warps when wet. Prevention: use 140 lb (300 gsm) paper or stretch your paper by soaking and taping it to a board.
If a wash goes truly wrong, the safest move is to let the paper dry completely, then lift pigment with a damp brush and start the area over. Trying to fix a wet wash usually makes it worse.
Practice Exercises to Build Your Wash Skills
Washes are muscle memory more than talent. These short drills will sharpen your control in an afternoon.
- The five-row flat wash. Draw five rectangles and paint a flat wash in each, using a different color for each one. Aim for no visible stroke lines. Repeat until each row is glass-smooth.
- The graded sky drill. Paint a graded wash from dark blue at the top to nearly white at the bottom across a full sheet. The grade should be so smooth you cannot tell where the dark ends and the light begins.
- The variegated sunset. Mix a warm orange and a cool blue. Paint a variegated wash that goes from orange at the bottom to blue at the top. Aim for a smooth green band where they meet.
- The single-stroke test. Load a huge brush with paint and try to cover a full sheet in one continuous stroke. The drill teaches you how much water your brush really holds.
- The repair drill. Intentionally let a wash dry with a streak. Then try to repair it by re-wetting the area and redistributing the pigment. The drill teaches recovery.
Do one drill a day for a week and your wash technique will be noticeably cleaner. The repetition matters more than the time spent.
Frequently Asked Questions
What is the watercolor wash technique?
A watercolor wash is a broad, transparent area of color applied with diluted pigment and water. You load the brush with a generous puddle of mixed paint, then lay down horizontal strokes across tilted paper while keeping a wet bead at the bottom of each stroke. The bead feeds the next stroke so the colors blend seamlessly and the surface stays even.
How do you make watercolor look smooth?
Use a large soft brush, mix a generous puddle of paint at an even consistency, and lay each stroke in a single pass. Keep a wet bead at the bottom of every stroke so the next stroke blends into it without leaving a hard line. Work quickly before the wash dries and avoid going back over wet paint.
What is the washout technique in watercolor painting?
The washout technique (also called a graded wash) starts with full-strength pigment at one edge and gradually adds clean water to the brush with each new stroke. The result is a smooth gradient from dark to light across the paper. It is the classic approach for skies, shadows, and atmospheric backgrounds.
What is the difference between wet on dry and wet on wet?
Wet on dry means you apply wet paint to bone-dry paper. Edges stay crisp and you control the result stroke by stroke. Wet on wet means the paper is already damp, so the new paint flows into the moisture, creating soft edges and natural blends. Use wet on dry for defined shapes and wet on wet for soft gradients and atmospheric effects.
What brush is best for watercolor washes?
A large mop brush (1 inch or wider) made of soft squirrel hair or a quality synthetic blend is the best choice for washes. It holds a huge reservoir of paint and lays down a wide stroke in a single pass. A 3/4 inch flat brush is the next best option. Avoid small detail brushes for washes because they cannot hold enough water.
What paper is best for watercolor washes?
Cold press, 100 percent cotton paper at 140 lb (300 gsm) is the gold standard for washes. Cold press has enough tooth to slow the water down and let the wash blend smoothly. Hot press paper works for crisp edges but lets water run faster, which is harder for beginners. Avoid anything below 90 lb because it buckles the moment it gets wet.
How do you fix a watercolor wash that went wrong?
If the wash is still damp, re-wet the entire area with a clean brush and let the pigment redistribute evenly. If it has already dried, let the paper dry completely, then lift the unwanted pigment with a damp brush and start the area again. Trying to fix a drying wash usually makes streaks worse, so patience is the real fix.
What is a graded wash in watercolor?
A graded wash is a watercolor wash that fades smoothly from dark to light (or light to dark) across the paper. You start with full-strength pigment and gradually add clean water to the brush with each new stroke. Graded washes are the standard technique for skies and atmospheric backgrounds.
Final Thoughts on Painting Smooth Watercolor Washes
Learning how to paint a smooth watercolor wash comes down to three habits: mix more paint than you need, finish every stroke in a single pass, and respect the wet bead at the bottom of each row. Those three habits cover roughly 90 percent of what makes a wash look clean.
The other 10 percent is just practice. Pick up your brush, run through the five drills above, and let your hands learn the rhythm. Within a week, you will see streaks turn into glassy skies and patchy backgrounds turn into luminous washes. Every painting after that gets easier.