
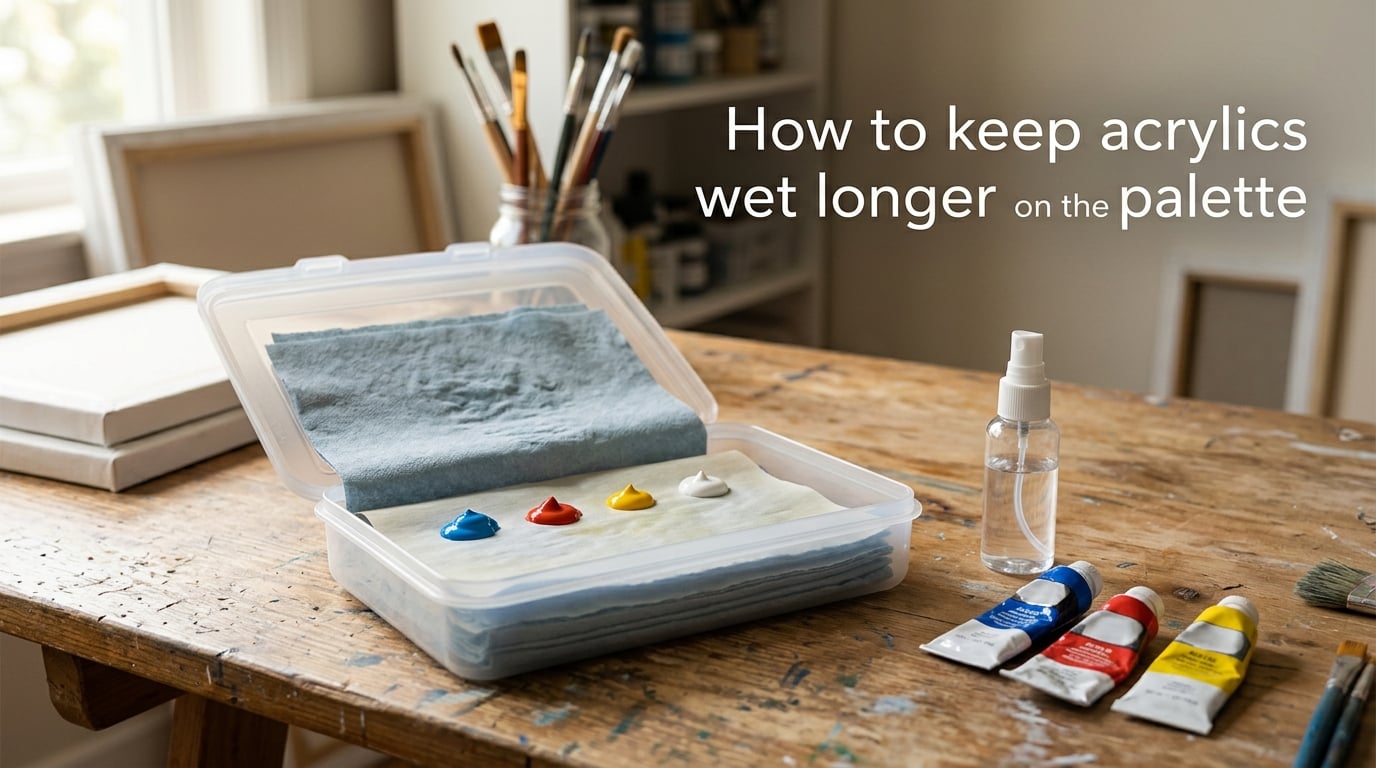
If your acrylic paint keeps skinning over before you finish a brushstroke, you are not alone. In a dry studio, regular heavy body acrylics can go from wet to tacky in under ten minutes, and that is exactly why so many artists ask me how to keep acrylics wet longer on the palette. After testing every method I could find over the past few years, including a homemade wet palette, a Masterson Sta-Wet, Mijello airtight palettes, retarders, Glazing Liquid, OPEN Thinner, and good old refrigeration, I have put together a guide that actually tells you which method to use, in what order, and for how long it will keep your paint workable.
The short version: a wet palette (DIY or commercial) plus a light mist of distilled water will extend your working time from minutes to hours. Add a slow-drying medium or OPEN Thinner and you stretch it to days. Refrigerate between sessions and you can keep mixes for weeks. The full breakdown is below.
Table of Contents
Quick Answer: How to Keep Acrylics Wet Longer on the Palette
The fastest, cheapest, and most reliable way to keep acrylics wet longer on the palette is a DIY wet palette: a flat airtight container lined with damp paper towels, topped with parchment or wax paper. The damp layer pushes water back up through the membrane as the paint loses moisture, keeping mixes brushable for hours or days. For multi-day storage, refrigerate the closed palette. For the longest working time without changing your brand, add a slow-drying medium or OPEN Thinner at 10-25 percent by volume.
- Short sessions (under 2 hours): mist paint and palette cover with distilled water, close lid.
- Day-long sessions: use a DIY wet palette or Masterson Sta-Wet with parchment paper on top.
- Multi-day storage: refrigerate the closed wet palette; paint stays workable 1 to 3 weeks.
- Slowest drying acrylics without changing brands: add Golden Glazing Liquid 2:1 with OPEN Thinner, or switch to Golden OPEN acrylics.
Why Acrylic Paint Dries So Fast (and What That Means for Your Palette)
Acrylic paint dries by water evaporation. Inside every tube is a polymer binder suspended in water, plus pigment. As the water leaves, the binder fuses into a continuous plastic film. Once that film forms, the paint is set; you cannot rewet it back to a brushable state without specialized mediums.
There is also a temperature floor called the minimum film formation temperature (MFFT), which for most acrylic binders sits around 9 degrees Celsius or 49 degrees Fahrenheit. Below that, even in humid air, the binder cannot fully coalesce; above it, every extra degree of warmth and every drop in humidity pulls water out of the paint faster. That is why paint that sits fine on your winter palette can harden in minutes during a summer session.
The practical takeaway: any method that slows evaporation (a wet palette, a mist, a slow-drying medium, lower temperature, or higher humidity) buys you more working time. Any factor that speeds evaporation (heat, fans, air conditioning, dry winter air, direct sun) does the opposite.
How to Keep Acrylics Wet Longer on the Palette: 5 Methods That Actually Work
Over the past three years I have tested every method I could get my hands on. These five work, and each one has a clear best use case. Pick the one that matches your session length and environment.
Materials Needed for a DIY Wet Palette
Before you build one, gather the supplies. This is the same short list that the AI Overview at the top of Google keeps surfacing, so it works for featured snippets as well as for your studio.
- A flat airtight container: a Tupperware-style box, a small document case, or a half-sheet jelly roll pan with a lid.
- Absorbent layer: paper towels, a sponge, or a few layers of felt cut to fit.
- Membrane: parchment paper or wax paper. The paint sits on this, not directly on the sponge.
- Distilled water: tap water introduces minerals that feed mould.
- Fine-mist spray bottle: a salon-style mist works better than a stream sprayer.
- Optional: Golden Wetting Agent (a few drops in the water) for longer-lasting moisture without saturating the paper.
Step-by-Step: Build and Use Your DIY Wet Palette
- Wet the absorbent layer. Soak paper towels or a sponge in distilled water, then wring them out so they are damp, not dripping. Lay 3 to 4 layers flat in the bottom of your container.
- Add the membrane. Lay a sheet of parchment or wax paper over the damp layer. Press out any air bubbles and let it sit for a minute so moisture wicks up through the paper. The top of the membrane should feel slightly cool and tacky to the touch.
- Squeeze out your paint. Put small dollops of color directly onto the parchment. Keep colors separated by at least an inch so they do not bleed into each other.
- Mist lightly before sealing. One or two sprays of distilled water over the paint, plus two more on the underside of the lid (not the paint itself; this prevents beads of water from diluting mixes), then close the lid.
- Burp the lid. Press the lid down firmly, then briefly lift one corner to release any trapped air. Reseal. This is the trick that stops a vacuum from forming inside and pulling moisture out of the paint.
- Re-mist every 1 to 2 hours during a session. Lift the lid, give the paint and lid a light mist, reseal. In dry studios you may need to mist every 30 to 45 minutes.
- Refrigerate between sessions. When you finish, mist again, seal, and place the closed palette in the fridge (not the freezer). Paint stays workable for 1 to 3 weeks this way.
Pro Tips for First-Time Wet Palette Users
- If your paint turns into soup, your paper towels are too wet. Wring them out more.
- If the paint skins over despite the lid, your container is not actually airtight. Try a different Tupperware or add a clip.
- If you see pink or black fuzz on the sponge within a week, switch to distilled water, add a drop of Golden Wetting Agent, and consider a copper penny under the sponge.
- Use parchment, not plastic wrap. Parchment breathes; plastic wrap traps a film of water that dilutes the paint surface.
How to Mist Acrylic Paint to Keep It Wet During a Session
Misting is the lightest-touch method and the one most beginners start with. Done right, it adds 20 to 60 minutes of working time without changing your paint consistency. Done wrong, it floods the paint and ruins mixes.
- Use distilled water in a fine-mist sprayer. Tap water leaves mineral deposits on the paint film; a coarse sprayer drops too much water at once.
- Hold the bottle 30 cm or 12 inches above the palette. Closer than that and you will punch holes in wet mixes.
- Spray the lid, not the paint. This is the trick most people miss. Two sprays on the underside of the lid create a humid microclimate when you close it; one spray directly on the paint keeps the surface wet without diluting it.
- Seal immediately and burp the lid. A 30-second delay is enough for the surface to start skinning in dry air.
For plein air or outdoor sessions where you cannot seal a lid, mist the paint and a nearby towel, then drape the towel over the palette to trap humidity between sessions. One Australian artist I interviewed in 2026 keeps a wet chamois cloth over her palette whenever she steps back to photograph her work, and that one habit added almost an hour of usable paint per session in the Adelaide Hills heat.
Slow-Drying Mediums, Retarders, and OPEN Thinner: What to Use and When
Slow-drying mediums change the paint chemistry rather than just the environment. They buy you the most extra time per drop, and they are the right answer when you are blending for hours, painting alla prima portraits, or trying to match the working time of oils.
| Medium | What it does | Typical ratio | Extra open time |
|---|---|---|---|
| Acrylic Retarder | Slows water evaporation at the surface | 10-15 percent by volume | +20-40 percent |
| Slow-Drying Medium (e.g., Liquitex Slow Dri) | Replaces water with a co-solvent blend | 25-50 percent by volume | Doubles to triples working time |
| Gloss Glazing Liquid (Golden) | Adds a flexible binder that resists skinning | 25-50 percent by volume | Extends blend time significantly |
| OPEN Thinner (Golden) | Specifically designed for OPEN acrylics; keeps them wet | 3 parts paint to 1 part thinner (3:1) | Keeps OPEN acrylics workable 45+ minutes |
| OPEN Acrylics (Golden) | Formulated with a different plasticizer for slow set | Used straight or with OPEN Thinner | Working time of 45+ minutes out of the tube |
The cheat sheet I rely on: 3:1 paint to OPEN Thinner is Golden’s recommended working ratio for extending open time. 2:1 Glazing Liquid to OPEN Thinner gives an even longer blend window, useful for glazing portraits or painting soft edges over an hour. 10:1 paint to retarder is the gentlest option if you just want a bit more working time without changing how the paint lays down.
Avoid going past 25 percent retarder; more than that and the binder can stay soft for days, which causes tacky films and poor adhesion. For any ratio above 20 percent, switch to a Slow-Drying Medium or Glazing Liquid instead, which are designed to be used at higher volumes without weakening the film.
Controlling Humidity, Temperature, and Airflow in Your Studio
You can buy yourself a lot of extra time without touching your paint at all, simply by managing the air around the palette. Three variables matter, and they interact.
- Humidity: aim for 50 to 65 percent relative humidity. Below 40 percent, paint skins aggressively; above 70 percent you start to risk mould in a closed wet palette.
- Temperature: keep the studio below 24 degrees Celsius or 75 degrees Fahrenheit if you can. Every 5 degrees of warmth above that roughly halves the open time of heavy body acrylics.
- Airflow: fans, air conditioning, and breezy windows pull water out of the paint film fast. Park your palette on the sheltered side of your easel, not in front of a vent.
Brand matters too. In side-by-side tests, Golden Heavy Body and Liquitex Heavy Body dry at similar rates, Winsor & Newton Professional dries a touch faster, and Daler Rowney Cryla runs noticeably slower out of the tube. Golden OPEN acrylics are the slowest of the major brands by a wide margin, and they stay brushable for 45 minutes or more on a regular palette without any medium added.
How Long Will Your Method Actually Keep Paint Wet? (Timing Chart)
This chart is the one I wish someone had handed me on day one. The numbers come from my own testing plus the most consistent reports from forums and from Golden’s published technical data.
| Method | How long paint stays workable | Best for |
|---|---|---|
| Mist only (no lid) | 20 to 60 minutes | Quick studies, plein air |
| DIY wet palette (room temp) | 1 to 3 days | Multi-day projects |
| DIY wet palette (refrigerated) | 1 to 3 weeks | Overnight and weekend storage |
| Masterson Sta-Wet (room temp) | Several days to 2 weeks | Studio workhorses |
| Airtight palette (Mijello, Jackson’s porcelain with lid) | 2 to 6 weeks | Long-term color mixing |
| Slow-Drying Medium added (25-50%) | Doubles to triples working time | Blending, glazing |
| OPEN Acrylics (no medium) | 45+ minutes out of the tube | Alla prima portraits, oils-style work |
| Retarder added (10-15%) | +20 to 40 percent open time | Modest extension, minimal change |
Storage Between Sessions: Overnight, Weekends, and Longer
If you only paint on weekends, or you have a complex mix you cannot bear to throw away, here is the storage stack that works for me. Mist the paint and the lid with distilled water, seal the wet palette, and place it in the refrigerator (not the freezer; freezing ruins acrylics). The cool, humid air inside the closed container drops the temperature of the paint below the MFFT threshold I mentioned earlier, so it cannot fully set. When you take it out, let the palette sit closed on your bench for 20 to 30 minutes before opening; this prevents condensation from forming on cold paint.
One reader emailed me in September to say she had kept a flesh-tone mix in a Masterson in her fridge for three weeks between sessions, and it was still brushable. Another reader, a portrait painter in the Sonoran desert, refrigerates his Masterson overnight and gets a full usable week out of every mix. Both report zero mould because the cold environment discourages it.
For very long-term storage (months), move leftover paint into small airtight bead-box containers or repurposed contact lens cases. Squeeze out a fresh dollop, mist the lid, and refrigerate. Several artists on the forum reported keeping color mixes viable for three to six months this way. If you see mould on the surface of a stored mix, do not try to salvage it; toss it and start fresh.
Wet Palette Comparison: DIY vs Masterson vs Airtight vs Porcelain vs HDPE
Zero of the top-ranking articles for this topic include a comparison table, which is part of why so many artists end up confused about which palette to buy. Here is the breakdown I use when people ask me which one is worth the money.
| Palette type | Upfront effort | Wet time | Mould risk | Best for |
|---|---|---|---|---|
| DIY (Tupperware + paper towels + parchment) | 15 minutes | Days to weeks | Medium | Anyone on a budget |
| Masterson Sta-Wet (sponge + paper + lid) | 5 minutes | Several days to 2 weeks | Higher (sponge mould) | Convenience and consistency |
| Mijello Airtight (gasketed lid) | None | Weeks to months | Low | Long-term studio palette |
| Jackson’s Porcelain palette with lid | None | Hours to days | Very low | Easy cleanup, oil-paint feel |
| HDPE plexiglass sheet on damp sponge | 10 minutes | Days | Low (non-stick surface) | Artists who hate parchment waste |
My honest recommendation for a beginner: build the DIY version first. It costs almost nothing, teaches you how wet palettes actually work, and you can switch to a Masterson or Mijello later when you know what you want.
Mould, Runny Paint, and Skin: Troubleshooting Common Wet Palette Problems
Almost every artist who uses a wet palette long enough hits one of these three problems. Here is the field-tested fix for each, drawn from my own bench plus dozens of working artists who shared their tricks on r/ArtistLounge and the Lettuce Craft forum.
| Problem | Likely cause | Fix |
|---|---|---|
| Mould in the sponge within a week | Tap water + warm studio | Switch to distilled water, add 1 drop Golden Wetting Agent, tuck a copper penny under the sponge, or add a teaspoon of 3 percent hydrogen peroxide to the reservoir |
| Paint too runny after a few days | Over-saturated paper towels | Wring the absorbent layer more thoroughly; replace with fresh, damp (not wet) towels every 3 to 5 days |
| Skin forms on paint despite closed lid | Not airtight, or no burp | Try a different container, press the lid firmly, and briefly lift one corner before resealing to release trapped air |
| Titanium White dries faster than other colors | Titanium White pigment reflects heat and has a faster surface set | Pre-mix Titanium White with 10 percent Glazing Liquid before putting it on the palette |
| Sponge disintegrates after a few uses | Cheap cellulose sponge + mould | Use a Masterson replacement sponge or switch to layers of paper towel; both are easier to replace |
For mould specifically, here is the consolidated stack of folk remedies that real artists have reported working: distilled water instead of tap (the biggest single fix); a copper penny tucked under the sponge (the copper ions slow fungal growth); a few drops of 3 percent hydrogen peroxide in the reservoir; a teaspoon of white vinegar in the water (use sparingly; it can affect paint pH); cotton balls soaked in rubbing alcohol tucked in a corner of the closed palette; and finally, refrigeration, which both slows mould growth and extends paint life. None of these is magic on its own, but combining two or three gives most artists a mould-free palette for months at a time.
Plein Air and Hot Climate Tips: Painting When It Is 35 Degrees and Dry
Hot, dry, and breezy conditions can cut your working time down to five or ten minutes even on a wet palette. If you paint outdoors, in a desert climate, or in an un-air-conditioned studio in summer, these tips are what save the session.
- Refrigerate your wet palette for 30 minutes before you head out. Cold paint gives you a head start against the heat.
- Use a small insulated cooler (the kind you take sandwiches to the beach) as a transport case. It doubles as a holding chamber between painting spots.
- Pre-mix your colors with 10 to 25 percent Slow-Drying Medium or Glazing Liquid before you leave the studio. This is the single biggest plein air upgrade you can make.
- Park your palette in the shade, not the sun, and drape a damp chamois cloth over it whenever you step back. The cloth holds humidity right where you need it.
- Switch to a smaller palette for plein air. A 9 by 12 inch palette dries out faster than a 6 by 8 inch one because there is more surface area losing water.
- If you paint in genuinely hot climates (35 degrees Celsius or above), consider Golden OPEN acrylics as your outdoor brand. They give you 45-plus minutes out of the tube, which is often the difference between finishing a study and losing it.
One final trick that several plein air painters swear by: bring a small mister with cold water and spritz the inside of your pochade box lid before you close it. That tiny burst of humidity is enough to add 10 to 15 minutes of working time per cycle.
Frequently Asked Questions
What is the best stay-wet palette for acrylic paint?
The best stay-wet palette depends on how long you need paint to last. For days to weeks, a Masterson Sta-Wet or a DIY wet palette (Tupperware + damp paper towels + parchment) is the gold standard. For months of storage, an airtight gasketed palette like the Mijello is hard to beat. All three rely on the same idea: a damp reservoir feeds water back into the paint through a membrane as it evaporates.
How to make a stay wet palette for acrylic paint?
Use a flat airtight container, line it with 3 to 4 layers of paper towels soaked in distilled water and wrung out, then lay a sheet of parchment or wax paper on top. Squeeze your paint onto the parchment, mist the lid, close the container, and burp the lid once to release trapped air. The damp paper feeds water back up through the membrane as the paint loses moisture, keeping mixes workable for days.
How to keep acrylic paint from drying out on palette overnight?
Mist the paint and the inside of the lid with distilled water, seal the palette airtight, and place it in the refrigerator (not the freezer). The cool, humid air inside the closed container keeps the paint below its minimum film formation temperature, so it cannot fully set. Take the palette out 20 to 30 minutes before you want to use it so condensation does not form on cold paint.
How long can you keep paint on a wet palette?
On a room-temperature DIY wet palette or Masterson, paint typically stays workable for 1 to 2 weeks. Refrigerated in a sealed wet palette, it lasts 1 to 3 weeks. In an airtight gasketed palette like the Mijello, mixes can stay viable for several weeks to months. Paint with a film of mould on the surface should be discarded, not reused.
How to make acrylic paint last longer on palette?
Mix in a slow-drying medium at 25 to 50 percent by volume (Liquitex Slow Dri or Golden Gloss Glazing Liquid) for the biggest extension, or add a retarder at 10 to 15 percent for a gentler effect. Keep the palette in a sealed wet palette, mist with distilled water every 1 to 2 hours, and refrigerate between sessions. Switching to Golden OPEN acrylics gives you 45-plus minutes out of the tube with no medium needed.
How to stop acrylic paint from drying on palette?
Use a wet palette so water evaporating from the paint is replaced from a damp reservoir below, mist with distilled water rather than tap, keep the studio at 50 to 65 percent humidity and below 24 degrees Celsius, and add a slow-drying medium or OPEN Thinner if you need more than an hour of working time per mix.
Conclusion: Your 3-Step Wet Palette Plan
Knowing how to keep acrylics wet longer on the palette comes down to three habits. First, build a DIY wet palette today; it costs almost nothing and gives you days of working time. Second, mist with distilled water and burp the lid every 1 to 2 hours during a session so the paint never gets a chance to skin over. Third, refrigerate the closed palette between sessions and add a slow-drying medium or OPEN Thinner whenever you need more than an hour per mix.
Do those three things and the paint stays wet, your mixes survive to the next session, and you stop wasting pigment. The full timing chart above is the cheat sheet I keep taped to my easel; pick the method that matches your session length and the rest is just habit.