
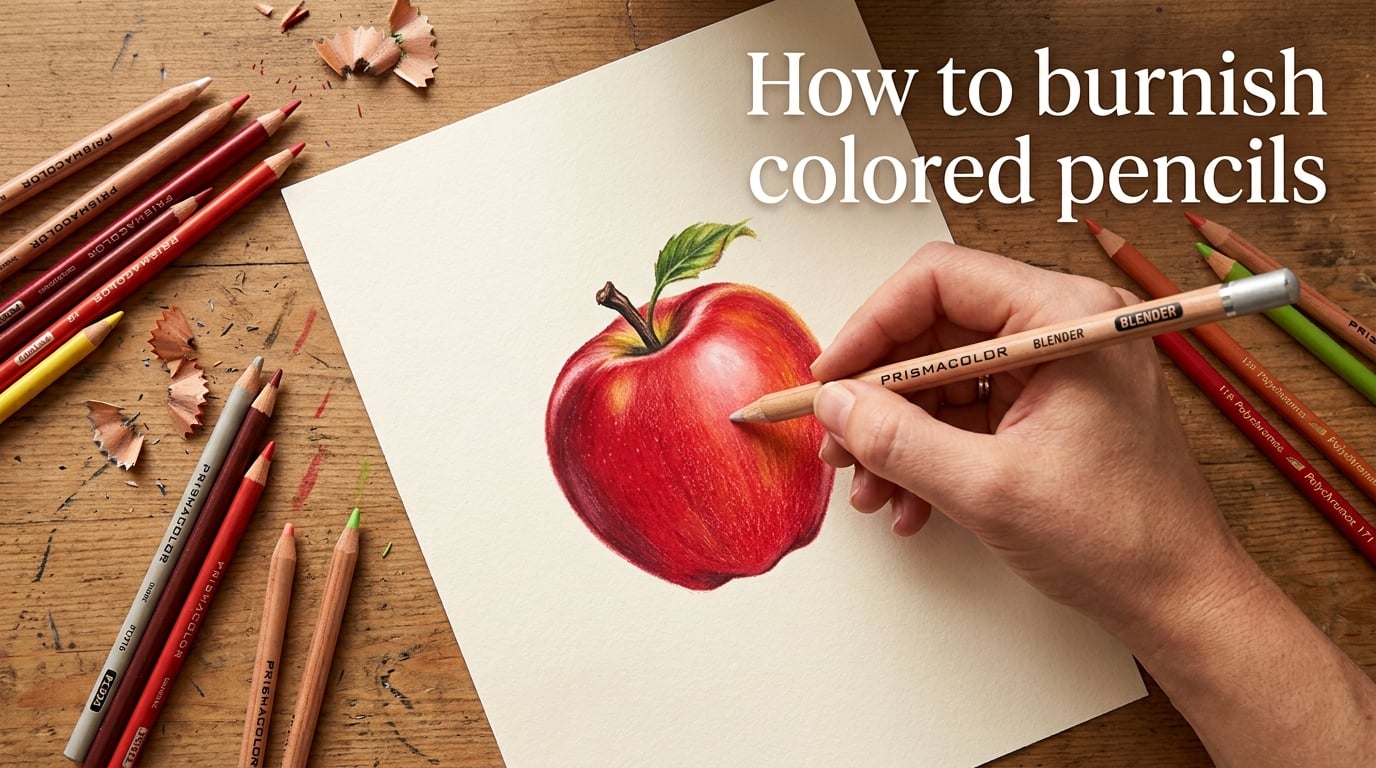
Burnishing is the colored pencil technique that turns layered, grainy strokes into a polished, glassy surface that looks almost photographic. I remember the first time I tried it on a shiny red apple; the moment I pressed harder with a white pencil, the pigment compressed into a single rich tone and the paper tooth disappeared. That “aha” moment is exactly what this guide will walk you through.
In this complete guide on how to burnish colored pencils, I’ll cover what burnishing actually is, how it differs from blending, the tools and paper that work best, the exact step-by-step technique, and how to fix the most common mistakes (especially that stubborn wax bloom). Whether you are working with Prismacolor Premier, Faber-Castell Polychromos, or Caran d’Ache Luminance, these principles apply across brands.
Table of Contents
What Is Burnishing in Colored Pencils?
Burnishing is the technique of applying heavy pressure with a light-colored pencil or colorless blender to compress pigment layers into the paper, creating a smooth, glossy finish with no visible strokes. The pressure grinds the wax or oil binder in your pencils into the paper tooth (the tiny fibers and texture of the paper surface), filling every gap so light reflects evenly off the artwork.
Think of paper tooth as a miniature mountain range. Your first layers of pencil sit on top of those peaks, leaving white valleys showing through. Burnishing pushes pigment down into those valleys and flattens the peaks at the same time. The result is a dense, saturated surface that looks polished rather than textured.
Most colored pencil artists use burnishing for one of three reasons: to intensify a color, to remove the appearance of individual pencil strokes, or to create the reflective sheen on smooth subjects like glass, fruit, and metal. It is the difference between a sketch that looks colored in and one that looks painted.
Burnishing vs Blending: What’s the Difference?
Burnishing and blending are often confused because both create smooth transitions, but they work in different ways. Burnishing uses heavy pressure to compress existing pigment and the paper surface into a flat, reflective layer. Blending is the softer process of moving pigment around so two colors transition gradually into each other.
This is one of the most common questions beginners ask, so here is a clear side-by-side comparison:
| Factor | Burnishing | Blending |
|---|---|---|
| Pressure | Heavy, firm pressure | Light to medium pressure |
| Main goal | Polish surface, kill paper tooth | Smooth color transitions |
| Best tool | Colorless blender, burnisher, or white pencil | Colorless blender, blending stump, solvent |
| Result | Glossy, hard, enamel-like finish | Soft gradients between colors |
| Reversibility | Permanent (cannot easily be lifted) | Often liftable with tape or eraser |
| When in process | Final step, after all layers are complete | Any stage, between layers |
| Risk | Can lighten colors, causes wax bloom | Muddy colors if overworked |
In practice, you’ll often use both. I blend while building layers (to keep transitions clean) and burnish only on the final pass (to lock everything into a polished surface). The Reddit r/ColoredPencils community echoes this: most artists reserve heavy pressure for the very last layer and keep their early layers soft.
Tools You Need for Burnishing Colored Pencils
You do not need every tool on this list to start. Most beginners get great results with just a colorless blender and a sharp white pencil. As you grow, you may add specialized burnishers that feel different in the hand.
Colorless Blenders
A colorless blender is a pencil-shaped stick made entirely of binder (wax or oil) with no pigment. When you press it onto layered color, the binder melts into the pigment and fuses everything into a smooth layer. It is the single most popular burnishing tool because it does not shift your color hue.
- Prismacolor Colourless Blender – wax-based, soft, and forgiving. The standard pick for Prismacolor Premier users.
- Derwent Burnisher – slightly firmer, oil-based, works well with Polychromos.
- Lyra Splender Blender – oil-based, popular in Europe, very smooth laydown.
- Caran d’Ache Full Blender Bright – premium option, very creamy, expensive but long-lasting.
Dedicated Burnisher Pencils
These are technically colorless too, but they tend to be slightly harder and produce a different finish. The Derwent Burnisher has a thicker core and holds a point longer, which I prefer for large flat areas.
White Pencils
A sharp white pencil can burnish and slightly tint at the same time. Use it when you want to push colors toward a cooler, lighter version (great for snow, ice, or pale skin highlights). Faber-Castell Polychromos White and Prismacolor White are both reliable choices.
Optional Extras
- Tortillons or blending stumps – rarely used for true burnishing, but useful for tiny areas.
- Colorless blending marker (like a Copic 0) – a fast alternative that delivers heavy pressure through the marker tip.
- Electric eraser – not for burnishing, but for lifting small mistakes before you commit to the final burnish.
My honest advice: start with one Prismacolor Colourless Blender and a white Polychromos. Master those before buying anything else. The technique matters far more than the tool.
Best Paper for Burnishing Colored Pencils
Paper choice can make or break your burnishing results. You need a paper with enough tooth to hold many layers, but not so rough that even burnishing leaves a gritty look. Heavier weight also prevents the paper from buckling under heavy pressure.
Top Paper Choices
- Stonehenge by Legion – 100 percent cotton, warm white, medium tooth. The gold standard for many professional colored pencil artists because it accepts endless layers.
- Strathmore 400 Series Drawing Paper – affordable, medium tooth, accepts lightfast colored pencils well.
- Strathmore 500 Series Plate Bristol – very smooth plate finish; ideal when you want an almost enamel-like surface.
- Fabriano Artistico Hot Pressed – smooth watercolor paper, takes heavy burnishing without warping if you stretch it first.
- Clairefontaine Pastelmat – sanded surface that grabs pigment like velcro, so burnishing happens almost automatically.
Paper Tooth Explained
Tooth is the texture of the paper surface. Rough paper has deep tooth that grabs lots of pigment quickly but shows every stroke. Smooth paper has almost no tooth, so pencil slides on top and layers are harder to build. For burnishing, medium tooth is your friend: enough texture to hold 6 to 10 layers, but not so much that polishing becomes impossible.
Sketching paper and cheap printer paper are too thin and weak. They pill, tear, and buckle the moment you apply heavy pressure. Always use paper rated at 100 lb (270 gsm) or heavier.
How to Burnish Colored Pencils: Step-by-Step Technique
Here is the exact process I teach my students. Follow these steps in order and you will get a smooth, glossy finish every time.
- Plan your layers first. Decide where the burnished areas will go before you start. Burnishing is essentially permanent, so sketch lightly and plan ahead.
- Build light layers. Apply 4 to 6 thin, light layers of color, sharpening your pencil often. Keep your pressure gentle. Each layer should look almost translucent.
- Fill the paper tooth. Switch to medium pressure on the final colored layers. Cover every white speck of paper. The surface should look fully saturated before you burnish.
- Choose your burnishing tool. Pick a colorless blender to preserve your color, a white pencil to lighten and cool the hue, or a tinted light pencil for subtle shifts.
- Burnish with firm, even pressure. Use small circles or overlapping ovals. Cover the entire area without leaving streaks. The pressure should feel almost uncomfortable; that is how you know pigment is compressing.
- Check your work under good light. Tilt the paper toward a lamp. A properly burnished surface reflects light uniformly. Spots that still look dull need more pressure.
- Let the artwork rest. Do not touch the surface for 24 hours. This gives the wax binder time to fully set and reduces the risk of fingerprint impressions.
Pro Tips for Better Burnishing
- Keep your colorless blender freshly sharpened so the tip matches the size of detail you need.
- Use short, controlled strokes instead of long sweeping ones. Long strokes create uneven pressure.
- If the surface feels slippery, your paper is fully polished; stop, because more pressure will not improve it.
- Work in sections. Trying to burnish an entire large piece at once leads to arm fatigue and inconsistent pressure.
- Always save burnishing for the last step. Burning too early can seal in mistakes and prevent further layering.
Wax-Based vs Oil-Based Pencils: How Burnishing Differs
The binder inside your pencil changes how burnishing behaves. Most student-grade colored pencils are wax-based; most professional ones are oil-based. Knowing what you have determines your pressure, your burnisher, and the trade-offs you accept.
| Property | Wax-Based (Prismacolor Premier, Caran d’Ache Luminance) | Oil-Based (Polychromos, Lyra Rembrandt Polycolor) |
|---|---|---|
| Burnish feel | Creamy, soft, fast to blend | Firm, slower, more controlled |
| Gloss level | Very high, almost enamel-like | Soft sheen, more natural look |
| Layer limit | 6 to 8 layers before waxy buildup | 10+ layers with no wax buildup |
| Wax bloom risk | High (white haze over time) | Minimal |
| Best burnisher | Same-brand wax-based blender | Oil-based or dedicated burnisher |
If you use Prismacolor Premier, you will love how quickly it burnishes, but expect to deal with wax bloom on darker passages. If you use Polychromos, the surface will look slightly less glossy but feel more stable and never bloom. Many serious artists mix both: Polychromos for the structure, Prismacolor for the final polish.
When to Burnish (and When NOT To)
Timing is everything. Burnishing is essentially a one-way door; once you polish an area, you cannot easily layer more pigment on top of it. Here’s how to decide.
When Burnishing Helps
- You are finishing the final layer of a subject like glass, metal, fruit, or skin.
- You want to eliminate all visible pencil strokes in a background or sky.
- You are sealing in a complex multi-color area to unify the look.
- You are creating a polished, magazine-cover-style portrait.
When You Should Skip Burnishing
- You are still exploring colors and may need to adjust the palette.
- You are rendering textured surfaces like fur, bark, fabric weave, or rough stone. Burnishing kills the texture you want.
- You want a soft, painterly, organic look. Many artists on r/ColoredPencils deliberately avoid burnishing for this reason.
- You are working on a thin paper that cannot handle the pressure.
- You are early in your colored pencil journey. Wait until you have built confidence with layering first.
The Reddit r/ColoredPencils thread “To Burnish or Not To Burnish” makes this point well: a lot of award-winning colored pencil art is unburnished on purpose. Burnishing is a tool, not a requirement.
Best Subjects for Burnishing
Burnishing shines on smooth, reflective, or polished surfaces. Think of anything in real life that catches light without obvious texture.
- Glass and water – perfect for transparent or reflective effects. The glassy finish of a polished apple or a wine bottle looks identical to burnished pencil when done well.
- Metal – chrome, polished silver, brass, and copper all benefit from burnishing to get those crisp highlights.
- Fruit skin – grapes, cherries, plums, and citrus peels look waxy and luminous after burnishing.
- Ceramic and porcelain – smooth, glossy, hard surfaces.
- Skin and lips – close-up portraits look airbrushed when burnished properly.
- Eyes – especially the iris and the wet reflection on the pupil.
- Sky and atmospheric backgrounds – burnishing removes grain that distracts from the mood.
Avoid burnishing on subjects like animal fur, knitwear, weathered wood, tree bark, raw stone, or clouds with visible texture. These surfaces need the paper tooth to stay visible to look believable.
Common Burnishing Mistakes and How to Fix Them
Every colored pencil artist hits these walls at some point. Here is how to recognize and recover from the most common ones.
Mistake 1: Burning Too Early
If you burnish before the paper tooth is filled, you will lock white paper underneath a smooth surface. The result looks blotchy and uneven.
Fix: Lift what you can with a kneaded eraser, then add more color layers, and only burnish once the surface is fully opaque.
Mistake 2: Colors Look Too Light After Burnishing
Burnishing with a white pencil or heavy pressure on a wax binder physically pushes pigment aside, which can lighten the appearance by 15 to 25 percent. Beginners panic at this stage.
Fix: Go back to your dark colors and lay in another layer or two, then burnish again. Repeat until the value is correct. Always compensate by going slightly darker than your target before the final burnish.
Mistake 3: Wax Bloom Appears Days Later
Wax bloom looks like a soft white haze creeping over your darker passages a day or two after finishing. It is the wax binder migrating to the surface as it cures.
Fix: Buff the surface very gently with a soft microfiber cloth or a clean cotton t-shirt. Never use a chemical solvent to remove it; you will dissolve the binder underneath.
Mistake 4: Muddy, Lifeless Colors
Too many layers combined with too much blending pressure can mix your colors into a brownish soup.
Fix: Start over on a fresh sheet, and limit yourself to 6 to 8 layers per area. Trust the colors to do their job.
Mistake 5: Paper Pilling or Tearing
This happens on cheap paper or with blunt pencils.
Fix: Switch to a heavier, smoother paper and keep your pencil points needle-sharp. Pilling means you are essentially erasing the paper surface.
How to Fix Wax Bloom After Burnishing
Wax bloom deserves its own section because it is the single most frustrating burnishing side effect, especially with wax-based pencils like Prismacolor Premier and Caran d’Ache Luminance.
Bloom appears because wax molecules migrate to the surface as the binder cures, especially in cool temperatures and humid storage. It does not mean your artwork is ruined; it just means the wax has done what wax does.
Three Ways to Handle Wax Bloom
- Buff it away. Wait at least 24 hours after finishing, then buff gently with a soft, lint-free cloth in small circles. This removes the surface haze without disturbing the pigment underneath.
- Use a spray fixative designed for colored pencil. Light coats slow the bloom process. Avoid heavy coats that darken or shift your colors.
- Frame the artwork behind glass with a mat spacer. A physical barrier keeps dust and humidity off the surface, which dramatically reduces bloom on display pieces.
To prevent bloom in the first place, store finished pieces in a cool, dry place and avoid sealing them in plastic. A simple archival sleeve is enough.
Solvent Alternatives for a Glossy Finish
Some artists prefer to use solvents instead of dry burnishing because solvents dissolve the binder and create an almost paint-like, ultra-glossy finish in seconds.
- Rubbing alcohol (isopropyl alcohol 70 percent or higher) – works best on wax-based pencils. Apply with a brush or cotton swab in light passes. The pigment melts into a smooth wash.
- Odorless mineral spirits (OMS) – ideal for oil-based pencils like Polychromos. Penetrates without dissolving the wax. Gives a softer sheen than alcohol.
- Turpenoid – similar to OMS, slightly stronger solvency.
- Specialty colorless blender markers – premixed and easy to control.
Solvent blending works well but it is not really burnishing. It is a separate technique called “wet blending.” If you love the glossy finish but hate the arm fatigue of dry burnishing, solvent blending is a faster alternative.
A quick safety note: always work in a ventilated space, keep solvents away from children and pets, and never mix solvents. Dispose of used swabs in a sealed metal container, not the trash.
Frequently Asked Questions
What is the difference between burnishing and blending colored pencils?
Burnishing uses heavy pressure to compress pigment and the paper tooth into a flat, glossy, enamel-like surface and is essentially permanent. Blending uses light to medium pressure or solvents to move pigment around so two colors transition smoothly into each other, and it can usually be lifted or reworked later. Burnishing is the final step; blending happens during layering.
What is the burnishing technique in colored pencils?
Burnishing is the technique of applying firm pressure with a colorless blender, a burnisher pencil, or a sharp white pencil to compress fully layered colored pencil pigment into the paper. The pressure fills the paper tooth and creates a smooth, reflective surface with no visible strokes.
What does rubbing alcohol do to colored pencils?
Rubbing alcohol dissolves the wax or oil binder in colored pencils, allowing pigment particles to flow together into a smooth, paint-like layer. It produces a quick glossy effect, especially on wax-based pencils like Prismacolor Premier, and works as a wet alternative to dry burnishing. Use it sparingly in a ventilated space.
Can you use vaseline to blend colored pencils?
Vaseline can be smeared onto colored pencil work as a homemade blending aid, and it does soften and shift pigment. However, it is not archival, it yellows over time, and it can damage your paper. Professional colorless blenders or approved solvents are safer, longer-lasting choices.
How do you burnish colored pencils step by step?
Start by layering 4 to 6 thin, light layers of color with a sharp pencil until the paper tooth is fully filled. Switch to medium pressure on the final color layers so the surface looks saturated. Then press firmly with a colorless blender or a sharp white pencil in small circles until the surface reflects light evenly. Let the artwork rest for 24 hours before handling or framing.
How do you make colored pencil art look shiny?
To make colored pencil art look shiny, build multiple layers until the surface is fully saturated, then burnish the final layer with a colorless blender or a sharp white pencil using firm pressure. Wax-based pencils produce the highest gloss. You can also use rubbing alcohol on wax pencils or odorless mineral spirits on oil-based pencils for a wet, painted gloss.
What is the best paper for burnishing colored pencils?
The best paper for burnishing colored pencils is a heavyweight, medium-tooth paper such as Stonehenge, Strathmore 400 Series, Fabriano Artistico Hot Pressed, or Clairefontaine Pastelmat. The paper needs to be at least 100 lb (270 gsm) so it does not buckle under heavy pressure, and medium tooth gives enough texture for many layers while still being polish-able.
Why does burnishing lighten my colors?
Burnishing lightens colors because heavy pressure physically pushes pigment aside and, with a white pencil, adds white pigment on top. The binder compression also reflects more light, which can make colors appear paler than they did before burnishing. To compensate, build your colors slightly darker than your target before the final burnish.
Final Thoughts on Burnishing Colored Pencils
Burnishing is one of the most powerful techniques in the colored pencil world, and once you understand the fundamentals, it transforms everything you make. The key is to think of it as a finishing move: build clean light layers first, fill the paper tooth completely, and only then commit to that glossy final polish. Start with a Prismacolor Colourless Blender or a sharp white pencil on heavyweight paper, and give yourself permission to practice on scrap before touching a finished piece.
Now that you know how to burnish colored pencils the right way, grab a 4×6 inch scrap of Stonehenge, pick one subject (a cherry or a marble works beautifully), and spend 30 minutes running through the steps in this guide. Your first burnished piece will not be perfect, and that is exactly the point. Every polished apple in every gallery started with one nervous heavy-handed stroke.