
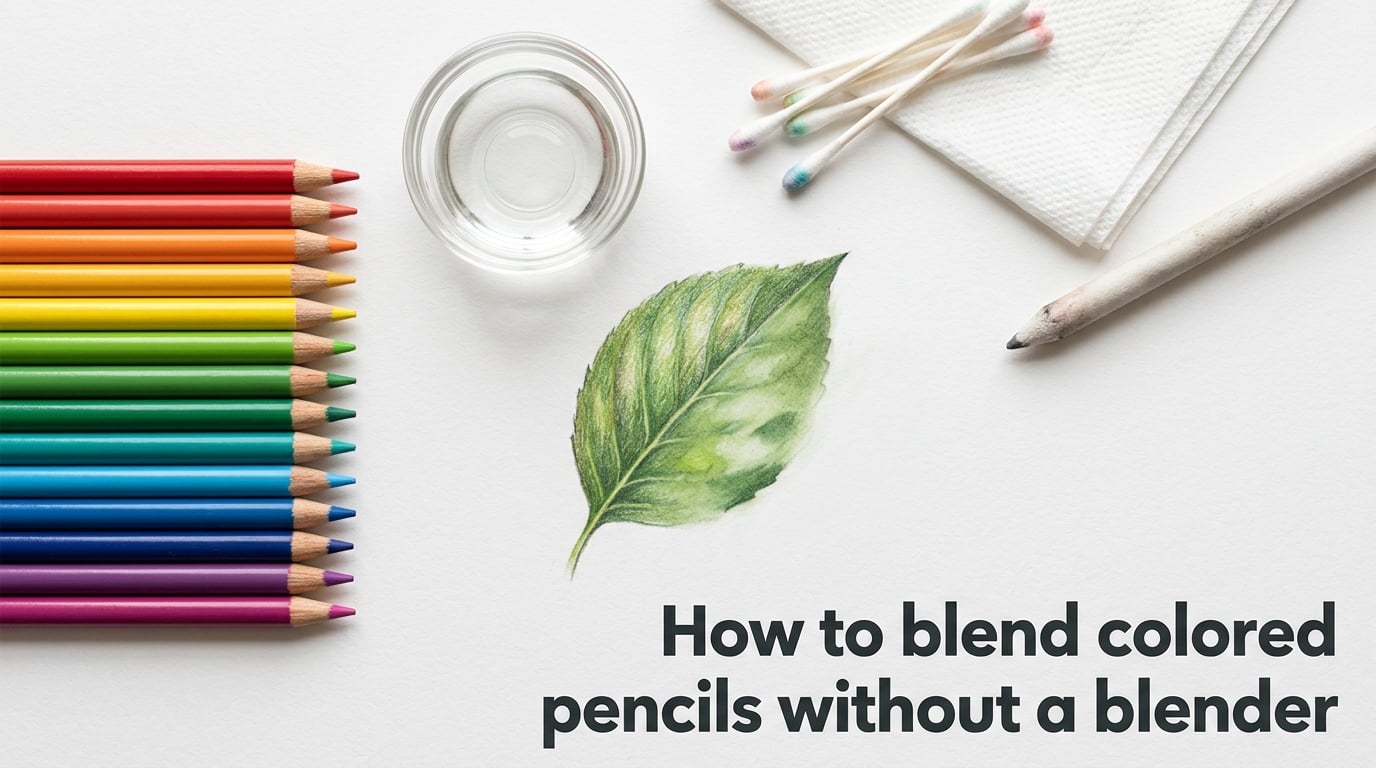
You can blend colored pencils without a blender using layering and pressure, household items like baby oil or rubbing alcohol on a cotton swab, and dry tools such as paper towels or blending stumps. Over the past few years I have tested every household trick I could find in my own studio, and the truth is that a dedicated colorless blender is convenient, but it is far from required. In this 2026 guide I will walk you through five practical methods for how to blend colored pencils without a blender, including which pencil type each one suits best.
Most readers land here because they either lost their blender pencil, never owned one, or simply want to know what is already in their kitchen or bathroom drawer. I have been there too, so I wrote this guide to give you a clear decision tree instead of a vague list. By the end you will know exactly which method to reach for based on the pencils and paper you already own.
This article covers pencil-only burnishing, dry tools, baby oil, rubbing alcohol, and Vaseline, plus a comparison table, a troubleshooting section, and answers to the most common questions I see on art forums and in r/ColoredPencils.
Table of Contents
5 Ways to Blend Colored Pencils Without a Blender
If you only have a minute, here are the five methods that actually work. Each one is covered in detail further down the page.
- Layering and burnishing with a light-colored pencil and heavy pressure. Best for beginners and wax-based pencils.
- Dry blending tools such as paper towel, tissue, a blending stump, or a Q-tip. Best for subtle gradients.
- Baby oil on a cotton swab. Best for wax-based pencils on sturdy paper. Faber-Castell officially recommends this method.
- Rubbing alcohol on a cotton ball. Best for wax-based pencils. Requires ventilation.
- Vaseline or vegetable oil in microscopic amounts. Best for finishing touches and small areas.
Method 1: Layering and Burnishing With a Pencil
Layering and burnishing is the cheapest, safest, and most beginner-friendly way to blend colored pencils without a blender. It needs no solvents, no extra tools, and zero ventilation. The whole technique relies on pressure and a light-colored pencil pressed on top of your layers.
Burnishing means pressing firmly with a light-colored pencil to push the pigment into the paper tooth and melt the wax or oil binder into a smooth film. When the binder saturates, the pigment below it fuses with the layer above, and you get that eggshell-smooth finish that looks airbrushed. It is the single most underrated technique in colored pencil work.
What Is Paper Tooth and Why It Matters
Paper tooth is the texture and roughness of your paper’s surface. Colored pencil pigment sits on top of and inside those tiny fibers. Heavy pressure smashes pigment into every crevice, while light pressure leaves pigment mostly on the peaks. When you layer colors and then burnish, you compress the peaks down and force everything to meet in the middle. That is the blending.
Step-by-Step: How to Burnish Colored Pencils
- Pick your base color and lay down an even layer using light pressure. Keep the strokes consistent so coverage is uniform.
- Add your second color on top with light pressure, overlapping where you want the blend to happen.
- Choose a light or white pencil that matches the value range of your piece. White works for bright artwork; cream or a pale tint works for warmer pieces.
- Burnish with firm, even pressure using small circular strokes. Increase pressure gradually. The heat and friction from your hand help soften the binder.
- Keep going until the strokes disappear into a smooth gradient. Stop as soon as you see the surface shift from textured to slightly waxy.
I tested this on Prismacolor Premier (wax-based) and Faber-Castell Polychromos (oil-based) on Bristol Vellum. Burnishing on Polychromos gave a slightly more painterly finish. On Premier it gave a creamier, almost pastel feel. Both looked excellent and neither required a single drop of solvent.
Best Pencils for Burnishing
Wax-based pencils like Prismacolor Premier, Derwent Coloursoft, and Caran d’Ache Luminance burnish beautifully because the wax binder softens fast under pressure. Oil-based pencils like Faber-Castell Polychromos need more pressure but produce a richer, more layered result. Whichever brand you own, the method works.
Method 2: Dry Blending Tools You Already Own
Dry blending with simple tools is the second best way to learn how to blend colored pencils without a blender. It costs nothing, smells like nothing, and gives surprisingly soft results.
Paper Towel and Tissue Paper
Paper towel is one of my favorite tools. It has two textures: a smooth side for gentle blending and a quilted side for heavier work. Fold it into a pad, press firmly, and rub in small circles over your layered colors. Tissues work the same way but are thinner and break down faster, so use them for light blending only.
Forum users on r/drawing consistently praise paper towel as a free and effective alternative. One r/drawing thread noted that bathroom tissue works “pretty effectively for blending pencils” with the smooth side giving subtle results and the textured side giving more aggressive blending.
Blending Stumps
A blending stump (also called a paper stump) is tightly rolled paper shaped like a pencil tip. It is one of the cheapest dedicated art tools and works on both wax and oil-based pencils. Rub the tip in small circles over your layered colors. The downside is that the stump stains quickly, especially with dark pigments, so dedicate one or two stumps to darker work and keep lighter ones clean for highlights.
Cotton Swabs and Q-Tips
Q-tips are technically a dry tool when used as-is. They are great for tiny areas, edges, and detail work where a paper towel would smudge too much. Rubbing too hard fluffs up the cotton, so use gentle pressure. If you dampen the Q-tip very lightly with water, you unlock a slightly stronger blend. We will cover liquid methods next.
When to Use Dry Tools
Reach for dry tools when you want subtle gradients, when you are working on thin paper that might buckle under solvent, or when you are blending in a sketchbook or coloring book where you cannot risk bleed-through. Dry tools are also the safest option for fine art paper like Stonehenge and for finished pieces you plan to sell or archive.
Method 3: How to Blend Colored Pencils With Baby Oil
Baby oil is the most popular household item for blending colored pencils. It dissolves the wax binder just enough to push pigment around like wet paint, then evaporates or absorbs into the paper. Faber-Castell officially recommends baby oil in their own tutorials, which gives this method some serious credibility.
Why Baby Oil Works
Baby oil is mineral oil with a small amount of fragrance. The mineral oil softens the wax binder in wax-based pencils and lets pigment flow across the paper surface. The effect is dramatic: a normal pencil drawing can look like it was painted with gouache after a single baby oil pass.
Materials You Will Need
- A bottle of baby oil (any brand)
- Cotton swabs or a small, soft brush
- Scratch paper for testing
- Your finished colored pencil layer (already drawn)
Step-by-Step Baby Oil Method
- Finish your colored pencil layers first. The solvent only blends what is already on the paper. It does not lay down new color.
- Dip a cotton swab into baby oil, then dab most of it off. You want the swab barely damp. Forum users warn that too much oil is the number one mistake. A microscopic amount is all you need.
- Test on scratch paper. Draw a swatch and run the swab over it before touching your real artwork. This step alone prevents most disasters.
- Blend in small circles with light pressure. Work a small area at a time so the oil does not migrate where you do not want it.
- Let the piece dry completely for at least an hour before adding more pencil or storing the page.
Wax vs Oil-Based Pencils
Baby oil works best on wax-based pencils like Prismacolor Premier and Derwent Coloursoft. On oil-based pencils like Faber-Castell Polychromos, baby oil has a much weaker effect because there is little wax to dissolve. For Polychromos, use a stronger solvent like rubbing alcohol instead, or stick to dry burnishing.
Common Mistakes to Avoid
The most common mistake is using too much baby oil. Excess oil makes paper translucent and greasy, can warp thin paper, and may bleed through to the other side of the page. If you overdo it, immediately press a clean paper towel onto the area to absorb the excess, then let it dry flat under a weight.
Method 4: Rubbing Alcohol Blending
Rubbing alcohol is the strongest household solvent for blending colored pencils. It dissolves wax binder fast and gives the most dramatic color shifts. Yes, rubbing alcohol does blend colored pencils, and it is the answer most experienced artists give when someone asks how to dissolve the wax and unify layers.
Why Alcohol Works
Isopropyl alcohol (70 percent or higher) breaks down the wax binder almost instantly. The pigment flows freely and the paper absorbs the alcohol, leaving a watercolor-like finish. A Reddit thread in r/drawing put it simply: alcohol dissolves wax, which is exactly why it is so effective on wax-based pencils.
Materials You Will Need
- 70 percent or 91 percent isopropyl rubbing alcohol
- Cotton balls, cotton swabs, or a soft brush
- A small dish for pouring
- Good ventilation
- Scratch paper for testing
Step-by-Step Alcohol Method
- Ventilate your workspace. Open a window or work near an exhaust fan. Alcohol fumes are strong and not pleasant to breathe for long.
- Pour a small amount of alcohol into a dish rather than dipping your swab into the bottle. This keeps the bottle clean.
- Lightly dampen a cotton ball and dab off the excess. Again, less is more.
- Apply in long, even strokes over your finished pencil layer. Work a small area at a time because alcohol dries fast.
- Allow to dry completely. Alcohol evaporates in minutes, but pigment continues to settle for about 30 minutes.
Safety Notes
Rubbing alcohol is flammable. Keep it away from open flames, candles, and hot lamps. Do not use alcohol near children or pets. Store the bottle capped when not in use. If you have sensitive skin or respiratory issues, wear nitrile gloves and a basic dust mask.
Archival Considerations
Alcohol does not leave residue once it evaporates, but it does not make pencil more archival than it already is. For artwork you want to keep for decades, use acid-free paper and store finished pieces in a portfolio away from direct sunlight. Forum users frequently ask whether household solvents damage artwork long-term. The honest answer is that we do not have 50-year studies on baby oil plus colored pencil, so if archival quality matters, stick to dry methods on archival paper.
Method 5: Vaseline, Vegetable Oil, and Other Household Items
Several other household products can blend colored pencils. Some are surprisingly effective, while others are best reserved for small finishing touches. Yes, you can use Vaseline to blend colored pencils, and it works because petroleum jelly has the same basic effect as baby oil on a wax binder.
Vaseline and Petroleum Jelly
Vaseline is petroleum jelly, which is a semi-solid mineral oil. Use a microscopic amount on a cotton swab and rub it across your finished pencil layer. The wax softens and the pigment spreads. Vaseline works, but only if you use a tiny amount. Reviewers consistently warn that over-application makes paper greasy and translucent, and that greasy residue is hard to fix later.
Vegetable Oil, Coconut Oil, and Olive Oil
Cooking oils work on the same principle as baby oil. They soften the wax binder and let pigment move. Coconut oil is solid at room temperature, so warm a small amount in your fingers before applying. Vegetable and olive oil both work but leave a slight yellow tint on white or pale areas. Walnut oil is mentioned by some professional artists as a more archival option because it polymerizes slightly as it dries, which can help the pigment set. None of these are likely to be in your average household, so treat them as creative experiments rather than daily drivers.
Hand Sanitizer
Hand sanitizer contains alcohol and a thickening agent. Some artists use it as a quick substitute for rubbing alcohol. The results vary widely depending on the brand and the percentage of alcohol. If you only have sanitizer and no rubbing alcohol, it will work in a pinch, but expect a slightly sticky residue.
Nail Polish Remover (Acetone)
Acetone-based nail polish remover is a strong solvent that can blend colored pencils fast. It also damages some pencil cores and can lift dye from paper. I recommend this only for experienced artists working on throwaway sketches. If you are a beginner, skip acetone and use rubbing alcohol instead.
Comparison Table: All Blending Methods Side by Side
| Method | Difficulty | Mess Factor | Best For | Cost | Effectiveness |
|---|---|---|---|---|---|
| Layering and Burnishing | Beginner | None | Wax and oil-based pencils | Free | High |
| Paper Towel / Tissue | Beginner | None | Subtle gradients, dry work | Free | Medium |
| Blending Stump | Beginner | Low | Small areas, edges | Low | High |
| Cotton Swab / Q-Tip | Beginner | None | Tiny details, edges | Free | Medium |
| Baby Oil | Intermediate | Medium | Wax-based pencils, sturdy paper | Low | Very High |
| Rubbing Alcohol | Intermediate | Medium | Wax-based pencils, smooth paper | Low | Very High |
| Vaseline | Intermediate | High | Small finishing touches | Low | High |
| Vegetable / Coconut Oil | Intermediate | Medium | Wax-based pencils | Low | Medium |
| Hand Sanitizer | Intermediate | Medium | Quick fixes | Free | Medium |
| Nail Polish Remover | Advanced | High | Throwaway sketches only | Low | High |
Which Method Is Right for You
Choosing the best method depends on three things: your pencil type, your paper, and how permanent you want the result to be. Here is a simple decision tree that picks up where the comparison table leaves off.
If you have wax-based pencils on sturdy paper like Bristol or mixed media, baby oil or rubbing alcohol gives the smoothest result. If you have oil-based pencils like Polychromos, use dry burnishing or a blending stump because oil-based binders resist household solvents. If you are working in an adult coloring book, stick to dry burnishing and paper towel because thin book paper buckles under any liquid. If you are a beginner, start with layering and a paper towel before trying solvents. If archival quality matters, never use household oils or alcohol; rely entirely on dry burnishing.
For beginners specifically, my honest recommendation is to learn burnishing first. It teaches you how much pressure to use, how pigment lays down, and how the binder behaves, all without risking a single drop of solvent. Once you are comfortable, graduate to baby oil for fast results on finished pieces.
Troubleshooting Common Blending Mistakes
Even experienced artists run into blending problems. Here is how to fix the most common ones, drawn from forum posts in r/ColoredPencils and r/learnart.
Muddy Colors
If your blend looks brown or gray instead of vibrant, you are probably pressing too hard with the wrong color combination. Complementary colors (orange and blue, red and green, purple and yellow) cancel each other out when mixed. Switch to analogous colors (neighbors on the color wheel) or work in smaller sections so the colors do not over-mix.
Too Much Oil or Solvent
Press a clean, dry paper towel onto the wet area to absorb excess. Let it dry flat under a stack of books for several hours. If the paper is buckled, mist the back lightly with water and press under weight until dry.
Paper Pilling or Damage
Some paper surfaces pill up under heavy blending. Stop immediately, switch to gentler pressure, and consider working on a more durable paper. Cheap paper does not handle blending well. Mid-weight drawing paper or Bristol Vellum holds up to every method in this guide.
Greasy Residue Left Behind
Greasy residue happens when too much oil sits on the surface. Blot with a clean paper towel, then dust the area lightly with cornstarch or talcum powder. Let it sit for 10 minutes, then brush off. The powder absorbs the excess oil without damaging pigment.
Blending Stump Stains
Stumps pick up pigment fast and start leaving dark streaks on light areas. Sand the tip with fine sandpaper to expose clean paper underneath, or keep separate stumps for dark and light work.
Tips for Success
Here are the practical habits that will save you time and frustration while you learn how to blend colored pencils without a blender.
- Always test on scratch paper first. Every solvent and every pencil behaves differently on every paper.
- Use less solvent than you think you need. You can always add more. You cannot easily remove it.
- Layer light to dark. Burnishing works best when you lay down light colors first and build toward darker shades on top.
- Keep pencils sharp. A sharp point gives you control over edges and detail work before blending.
- Work in small sections. Solvents dry fast and pigment moves easily. Small areas keep you in control.
- Invest in good paper. Cheap paper is the single biggest reason blending fails. Switch to Bristol Vellum or mixed media paper and everything improves.
- Store finished work flat. Pieces with solvent blending can shift slightly as they cure. Keep them under a weight for the first 24 hours.
Frequently Asked Questions
What’s the easiest way to blend colored pencils?
Layering and burnishing with a light-colored pencil and firm pressure is the easiest method for beginners. It needs no extra tools or solvents and works on both wax-based and oil-based pencils. Once you are comfortable, baby oil on a cotton swab gives the smoothest, fastest results.
What can I use to blend coloured pencils?
You can use paper towel, tissue, a blending stump, a Q-tip, baby oil, rubbing alcohol, Vaseline, vegetable oil, coconut oil, or a colorless blender pencil. Dry tools work for subtle blends, while household solvents like baby oil and rubbing alcohol give dramatic, painterly results on wax-based pencils.
Does rubbing alcohol blend colored pencils?
Yes. Isopropyl rubbing alcohol dissolves the wax binder in wax-based colored pencils and lets the pigment flow across the paper, producing a watercolor-like effect. Use 70 percent or higher, work in a ventilated area, and apply with a cotton ball or soft brush in small sections.
Can you use vaseline to blend colored pencils?
Yes. Vaseline is petroleum jelly, which is a semi-solid mineral oil. It softens the wax binder in colored pencils and lets pigment spread. Apply a microscopic amount on a cotton swab, then blend in small circles. Using too much Vaseline makes paper greasy and is hard to fix later.
What is the easiest way to blend colored pencils for beginners?
Start with layering and burnishing. Lay down two colors with light pressure, then press firmly with a light or white pencil using small circular strokes. This pencil-only method teaches you how pressure affects pigment and binder without any risk of paper damage from solvents.
What is the best solvent for blending colored pencils?
For wax-based pencils, rubbing alcohol (70 percent or higher isopropyl) gives the fastest, strongest blend. Baby oil is gentler and easier to control. For oil-based pencils like Faber-Castell Polychromos, household solvents are less effective, so dry burnishing or a dedicated solvent like odorless mineral spirits works better.
Final Thoughts on Blending Colored Pencils Without a Blender
Knowing how to blend colored pencils without a blender is one of the most useful skills you can develop as a colored pencil artist. The five methods in this guide cover every situation you are likely to run into, from a quick paper towel blend in a sketchbook to a finished piece blended with baby oil on Bristol paper. Start with dry burnishing to build pressure control, then experiment with baby oil and rubbing alcohol once you feel confident. Most importantly, test every method on scrap paper before you touch a finished piece. That single habit will save you more artwork than any technique I have ever shared.