
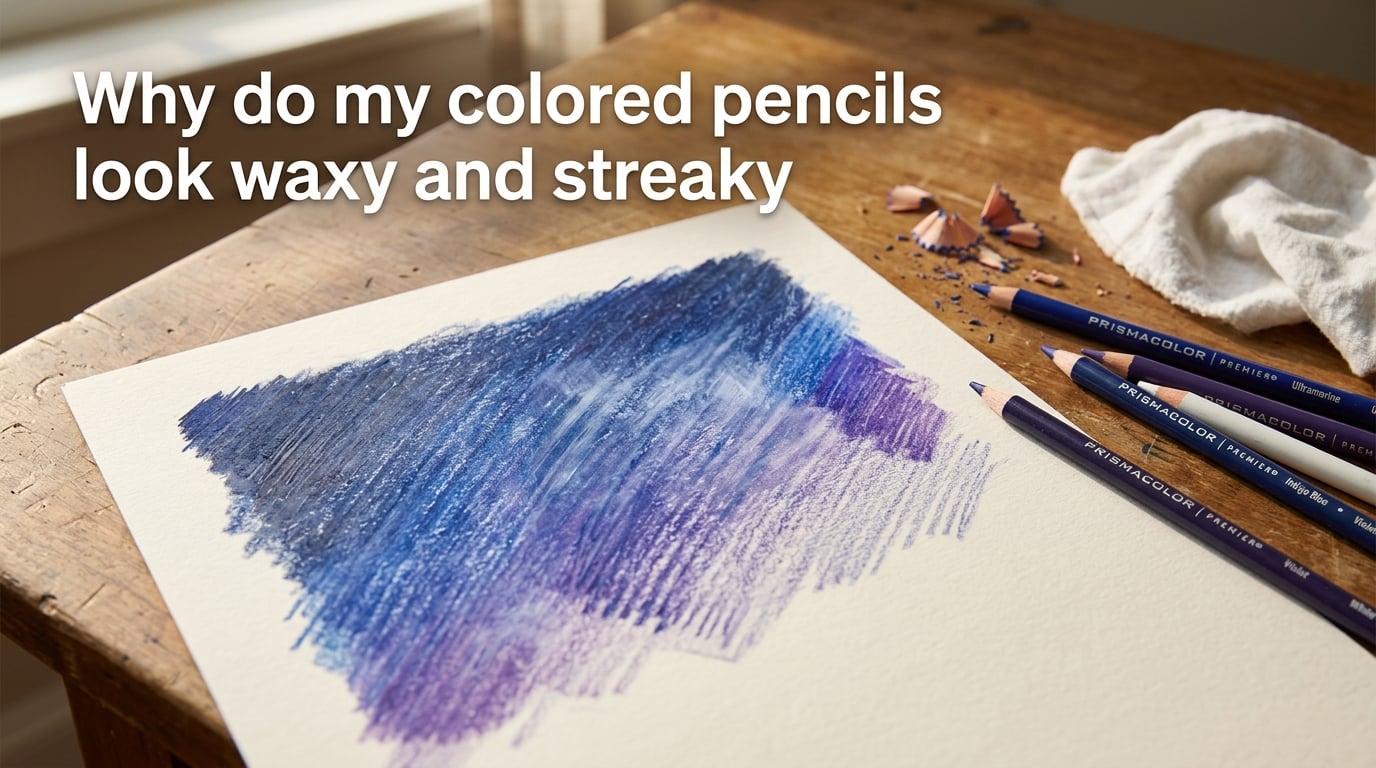
If you have ever stepped back from a finished colored pencil drawing only to find a hazy white film clouding your colors, you are not alone. I have been there, and so has almost every artist who works with wax-based pencils. The waxy and streaky look comes from two separate problems that often overlap: wax bloom (the hazy film) and streaky coverage (the visible pencil lines that never quite blend). Understanding which problem you are dealing with is the first step to fixing it.
Both issues have clear causes and even clearer fixes. In this guide, I will walk you through what is happening to your pigment, why your colored pencils look waxy and streaky, and exactly what to do about it. By the end, you will know how to layer cleanly, prevent that cloudy haze, and rescue artwork that already has it.
Table of Contents
Quick Answer: Why Colored Pencils Look Waxy and Streaky
Wax bloom is a thin, cloudy haze that rises to the surface of your drawing when excess wax binder migrates through the pigment layers. Streakiness is different: it happens when individual pencil strokes remain visible because of heavy pressure, dull tips, wrong paper, or insufficient layering. The two problems share a root cause (too much wax on the page) but need slightly different fixes.
The four most common reasons colored pencils look waxy and streaky are:
- Wax bloom forming after the drawing is “finished” — wax binder rises to the surface hours or days later.
- Heavy pressure and too few layers — you flattened the paper tooth before pigment could fill it.
- Paper with the wrong tooth or weight — slick paper cannot grab pigment, and very rough paper creates grain.
- Dull pencil tips — a blunt tip lays down wide, streaky strokes instead of fine, blendable marks.
Keep reading for the full breakdown of each cause, plus how to fix and prevent every one of them.
What Is Wax Bloom and Why Does It Happen?
Wax bloom is the most common reason colored pencils look waxy. It is that ghostly, hazy film you suddenly notice across a dark area of a finished drawing, often the day after you finished it. Beginners frequently think the drawing “went bad” or that the pencil pigment faded, but neither is true.
Most colored pencils are made of pigment held together by a wax or oil binder. When you build up multiple layers, the binder saturates the paper. As the artwork dries and settles, that excess wax slowly migrates upward through the pigment layers and crystallizes on the surface as a thin, cloudy film. That film is wax bloom.
Wax bloom is more visible on dark colors because the white haze shows up against deep blues, blacks, purples, and reds. It also appears more often with softer, wax-rich pencils. Prismacolor Premier, for example, is famous for wax bloom because the core is very soft and wax-heavy. Harder pencils, like Faber-Castell Polychromos, are oil-based and rarely bloom.
The good news: wax bloom is cosmetic, not structural. Your pigment is fine underneath. A gentle wipe brings the color right back.
Why Colored Pencils Look Streaky: 4 Main Causes
Streakiness is the visible texture of individual pencil strokes that never quite merged into a smooth tone. It feels different from wax bloom because the streaks are part of the drawing itself, not on top of it. If you see distinct pencil lines even after blending, you are dealing with streaky coverage, not bloom.
1. Heavy Pressure and Too Few Layers
The single biggest cause of streaky colored pencils is pressing too hard. Heavy pressure flattens the paper’s tooth (the tiny ridges that hold pigment) before the pigment has a chance to fill in evenly. Once the tooth is crushed, every additional stroke lays color on top of an already-glazed surface, and the strokes never blend.
Light pressure and many thin layers will always beat heavy pressure and a few thick ones. That is the cardinal rule of colored pencil technique.
2. Paper Tooth and Paper Choice
Paper tooth refers to the texture of the paper’s surface. Smooth paper (like Bristol vellum or hot-press watercolor paper) has very little tooth and tends to let pigment skate across the top, creating slick, streaky coverage. Very rough paper (like cold-press watercolor paper or cheap sketching paper) has so much tooth that pigment lands only on the high points, leaving white gaps and a grainy look.
The sweet spot is a medium-tooth, heavyweight paper designed for colored pencils. Stonehenge, Canson Mi-Tientes, Fabriano Artistico Hot Press, and Bristol Board all work well. The paper should feel slightly grabby when you test a stroke on it.
3. Dull Pencil Tips
A blunt tip lays down wide, blunt strokes that are hard to blend into the surrounding area. Sharpen your pencil frequently, and use a high-quality sharpener that does not break the soft core. I keep a separate electric sharpener just for my colored pencils because hand-sharpening Prismacolor soft cores is brutal.
4. Stroke Direction and Layering Order
Strokes that all run in the same direction show their tracks. Layering in different directions (light circular strokes, then crosshatching at 90 degrees, then a final burnishing pass) hides individual strokes. Always build from light to dark: establish your lightest values first, then deepen with mid-tones, then finish with the darkest layer.
Wax-Based vs Oil-Based Colored Pencils: What’s the Difference?
Understanding your pencil’s binder is the key to predicting its behavior. The two main categories are wax-based and oil-based, and they behave very differently.
| Feature | Wax-Based Pencils | Oil-Based Pencils |
|---|---|---|
| Binder | Soft wax | Drying oil (typically linseed or vegetable oil) |
| Feel on paper | Creamy, soft, buttery | Crisp, hard, slightly waxy but firm |
| Layering capacity | Moderate (limited by wax buildup) | High (oil binder does not saturate paper) |
| Wax bloom risk | High, especially with dark colors | Very low |
| Burnishing ability | Excellent (produces glossy finish) | Moderate |
| Best for | Color mixing, blending, vibrant coverage | Detailed work, fine lines, layering realism |
| Examples | Prismacolor Premier, Crayola, CastleArts | Faber-Castell Polychromos, Lyra Rembrandt Polycolor |
If you find yourself fighting wax bloom constantly, switching to an oil-based pencil like Polychromos removes the problem almost entirely. The trade-off is that oil-based pencils feel harder and do not blend quite as creamily as wax-based ones. Many artists keep both types on hand: oil-based for detail and realism, wax-based for bold color and quick coverage.
Prismacolor Premier pencils are wax-based. That is why they have such a loyal following (the pigment lays down like butter) and why they bloom so easily.
How to Fix Wax Bloom on Your Artwork
Fixing wax bloom is fast and low-risk. Here is the method that works on 95% of finished pieces.
The Gentle Wipe Method
- Let the drawing sit undisturbed for at least 24 hours so the wax fully migrates.
- Use a soft, lint-free cloth (an old t-shirt works) or a clean cotton swab.
- Wipe the bloomed area in one direction with very light pressure. Do not rub back and forth.
- Inspect the area. The haze should lift immediately, restoring the original color depth.
- If wax bloom returns a few days later, repeat the wipe. It usually stops happening after the second or third cycle as the wax fully settles.
For stubborn haze, a slightly damp cotton swab (just water, wrung out thoroughly) can lift more wax than a dry cloth. Avoid soaking the paper. For very dark areas where bloom is severe, a hair dryer on the lowest heat setting held a foot away can soften the wax enough for it to be wiped away cleanly.
Never use solvents like rubbing alcohol to “fix” wax bloom on a finished drawing unless you are prepared for the pigment to move. Solvents are useful during the drawing process (see below) but risky on completed work.
How to Prevent Waxy and Streaky Results Going Forward
Prevention is easier than fixing. Here are the technique changes that make the biggest difference.
Use Light Pressure and Many Layers
Always start with the lightest pressure you can control. Build coverage gradually. A good rule of thumb: if your fingertip shows white marks after resting on the page, you are pressing too hard.
Choose the Right Paper
Use a paper specifically made for colored pencils. The two most recommended by professional artists are Stonehenge (warm white, soft tooth, ideal for portraits) and Canson Mi-Tientes (textured surface, holds many layers, great for backgrounds and bold color). Bristol board is a solid budget choice.
Layer Light to Dark
Establish your lightest tones first, then build mid-tones, then deepen with darks. This order prevents you from accidentally overshooting a value and trying to fix it later with more layers (which causes wax buildup).
Keep Pencils Sharp
A sharp tip lays down controllable pigment and creates the fine crosshatch lines that blend invisibly. Resharpen after every 10 to 15 minutes of drawing time.
Apply Fixative at the End
A light coat of fixative spray (Krylon Workable Fixatif is the most commonly recommended) seals the wax in place and dramatically reduces future bloom. Hold the can 12 inches away, spray in short bursts, and let it dry between coats. Two light coats beat one heavy coat.
Give the Drawing Time to Settle
Wax migrates over hours, not minutes. If you finish a piece and immediately apply fixative, you trap the wax under the surface where it can still cause subtle haze later. Wait at least 24 hours before spraying fixative.
Troubleshooting Checklist: Diagnose Your Problem
Run through this quick checklist whenever your colored pencil work looks off.
- Cloudy white haze across dark areas? That’s wax bloom. Wipe gently with a soft cloth. It is cosmetic and reversible.
- Visible pencil strokes that won’t blend? You pressed too hard, the paper tooth is gone, or your tip was dull. Start that section over on fresh paper with light pressure and a sharp pencil.
- White specks or grainy texture showing through color? Your paper is too rough, or you didn’t apply enough layers. Switch to a smoother paper or add 2-3 more light layers.
- Pigment sliding around without sticking? Your paper is too smooth (often Bristol vellum) or you have already sealed the surface with too many layers. Switch paper or use a colorless blender pencil to push pigment into the tooth.
- Colors turning muddy when layered? Too many pigments or too much pressure. Use 2-3 colors per area max, and build with light pressure.
- Bloom keeps returning days after wiping? The drawing hasn’t fully dried yet. Wait a full week before final fixative.
If you have two or more symptoms at once, the most common culprit is over-pressed paper combined with bloom. Start a fresh piece and focus on light pressure from the very first stroke.
Practice Exercises for Smoother Coverage
These drills take 15 minutes each and quickly train your hand for the light, layered approach that prevents streaks.
Exercise 1: Gradient Strip
Draw a 2-inch square and fill it with horizontal strokes, going from very light on the left to fully saturated on the right. Use the same single color and build the gradient with 8-10 thin layers instead of pressing harder. Notice how the transition stays smooth even at the dark end.
Exercise 2: Fill Box Challenge
Draw a 2-inch square and fill it using circular, overlapping strokes. Do not allow yourself to press harder than a number-2 pencil pressure. Count your layers: most beginners need 6-10 layers to fill a square smoothly with light pressure.
Exercise 3: Layer Test
Draw three small squares. In the first, layer three colors in straight lines. In the second, crosshatch at 90 degrees. In the third, use circular strokes. Compare which method hides individual strokes best. For most subjects, the circular-stroke approach wins on smoothness.
Exercise 4: Paper Comparison
Swatch the same color on three different papers (cheap sketch paper, Bristol, and Stonehenge or Mi-Tientes). Notice how paper choice alone changes your pigment’s behavior. Most artists immediately see why paper matters after this test.
Doing these exercises once a week for a month will dramatically reduce streaks in your finished work. The muscle memory you build transfers directly to portraits, colorings, and full illustrations.
Frequently Asked Questions
Which is better, wax or oil based colored pencils?
Neither is universally better. Wax-based pencils like Prismacolor Premier feel creamier, blend faster, and produce vibrant color, but they are prone to wax bloom and have limited layering capacity. Oil-based pencils like Faber-Castell Polychromos feel firmer, layer indefinitely without buildup, and rarely bloom, but require more pressure for full coverage. Many professional artists keep both: oil-based for detail work and realism, wax-based for bold color and quick blending.
Do Prismacolor colored pencils go bad?
Prismacolor Premier pencils do not technically expire, but they can dry out slightly over many years if stored in poor conditions. Their soft, wax-rich cores are sensitive to heat and humidity, which can cause the wax to sweat or the pigment to become brittle. Stored properly in a cool, dry place, they stay usable for decades. Their main weakness is not going bad, it is wax bloom on the finished artwork.
Does soaking colored pencils make them better?
No, soaking colored pencils does not make them better and can actually damage them. Submerging the wood-cased pencils swells the wood and can crack it. Short, very brief exposure to warm air can soften a hard pencil temporarily, but the effect wears off within minutes. The right fix for a pencil that feels too hard is to use proper paper and lighter pressure, not to soak the pencil.
Are colored pencils waxy?
Most colored pencils are waxy to some degree, because wax is the binder that holds the pigment together in the core. The amount varies by brand. Soft, creamy pencils like Prismacolor Premier and Crayola contain a lot of wax. Firmer pencils like Faber-Castell Polychromos are oil-based with very little wax. The wax is what makes pencil coverage feel smooth, but it is also what causes wax bloom on finished drawings.
Are Prismacolor pencils wax or oil?
Prismacolor Premier pencils are wax-based. Their soft, creamy core uses a wax binder that produces rich color but is also responsible for the wax bloom that many users notice on their finished artwork. Prismacolor does make an oil-based line called Prismacolor Verithin, which has a harder, sharper core and does not bloom.
What is the best paper to avoid colored pencil streaks?
A medium-tooth, heavyweight (90 lb or heavier) paper designed for colored pencils gives the smoothest results. Stonehenge, Canson Mi-Tientes, and Fabriano Artistico are the most recommended by professional artists. Bristol board vellum finish is a solid budget choice. Avoid very slick papers (printer paper, tracing paper) and very rough papers (cheap sketch paper, cold-press watercolor paper).
Conclusion
If your colored pencils look waxy and streaky, you are almost certainly dealing with one (or both) of two issues: wax bloom rising to the surface of your finished drawing, or streaky coverage caused by heavy pressure, wrong paper, or dull tips. Both are completely normal, completely fixable, and completely preventable once you understand the cause.
Start with light pressure and good paper, layer from light to dark, sharpen often, and let your drawings rest before fixative. When wax bloom shows up, a soft cloth will wipe it away in seconds. With these habits in place, your colored pencils will produce the smooth, vibrant coverage you have been chasing.