
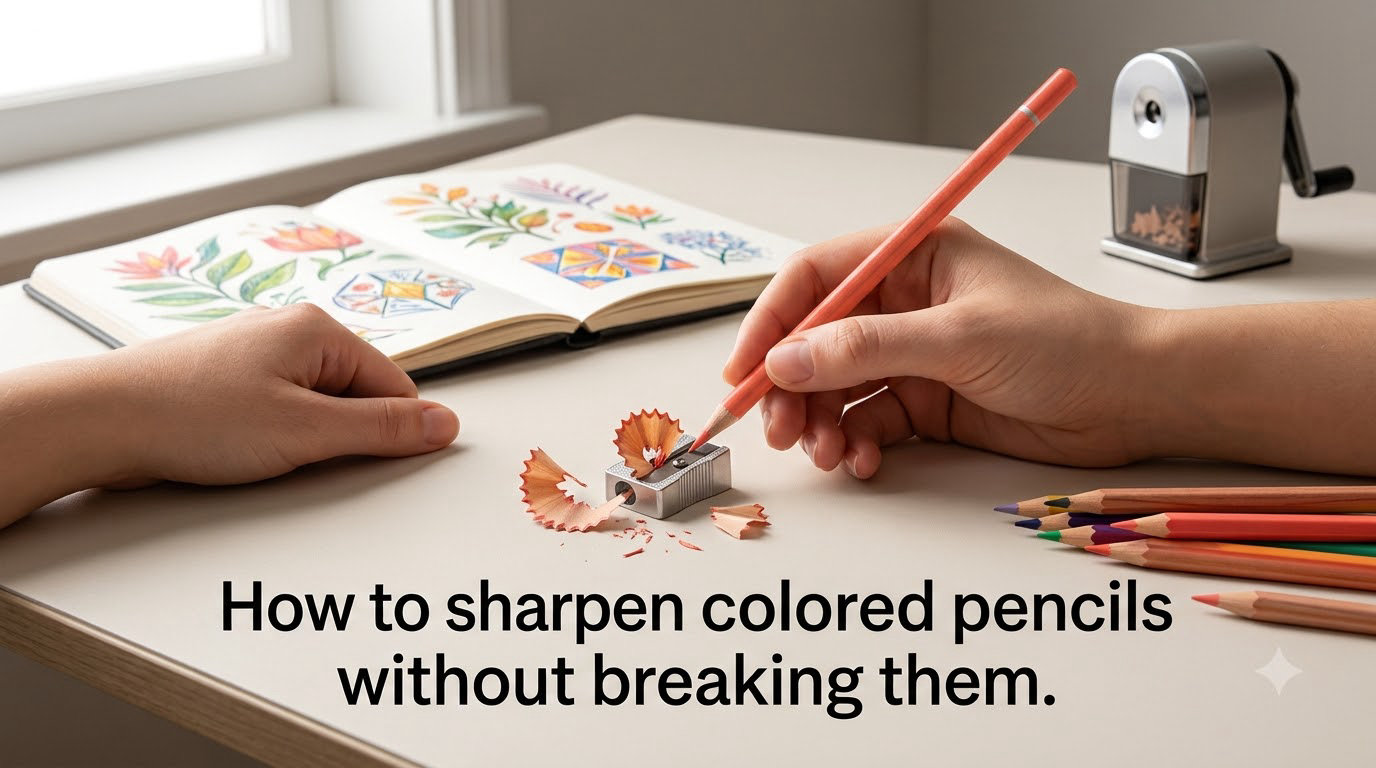
I have lost count of how many Prismacolor pencils I have snapped in a cheap sharpener before learning this stuff the hard way. If you have ever pulled a pencil out of the sharpener only to watch the tip crumble the moment it touches the paper, this guide is for you. Sharpening colored pencils without breaking them is less about luck and more about matching the right tool to the right core.
In the next few minutes, I will walk you through exactly why colored pencils break, the seven methods that actually work, how to match a sharpener to your pencil, and what to do when a lead snaps inside the wood. I have tested these techniques with Prismacolor Premier, Faber-Castell Polychromos, Derwent Lightfast, and Caran d’Ache Luminance, so the advice applies whether you are an adult colorist or a working artist. Let us save your next pencil.
Table of Contents
Why Colored Pencils Break When You Sharpen Them (Wax vs Oil Core)
Colored pencils break during sharpening because their cores are softer and more brittle than graphite. The pigment inside a colored pencil is bound with either wax or oil, and that binder determines how the pencil behaves under a blade.
Wax-based pencils like Prismacolor Premier, Crayola, and most student-grade lines have a soft, creamy core that lays down color beautifully but snaps easily. The wax melts at low temperatures, which means the core shifts and can detach from the wood casing. Once that gap forms, any pressure on the tip causes it to snap. This is the #1 reason people keep asking why their colored pencils keep breaking.
Oil-based pencils like Faber-Castell Polychromos, Caran d’Ache Pablo, and Derwent Studio are denser and more resilient. Their oil binder holds pigment together tightly, so the core resists snapping even under sharp blades. They still break if you press too hard or use a dull blade, but breakage happens far less often.
A third category, wax-oil hybrids like Derwent Lightfast and Caran d’Ache Luminance, sit between the two. They blend smoothly like wax but hold together like oil.
Reddit users in r/ColoredPencils describe this exact frustration. One poster noted that “they are made of wax and they break inside,” while another observed that “sometimes sharpening soft cored pencils too sharp can break its tips easily.” The takeaway: a soft core plus too much pressure equals a snapped tip. Knowing your pencil’s binder tells you how aggressively you can sharpen.
Wood casing quality also matters. Cheap pencils have uneven casings that grip the core unevenly, creating stress points. Higher-end brands use centered cores and consistent casings, which reduce internal fractures.
Core diameter plays a role too. Thicker cores (3.8 mm and up, like in Prismacolor Premier) carry more pigment per stroke but have a higher snap risk because there is more mass hanging off a narrow attachment point. Thinner cores (3.0 mm in many oil-based pencils) hold up better under pressure simply because there is less mass to snap.
Humidity is the silent factor most people miss. A wax-based pencil stored in a dry environment for months can lose flexibility in the binder. The wax becomes more crystalline and less elastic, which is why older pencils seem to break more often than fresh ones. A day or two in a humid studio can bring some of that flexibility back.
The 7 Best Methods to Sharpen Colored Pencils Without Breaking Them
These are the seven techniques I rely on, ordered from the everyday method to the artist’s secret. Each one works better for a specific pencil type, and I tell you which.
Method 1: Handheld Pencil Sharpener (Rotate the Sharpener, Not the Pencil)
A handheld sharpener is the most common method, and the right technique prevents most breakage. The trick I learned from coloring artist Thaneeya McArdle is to rotate the sharpener while keeping the pencil still.
Grip the pencil firmly in your non-dominant hand with the tip pointing down. Insert it into the sharpener hole and turn the sharpener body clockwise with light pressure. Let the blade do the work. If you crank hard or twist the pencil back and forth, you create torque that snaps the core. Gentle, steady rotation works best.
This method works for both wax and oil-based pencils, but is best for oil-based and harder wax-oil hybrids. Student-grade wax pencils can still snap, especially if your sharpener blade is dull.
For best results with this method, sharpen in short bursts rather than continuous cranking. Three or four rotations, then check the tip. This lets you feel when the blade meets the core and stop before exposing too much fragile lead. A clean short rotation also produces a tapered point instead of a stubby blunt one.
Method 2: Electric Pencil Sharpener (Use Auto-Stop and Helical Blades)
An electric sharpener with an auto-stop feature prevents you from over-sharpening and exposing too much fragile core. The best electric sharpeners for colored pencils use helical blades rather than straight blades.
Helical blades cut at an angle around the pencil rather than slicing straight across. They remove wood gradually and put less sudden pressure on the core. Brands like Bostitch, X-Acto, and Eggleland make electric sharpeners specifically marketed for artists that use helical steel blades.
Insert the pencil, let the sharpener run until it stops automatically, and pull the pencil straight out without twisting. Twisting while the blade is still spinning snaps the tip. If the auto-stop fails or your sharpener does not have one, count to three and pull.
This method works best for oil-based and harder pencils. Avoid cheap electric sharpeners for soft Prismacolor — Reddit users consistently complain that electric sharpeners “eat through” wax-based pencils.
Clean the blade chamber every week if you sharpen daily. Wax shavings gum up the helical blade and turn an effective sharpener into a pencil-crushing machine faster than any other factor. A 30-second brush-out makes a measurable difference.
Method 3: Sharp Hobby Knife or X-Acto Knife
Knife sharpening is the artist’s gold standard for preserving pigment and avoiding breakage. A sharp hobby knife lets you control exactly how much wood and core you remove.
Hold the pencil in your non-dominant hand at a slight downward angle. With the knife in your dominant hand, place the blade about an inch from the tip and draw it toward you, shaving a thin sliver of wood. Rotate the pencil a quarter turn and repeat. Work your way down to the core gradually, then shape the exposed core into a point with the tip of the blade.
The advantage: you control the angle of the point, so you can create a sturdy chisel tip or a fine needle tip depending on your work. The disadvantage: it takes practice, and a dull knife causes more breakage than a sharp one. Replace the blade often — a fresh #11 X-Acto blade makes this method almost effortless.
This method works for all pencil types and is the most economical since it wastes almost no pigment. Carrie Lewis, a colored pencil artist, considers knife sharpening the “absolute best way” to sharpen pencils with minimum waste.
Save your pigment shavings when you knife-sharpen. The colored dust left behind on your cutting mat is pure pigment. A few drops of solvent (rubbing alcohol or odorless mineral spirits) turns those shavings into a custom paint or burnishing medium, which is one of Carrie Lewis’s favorite economical tricks.
Method 4: Sandpaper Block or Sanding Pad
A sandpaper block (a small block of foam wrapped in fine-grit sandpaper) is perfect for refining an already-sharpened tip or for shaping delicate leads without pressure.
Lay the sandpaper block flat on your table. Hold the pencil at a 30-degree angle and draw it across the sandpaper in long, smooth strokes, rotating the pencil as you go. The sandpaper removes wood and core together without squeezing the lead.
Use 400-grit or finer sandpaper. Coarser grits tear the wood and create splinters that weaken the casing.
This method works especially well for finishing a knife-sharpened pencil and for very soft wax-based pencils that cannot handle the pressure of any sharpener. It is also the safest method for young artists or anyone nervous about blades.
A sanding pad also doubles as a great way to refresh a dull tip without losing pencil length. If your tip has gone blunt but you have plenty of pencil left, a few strokes on the sandpaper block restore the point in seconds.
Method 5: Cosmetic Sharpener (Large Opening)
A cosmetic sharpener has a wider opening designed for eye and lip pencils, which are much thicker and softer than standard pencils. The wider opening gives the core more room and reduces stress.
Use the same gentle, steady rotation as a regular handheld sharpener. The larger blade angle removes wood in a longer taper, which exposes less fragile core at once.
This method works best for very thick or oversized colored pencils, like Derwent Graphitint or Caran d’Ache Museum Aquarelle. For standard pencils it works fine but does not sharpen them quite as finely.
One side benefit of cosmetic sharpeners: they rarely clog with wax because the larger exit hole lets shavings fall away freely. For artists who sharpen dozens of pencils in a session, this saves time and keeps the blade cutting cleanly.
Method 6: Hand-Crank Helical Sharpener
A hand-crank helical sharpener combines the precision of a helical blade with manual control. You turn a handle, the blade rotates around the pencil, and the wood peels away in continuous curls.
These sharpeners (like the Maped Helix or KUM Automatic) cost more than a basic handheld, but artists swear by them. The continuous helical blade never creates a flat stress point, so the core rarely snaps.
This method works for all pencil types and is the closest you can get to a knife-shaved finish without using a blade. Reddit users in r/ColoredPencils frequently recommend M&R helical sharpeners for serious colored pencil work.
The biggest advantage of helical sharpeners is consistency. Every pencil comes out with the same point length and angle, which matters when you are working on a portrait or a detailed illustration where uniform marks depend on uniform tips.
Method 7: The Sun Trick (Warming Wax Pencils Before Sharpening)
If you have a wax-based pencil that keeps snapping no matter what sharpener you use, the pencil itself might be the problem. Cold wax cores are brittle. Warming them slightly before sharpening softens the binder and lets the core flex instead of snap.
Set the pencil on a sunny windowsill for 10-15 minutes, or hold it under a hair dryer on low for 30 seconds. The wax becomes just pliable enough to survive sharpening. Do not overheat it — you do not want a melted mess.
Mont Marte and several Reddit threads recommend this trick for stubborn Prismacolor pencils that keep breaking. It also works to re-fuse a snapped lead inside the wood: warm the pencil and the broken pieces melt back together.
This method is not necessary for oil-based pencils, which are stable at room temperature.
Warming is also a good first aid step when you suspect a fresh pencil may have shifted internally during shipping. A pencil that has been bouncing around in a delivery truck for a week often has small internal fractures that are not visible from the outside. A minute under the hair dryer re-fuses those before you even take it out of the box.
Choosing the Best Sharpener Type for Your Pencil
Not every sharpener works for every pencil. The table below matches sharpener types to pencil types based on what I have tested and what the artist community recommends.
| Sharpener Type | Best For | Avoid For | Breakage Risk |
|---|---|---|---|
| Handheld (rotated, sharp blade) | Oil-based, hybrids | Soft wax at high pressure | Low |
| Electric auto-stop with helical blade | Oil-based, hybrids, classroom use | Soft wax (Prismacolor) | Medium |
| Hobby knife or X-Acto | All pencil types | Beginners without practice | Very low (when sharp) |
| Sandpaper block | Soft wax, finishing touches | Quick bulk sharpening | Very low |
| Cosmetic sharpener | Oversized pencils, chunky leads | Standard pencils needing a fine point | Low |
| Hand-crank helical | All pencil types, daily studio use | Travel (bulky) | Very low |
| Wax pencils warmed first | Brittle Prismacolor, Crayola | Oil-based (unnecessary) | Low (with warmth) |
The single biggest factor is blade sharpness. A dull handheld sharpener causes more breakage than any other variable. If your sharpener requires heavy pressure or produces powder instead of clean curls, replace the blade or the sharpener.
Brand-Specific Sharpening Advice
Different brands have different core characteristics, so the best sharpener for one is not always the best for another. Matching your tool to the brand makes a real difference.
Prismacolor Premier: Wax-based, soft core, very pigment-rich but very fragile. The community consensus from Reddit r/ColoredPencils is that the official Prismacolor branded sharpener works well, but a sharp hobby knife or M&R hand-crank is even better. Many users warm the pencil slightly before sharpening. Avoid cheap electric sharpeners — they chew through these. Prismacolor also makes a “Premier” sharpener with a longer blade angle that exposes less core at a time, and that one is widely loved for the very soft pencils in this line.
Faber-Castell Polychromos: Oil-based, hard core, more forgiving. A good handheld sharpener with a fresh blade works fine. The cores do not snap easily, so beginners should start with Polychromos to build confidence. Faber-Castell’s own double-hole sharpener is a solid match for these pencils, and the dust catcher holds up to studio use.
Derwent Lightfast: Wax-oil hybrid, smooth but stable. Use the same techniques as Polychromos. A cosmetic sharpener or hand-crank helical gives the cleanest results. Lightfast pencils are designed to resist UV fading, which makes the binder tougher than a typical wax pencil, so they take a regular sharpener well.
Caran d’Ache Luminance and Pablo: Wax-oil hybrid and oil-based respectively. Both sharpen well with a fresh handheld blade or a hobby knife. Their casings are cleanly centered, so the core is rarely off-axis. Caran d’Ache’s Swiss-made sharpeners are designed to pair with these pencils and produce very clean points.
Crayola and student-grade: Cheap wax-based pencils. These will always snap more than professional pencils. Use a sandpaper block and gentle pressure, or accept that you will go through a lot of tips. For kids’ projects, the sandpaper block is also the safest option since it has no exposed blade.
Brutfuner and other hard-to-sharpen brands: Reddit users specifically mention Brutfuner pencils as difficult. The cores are often thick and slightly misaligned with the casing. A hand-crank helical or hobby knife gives the most control. When a brand’s casings are inconsistent, you cannot rely on a handheld sharpener to grip the pencil evenly, so any tool that lets you see and correct the angle is a better choice.
Derwent Graphitint, Inktense, and watercolor pencils: These have unusual cores that include binders other than straight wax or oil. They often sharpen fine with a handheld sharpener, but the cores can react to humidity and become gummy. Sharpen in a dry room and clean the blade right after.
How to Keep Your Sharpener Blade Sharp
A sharp blade is the single most important factor in preventing breakage. A dull blade crushes the wood instead of cutting it, which squeezes the core until it snaps.
For handheld sharpeners, replace the unit when the blade stops producing clean curls. Test by sharpening a graphite pencil — if the shavings are powdery or jagged instead of smooth ribbons, the blade is dull. Most handheld sharpeners last 6-12 months with daily use.
For hobby knives, swap the blade every few sharpenings. A #11 X-Acto blade costs pennies and makes a massive difference. A sharp blade glides through wood; a dull one requires force, which is exactly what causes breakage.
For electric sharpeners, follow the manufacturer’s cleaning instructions. Wax and pigment shavings build up inside the blade housing and dull the blade faster than graphite dust does. Use a small brush to clean out the shavings after every few uses.
Reddit users in r/ColoredPencils warn that trying to extend the life of a dull sharpener is the fastest way to ruin expensive pencils. One user summed it up: “Try a different sharpener if your current one causes constant breakage.”
For hand-crank helical sharpeners, the blades are usually replaceable. Order spares from the manufacturer and swap when sharpening gets harder.
5 Common Mistakes That Cause Colored Pencils to Break
After sharpening thousands of pencils, I have made every mistake in the book. Here are the five most common, and what to do instead.
Mistake 1: Pressing too hard. The blade should do the work. If you are bearing down on the sharpener, you are squeezing the core inside the wood until it snaps. Lighten your grip and let the blade turn smoothly. A good test: if your hand cramps after sharpening five pencils, you are pressing too hard.
Mistake 2: Using a dull sharpener. A dull blade crushes instead of cuts, and crush means snap. Replace handheld sharpeners when the blade dulls, swap hobby knife blades often, and clean electric sharpeners regularly. If you have ever sharpened a pencil and ended up with fine dust instead of curly shavings, the blade is dull and needs attention.
Mistake 3: Sharpening to a needle point. A super-fine tip is more fragile than a slightly blunter one. Stop sharpening when you have a 2-3 mm exposed core. Sharper than that, and the tip snaps the moment it touches paper. A short blunt point also lays down more pigment per stroke, which is a bonus for coverage work.
Mistake 4: Twisting the pencil while sharpening. Twisting creates lateral stress on the core. Either rotate the pencil smoothly in one direction or rotate the sharpener around a still pencil. No back-and-forth twisting. If you watch a colored pencil artist at work, you will see almost no wrist rotation during sharpening — just steady, controlled turns.
Mistake 5: Ignoring pencil temperature. Cold wax pencils snap. If you store your Prismacolors in a cold room or garage, let them warm to room temperature before sharpening. A few minutes in your hands is often enough, and the warmth from your fingers also helps the wax regain some flexibility.
One bonus mistake worth mentioning: sharpening pencils right before you need them. If you sharpen ten pencils in advance and leave them point-down in a cup, the tips can snap under their own weight or from a stray elbow. Sharpen as you work, not in big piles.
How to Fix a Broken Lead Inside a Colored Pencil
Even with perfect technique, sometimes the lead snaps inside the wood casing. The good news is you can usually fix it without throwing the pencil away.
The hair dryer method is the most reliable. Set your hair dryer to low heat, hold the pencil about 6 inches from the nozzle, and rotate the pencil for 30-45 seconds. The wax inside softens and the broken pieces melt back together. Let the pencil cool for a minute, then sharpen normally. Reddit users confirm this works on Prismacolor and similar wax-based pencils.
The sun method is slower but safer. Place the broken pencils on a sunny windowsill for 15-20 minutes. The gentle warmth re-fuses the wax without overheating the wood.
For oil-based pencils, a hair dryer on low also works, but the fix is less reliable because oil does not re-bond as cleanly as wax. If the lead keeps breaking in the same spot, you may need to sacrifice a bit of length by sharpening past the break.
One Reddit user shared a clever variant: “Try using a hair dryer on them to melt them back together.” This is now standard advice in the colored pencil community.
Storage and Handling Tips to Prevent Breakage
How you store and handle your colored pencils affects breakage just as much as how you sharpen them. A little care goes a long way with expensive pencils.
Store pencils point-up. Mont Marte and several Reddit threads recommend storing pencils point-up so any internal fractures fall away from the tip. Storing pencils horizontally or point-down puts pressure on the core. Standing cups, vertical desk organizers, and rolled canvas wraps all work well.
Avoid temperature extremes. Wax pencils melt in hot cars and snap in cold garages. Store your colored pencils at room temperature, ideally in a case or drawer that stays cool and dry. A climate-controlled room is the gold standard, but anything between 60 and 75 degrees Fahrenheit works.
Keep multiple pencils pre-sharpened. The more often you sharpen a stub, the more chance the core has to break. Keep 3-5 of each color sharpened and ready so you are not constantly re-sharpening the same pencil. For colors you use often, rotate between several sharpened pencils to give each one a break.
Transport pencils in a case. A hard pencil case or wrap protects tips from snapping against other pencils during transport. Soft pouches let pencils knock together, which can fracture the cores. If you travel with your colored pencils, invest in a divided zip case where each pencil sits in its own slot.
Drop resistance is mostly a myth. A Reddit user pointed out that “colored pencils don’t actually break inside when you drop them — that’s a graphite pencil problem.” Dropped colored pencils usually survive. The breakage happens during sharpening, not from falls. This is one of the most useful bits of myth-busting on the colored pencil forums.
Use a separate sharpener for colored pencils. Graphite dust contaminates the blade and dulls it faster. Dedicate a sharpener to colored pencils only and it will last longer and stay sharper. Label it with a piece of tape if you share a studio with graphite pencil users.
Replace your pencils before they become stubs. Once a colored pencil is shorter than about two inches, the wood-to-core ratio changes and the core becomes more likely to snap during sharpening. Retire short pencils to color-mixing duty rather than fine detail work, where the snap risk is highest.
Frequently Asked Questions
What is the best way to sharpen colored pencils without breaking them?
The best way to sharpen colored pencils without breaking them is to use a sharp blade, apply light pressure, and rotate the sharpener rather than twisting the pencil. For wax-based pencils like Prismacolor, a sharp hobby knife or hand-crank helical sharpener gives the most control. For oil-based pencils like Faber-Castell Polychromos, a fresh handheld sharpener works well. Always stop sharpening after exposing 2-3 mm of core — sharper points snap more easily.
How can I prevent colored pencils from breaking when sharpening them?
You can prevent breakage by keeping your sharpener blade fresh, applying gentle pressure, and matching the sharpener to your pencil type. Rotate the sharpener instead of the pencil, avoid twisting motions, and store wax-based pencils at room temperature. If a pencil keeps breaking, try the sun or hair dryer trick to soften the wax core before sharpening.
What kind of sharpener is best for colored pencils?
The best sharpener for colored pencils depends on the core. For soft wax-based pencils, a sharp hobby knife, hand-crank helical sharpener, or sandpaper block gives the most control. For oil-based pencils, a quality handheld sharpener with a fresh blade works well. For classroom or bulk use, an electric auto-stop sharpener with a helical blade is the safest choice. Avoid cheap electric sharpeners for soft Prismacolor pencils.
Do colored pencils ruin sharpeners?
Yes, colored pencils dull sharpeners faster than graphite pencils. The wax and pigment in colored pencil cores coat the blade and create buildup that reduces cutting efficiency. Clean your sharpener regularly, dedicate one sharpener to colored pencils only, and replace the blade or unit when sharpening becomes difficult. A dull sharpener is the #1 cause of breakage.
Why are colored pencils so hard to sharpen?
Colored pencils are hard to sharpen because their cores are softer and more brittle than graphite. Wax-based cores (Prismacolor, Crayola) are particularly fragile because the wax binder shifts inside the wood casing, creating gaps that snap under pressure. Oil-based cores (Faber-Castell Polychromos) are easier to sharpen but still break with a dull blade or heavy pressure. The key is matching your tool to your pencil’s binder type.
What does rubbing alcohol do to colored pencils?
Rubbing alcohol does not directly affect the sharpening process, but it can dissolve pigment and wax binders. Artists sometimes use it to blend layers or remove mistakes, but it does not soften cores for sharpening or fix internal breaks. For softening wax-based pencils before sharpening, use gentle heat from a hair dryer or sunlight instead of solvents.
Final Thoughts
Sharpening colored pencils without breaking them comes down to three things: a sharp blade, gentle pressure, and the right tool for the pencil’s core. Once you understand the difference between wax-based and oil-based cores, the rest is just matching technique to material.
If I had to pick one method to start with, it would be a fresh hobby knife. Knife sharpening gives you complete control, wastes almost no pigment, and works on every pencil type. Pair it with a sandpaper block for finishing, and you can sharpen any colored pencil in your collection. Keep your blades fresh, store your pencils point-up at room temperature, and your Prismacolors will thank you.
Whether you are a casual colorist or a working artist, mastering how to sharpen colored pencils without breaking them saves money, reduces frustration, and lets you focus on the art instead of the tools. Pick one technique from this guide and try it on your next session — your pencils (and your wallet) will last longer.