
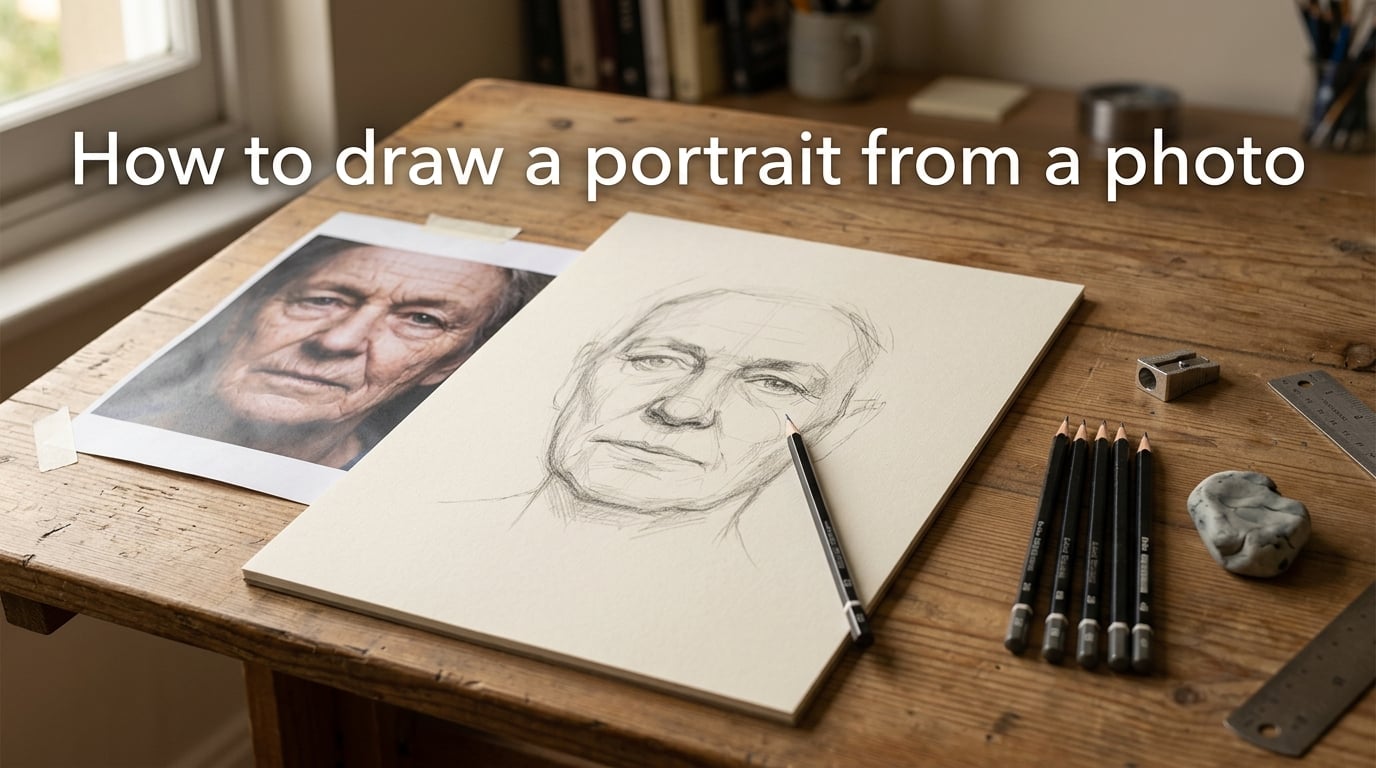
Drawing a portrait from a photo means using a photograph as your reference to create a hand-drawn likeness on paper. You study the image, map the proportions, sketch the facial features, and build up shading until the drawing captures the person in front of you. I have taught this process to dozens of first-time artists, and almost everyone walks away surprised by what they can produce with a single pencil and a little patience.
This guide walks you through the whole process I use in my own studio, from picking the right photo to laying down the final highlights. Whether you are a complete beginner or an intermediate artist trying to nail likeness, you will find a clear path forward here. By the end, you will know exactly how to draw a portrait from a photo with confidence, even if you have never drawn a face before.
Table of Contents
How to Choose the Right Reference Photo
The photo you choose has more impact on the final drawing than any technique you will use. A great reference photo makes the drawing easier, while a bad one forces you to fight your tools the whole way through. I learned this the hard way on my third attempt, when I picked a soft, backlit photo and spent six hours wondering why my shading looked muddy.
Pick a photo with sharp focus and high resolution. Blurry photos force you to guess at edges, and guessing is where portraits go wrong. A clear image lets you see exactly where the cheekbone meets the shadow, where the iris ends, and where the hairline truly sits.
Strong, directional lighting is your best friend. A photo where light comes from one side (window light, for example) reveals the form of the face through shadow. Flat, even lighting hides the planes of the head and gives you nothing to shade against.
Avoid busy backgrounds. Stripes, foliage, and crowds pull your eye away from the face and create noise around the silhouette. A plain wall, a softly blurred room, or a simple gradient gives the subject room to breathe and lets you focus on the head.
Choose a natural, relaxed expression. Extreme smiles, frowns, or tilted heads add complexity that beginners are not ready for. A calm, slightly turned face with relaxed eyes gives you the best chance of nailing the likeness without fighting facial distortion.
Convert the photo to black and white before you start. Color tempts you to match skin tones exactly, which is impossible in graphite. Grayscale forces you to focus on what really matters: the pattern of lights and darks across the face.
Tools and Materials You Need to Get Started
You do not need a huge kit to draw a portrait from a photo. Most of my finished pieces came from about a dozen tools that cost less than a takeout dinner. Here is the setup I recommend for beginners.
Pencil Grades Explained
Pencil hardness is measured on a scale from 9H (rock hard, pale) to 9B (extremely soft, almost black). For portraits you only need a handful.
- 2H — Hard and pale. Perfect for the initial grid lines and the lightest construction sketch. Anything you do not want to show up later.
- HB — The middle-ground pencil. Useful for mid-tone areas like skin in medium light and the soft shadow under the chin.
- 2B — A touch softer, slightly darker. Good for sketching the main shadow shapes once you commit to a layout.
- 4B — Where portraits start coming alive. Use this for the iris, the pupils, the deeper shadows in the hair, and the crease of the eyelid.
- 6B — Very dark. Use sparingly for the deepest accents, like the corner of the eye, inside the nostril, or a dark hair mass.
- 8B — Almost charcoal-soft. Reserved for the darkest darks and rich blacks in heavy hair. Easy to smudge, so keep it controlled.
Erasers Are Not Just for Mistakes
Three erasers will cover 99 percent of portrait work. A kneaded (putty) eraser lifts graphite without damaging the paper, making it perfect for highlights in the eyes, on the tip of the nose, and along the lower lip. A plastic or vinyl eraser cleanly removes construction lines and small errors. An electric eraser (a small motor-driven eraser shaped like a pencil) is the secret weapon for crisp white highlights in hair and on skin, and it is worth every penny once you start refining details.
Paper, Blending Tools, and Extras
Smooth Bristol paper (around 100 lb / 160 gsm) is the gold standard for graphite portraits because it gives you fine control without tooth that grabs the lead. A basic sketchpad works fine for practice runs. You will also want a blending stump or two (rolled paper pencils for softening graphite), a sharpener, a clean piece of tracing paper to protect your hand from smudging wet graphite, and a soft brush to dust away eraser crumbs.
Print the reference photo at roughly the same size as your drawing. If your drawing is going on an 8 by 10 inch sheet, print the photo at 8 by 10 inches. This removes a layer of guesswork when you are mapping proportions.
How to Draw a Portrait from a Photo: Step-by-Step
This is the process I teach in my own studio and the same one I used when I drew my first portrait at age 14. Take it one step at a time, and resist the urge to jump ahead. Each step sets up the next one.
Step 1: Analyze the Photo Before Drawing
Spend five full minutes just looking at the photo before your pencil touches paper. Identify where the light is coming from. Find the darkest dark on the face (usually the pupils or the shadow side of the hair). Find the lightest light (often the tip of the nose or the catchlight in the eye). Notice the angle of the head. Is it tilted? Turned? Slightly leaning back? Decide on the size of your drawing and the orientation of the paper.
Sketching these observations in the margin of your reference photo is a habit that will save you hours later.
Step 2: Set Up the Grid Method or Axis Lines
The grid method is the single most useful tool for beginners learning how to draw a portrait from a photo. It breaks the face into manageable squares so you are never guessing where a feature belongs.
Using a sharp 2H pencil and a light touch, draw a grid on your reference photo with even squares (half-inch squares work well for an 8 by 10 print). Repeat the same grid on your drawing paper, scaled to match. Number or letter each row and column so you can easily identify each square.
If grids feel too mechanical, draw a single vertical center line down the middle of both the photo and your paper, plus two horizontal lines: one across the eye level and one across the base of the nose. These axis lines alone are enough to keep your proportions on track.
Step 3: Block in the Head Shape and Central Axis
Lightly sketch the overall shape of the head. Most portraits start with a slightly egg-shaped oval, narrower at the chin and wider at the temples. Use straight, confident lines that you can adjust later.
Mark the central vertical axis down the middle of the face. Then draw a horizontal line across the brow, another across the bottom of the nose, and a third across the chin. These three horizontal lines divide the face into roughly equal thirds, which is a key proportion to memorize.
Compare the height of the head to its width. In most adults the head is roughly 1.5 times taller than it is wide. Getting this ratio right at the start prevents the dreaded “head too small on the body” problem.
Step 4: Map Facial Proportions and Feature Placement
The face divides neatly with a few reliable measurements. The eyes sit on the horizontal halfway line of the head. The bottom of the nose sits about halfway between the eyes and the chin. The mouth usually sits about one-third of the way from the nose to the chin.
The space between the eyes equals roughly the width of one eye. The corners of the mouth generally line up with the pupils of the eyes. The ears start at the eyebrow line and end at the base of the nose.
Use your pencil as a measuring tool. Hold it at arm’s length, line up the end with one feature, and slide your thumb down to mark the next feature. Transfer that measurement to your paper. This simple act is how realistic portrait drawing starts.
Step 5: Sketch the Eyes, Nose, and Mouth Lightly
Now you can begin the actual features, but keep everything very light. Draw the eyes as simple almond shapes first, then add the iris circles. Place a small dot for the highlight (the catchlight) at the same spot on each eye. The catchlight gives the eyes life and should never be filled in later.
For the nose, draw a soft wedge or trapezoid shape that suggests the bridge and the tip. Avoid drawing the nostril as a hard outline. Instead, suggest it with a soft shadow on the underside.
The mouth starts as a single soft horizontal line for the parting of the lips. Then add the upper and lower lip shapes, keeping them slightly fuller in the middle and tapering at the corners. The line where the lips meet is usually the darkest part of the mouth.
Step 6: Add Eyebrows, Ears, and Facial Contours
Eyebrows are not solid shapes. They are made of individual hairs that grow in a specific direction. Sketch the overall brow shape first, then add short, soft strokes that follow the natural growth pattern. Leave a few “flyaway” hairs here and there to keep them feeling natural.
The ears are tricky because most people see them as small bumps from the side. Take your time. The outer rim is a soft C-shape, the inner bowl curves into the head, and the earlobe hangs at the base of the nose line. Always draw both ears even if the photo hides one, to keep the symmetry balanced in your mind.
Now is the time to add the contour lines that show the planes of the face: the line where the cheekbone rises, the soft curve of the jaw, the shadow under the lower lip, and the slight crease of the chin.
Step 7: Block in Hair Shape and Major Shadows
Hair is not drawn strand by strand. It is drawn as a shape, just like the head itself. Block in the overall mass of the hair first, paying attention to where it sits on the skull. Hair has volume, so it extends beyond the head shape rather than lying flat against it.
Identify the darkest areas of the hair (usually where it meets the scalp and in the deepest recesses of the waves) and shade them in with a 4B pencil. Use a light touch. You will darken these areas in layers later.
Now look at the face and block in the major shadows. These are the cast shadow under the chin, the shadow side of the nose, the shadow in the eye socket, and the shadow along the jawline on the far side from the light. Block them in lightly so you can still see your construction lines beneath.
Step 8: Build Up Shading in Layers with Hatching
Realistic portrait drawing happens in layers, not in one pass. Start with light, even strokes in one direction. This is called hatching. Use an HB or 2B pencil and a steady, even pressure. Let the strokes overlap slightly to build a smooth mid-tone.
Once the first layer is down, you can add cross-hatching (a second layer of strokes at a different angle) to deepen the tone. Continue layering, alternating directions, until you reach the darkness you want. Each layer should be lighter than the last, building depth gradually.
Work from light to dark, never the other way around. Beginners often press too hard too early, then cannot lift the tone back to a mid-gray. If a shadow looks too dark, lift it with a kneaded eraser and start over with a lighter hand.
Step 9: Refine Features, Blend Tones, and Add Highlights
Now you can begin refining. Use a blending stump to soften the shading on the skin, especially on the cheek, forehead, and neck. The stump spreads graphite evenly and removes the visible hatch lines. Use a light touch. Over-blending creates a muddy, plastic look.
Refine the eyes by darkening the iris with a 4B or 6B pencil, leaving the catchlight white. Add a thin shadow along the upper lid to give the eye depth. Soften the edge of the lower lid. The whites of the eyes are rarely pure white, so shade them slightly to suggest the curve of the eyeball.
Lift highlights with your kneaded eraser. A bright spot on the tip of the nose, a glint on the lower lip, or a shine on the cheekbone can transform a flat drawing into a three-dimensional one. For crisp, sharp highlights (like strands of light in hair), use an electric eraser.
Step 10: Final Contrast Pass and Likeness Check
Step back from the drawing. Literally stand up and walk across the room. Squint at the drawing and at the photo. The places where your drawing does not match the photo in pattern of dark and light are the places that need more work.
Add final accents with a sharp 6B or 8B pencil: the darkest corners of the eyes, the inside of the nostrils, the deepest shadow in the hair, and the dark side of the neck. These accents anchor the whole drawing.
Sign the finished portrait in the lower corner with a light pencil mark. Then set it aside for at least an hour before deciding it is done. Fresh eyes catch mistakes tired eyes miss.
Shading Techniques That Bring a Portrait to Life
Shading is the difference between a flat outline and a believable human face. Once you understand a few core techniques, you can adapt them to almost any photo reference.
Hatching is a series of parallel lines. Cross-hatching layers a second set of lines across the first to deepen the tone. Contour hatching follows the curve of the form, which keeps the shading from looking pasted onto the surface. For skin, gentle contour hatching on the cheek and forehead feels natural. For hair, longer straight hatching in the direction of hair growth gives a smooth dark mass.
The squinting technique is the simplest way to identify the major value groups in your photo. Squint until the photo blurs into a pattern of darks and lights. Now draw that pattern, not the detail. Detail comes later, in the refining stage.
Layering graphite slowly is the secret to smooth skin tones. Five light layers of 2B graphite blended gently will look richer than one heavy-handed pass with a 6B. Patience pays off here.
The kneaded eraser is your tool for pulling highlights back out. Pinch it into a fine point and press it gently against the paper where you want a highlight. The eraser lifts graphite and leaves a soft white shape behind. This is how the shine on the tip of the nose and the catchlight in the eye get drawn.
Common Mistakes When Drawing a Portrait from a Photo
Even experienced artists make these errors, so do not feel bad if you have run into them. Knowing what to look for is half the fix.
Eyes placed too high on the face is the most common error. If the eyes look like they are climbing toward the hairline, the whole head will feel top-heavy. Check the halfway line of the head. The eyes should sit right on it, or just below.
Flat shading happens when the light source is ignored. Every shadow on the face must match a single direction of light. If the left side of the nose is dark and the right side of the cheek is also dark, your light source is inconsistent and the face will look confused.
Skipping the grid and chasing mistakes is the trap that turns a 30-minute study into a six-hour struggle. Beginners often resist the grid because it feels like cheating. It is not cheating. It is a measurement system. Use it until your eye can measure proportions on its own.
Pressing too hard too early is what creates the shiny, hard-to-shade patches on the paper. Once graphite is burnished into the tooth of the paper, no additional pencil will stick. Start light and stay light until you are sure.
Forgetting the negative spaces around the head leads to a face that floats in space. Look at the shapes between the head and the background, the triangles between the chin and the neck, and the gap between the nose and the cheek. Drawing those negative shapes accurately helps anchor the head.
Practice Exercises to Improve Faster
Improvement comes from repetition, not from any single piece. Here are the exercises that have helped my students make the fastest progress.
Daily twenty-minute sketch studies beat occasional marathon sessions. Set a timer, pick a single feature, and draw it ten times in twenty minutes. Do this for a week on the eyes, then the nose, then the mouth. Your hand learns what your eyes cannot yet articulate.
Crop your reference photos to focus on a single feature. Drawing just the eyes one day and just the mouth the next removes the overwhelm of the full face and lets you focus on form and shading.
The upside-down drawing trick rewires your brain. Turn your reference photo upside down, then turn your paper upside down, and draw what you see without thinking about “an eye” or “a nose.” You will draw shapes instead of symbols, and your likeness will often improve dramatically.
Copying master portraits teaches you more in one session than months of trial and error. Find graphite portraits by artists like Ann Bregman, Diego Velazquez, or contemporary portrait artists you admire. Spend an evening copying one. You will absorb decades of decisions.
Frequently Asked Questions
How do you turn a photo into a portrait drawing?
Start by choosing a sharp, well-lit reference photo with strong directional light. Convert it to black and white so you can focus on tonal values rather than color. Use the grid method to map the proportions onto your paper, then sketch the head shape, facial features, and shadows lightly before building up shading in layers with a 2B or 4B pencil. Refine details last, add highlights with a kneaded eraser, and adjust until the likeness feels right.
How do you draw a sketch of a person from a photo?
First, study the photo for several minutes and identify the light source, the darkest areas, and the lightest highlights. Print the photo at the same size you plan to draw and set up a grid on both the photo and your paper. Sketch the head shape and central vertical axis with a light 2H pencil, then map where the eyes, nose, mouth, and ears fall within the grid. Once the proportions are accurate, start adding shading in soft layers and refine the features one at a time.
What is the easiest way to convert a photo into a drawing?
The easiest method for beginners is the grid method. Draw an even grid on your printed reference photo (half-inch squares work well) and a matching grid on your drawing paper. Copy each square one at a time, treating it as an abstract shape rather than a recognizable feature. This removes the pressure of freehand accuracy and lets beginners achieve a strong likeness even on their first try.
How long does it take to draw a realistic portrait from a photo?
A finished pencil portrait from a photo typically takes between 8 and 20 hours for an intermediate skill level. Beginners should expect 15 to 30 hours on their first few attempts, while experienced artists can finish a likeness in 4 to 6 hours. The first hour is usually spent on setup, grid, and proportion mapping. The next several hours go into blocking shadows and refining features, with the final hour or two reserved for highlights and final contrast adjustments.
What pencils should I use for portrait drawing?
A complete portrait pencil kit only needs about five grades. A 2H is ideal for light construction lines and the initial grid. An HB works for mid-tones in the skin. A 2B handles soft shadows like the side of the face or under the chin. A 4B is your main shading pencil for the iris, deeper skin shadows, and the darker areas of hair. A 6B or 8B adds the deepest accents in pupils, nostrils, and dense hair. Adding a kneaded eraser and a blending stump rounds out the essential kit.
Can beginners learn how to draw a portrait from a photo?
Yes, beginners can absolutely learn to draw a portrait from a photo, and working from a photo is actually easier than drawing from life because the reference stays still and you can take as long as you need. The key is to use the grid method for accurate proportions, work in light layers rather than pressing hard, and resist the urge to add detail until the basic shapes and shadows are correct. Most beginners see real improvement within their first three or four attempts.
Final Thoughts: Drawing a Portrait from a Photo Takes Patience
Learning how to draw a portrait from a photo is one of the most rewarding skills an artist can build. Every portrait you finish teaches you something new about light, form, and the human face. The grid method, layered shading, and patient feature refinement covered in this guide are the same techniques professional portrait artists use every day, just practiced and refined over years.
If you take one thing from this guide, let it be this: start light, measure often, and trust the process. Your first portrait will not look like a master drawing. Your fifth portrait will surprise you. Your twentieth will impress you. Set up your photo, sharpen your pencils, and start your first square of the grid today.
Once you finish your first portrait, share it with a friend or post it in an online community like r/learntodraw on Reddit. Other artists will encourage you, offer tips, and help you see what to improve on your next attempt. The drawing community is welcoming, and your work will inspire someone else just starting out. Pick up your pencil and draw.