
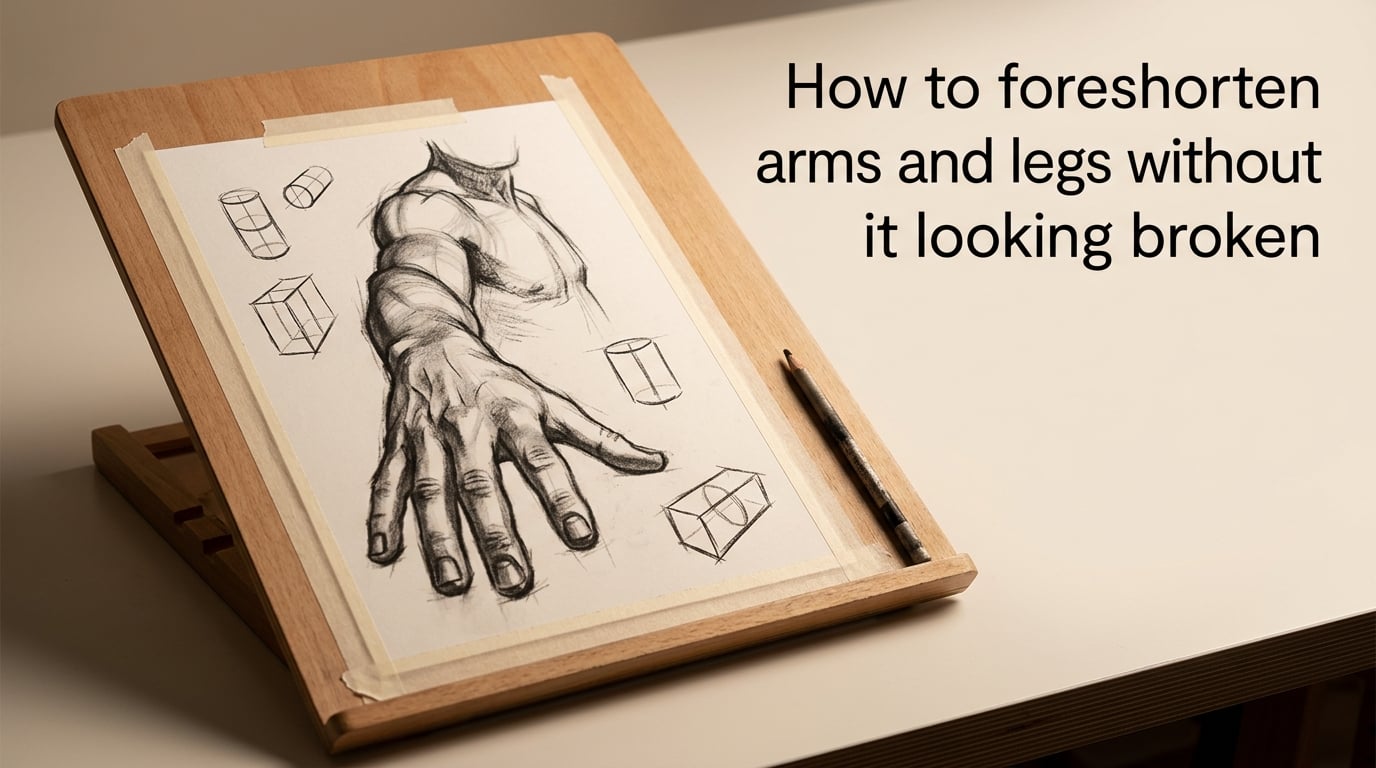
If you’ve ever drawn a character reaching toward the camera and ended up with what looks like a baby arm welded onto an adult body, you’re not alone. Foreshortening is the apparent compression of a form whose long axis points toward or away from the viewer. An arm aimed at the camera looks shorter on the page than its actual length, and that mismatch between what you know and what you draw is exactly why most foreshortened limbs end up looking broken, stubby, or disjointed.
I’ve spent more late nights than I’d like to admit fighting foreshortening in my own comic pages and concept sketches. The breakthrough wasn’t a single trick. It was a stack of small ones that, combined, turn a “weird shrunken stump” into a believable limb flying through space. In this guide I’ll walk you through the diagnosis, the one rule that fixes most mistakes, the construction process for arms and legs, a continuity checklist, five practice exercises, and the reference workflow I use weekly. By the end, you should be able to look at a foreshortened limb and know exactly what’s wrong, and exactly how to fix it.
Table of Contents
What Is Foreshortening and Why Arms and Legs Look Broken
Foreshortening is a perspective effect. When a cylinder – which is essentially what an arm or leg is – rotates so that one end points toward you and the other points away, the end closer to your eye occupies more visual space than the far end. The cylinder hasn’t actually shrunk; your eye is reading depth and compressing the length along your line of sight. Linear perspective, by contrast, is what happens to parallel edges of a flat plane (a road, a set of railroad tracks) as they recede toward a vanishing point. Foreshortening happens to a single form that points at you; linear perspective happens to sets of parallel lines on a plane. They share the same underlying math, but they show up in different drawing problems.
So why does foreshortening so often look broken? In my experience, and from watching hundreds of critiques on r/learnart and r/comicart, it almost always comes down to one of three causes:
- The “knowledge trap”: You draw the limb the length you know it is in real life, not the length it appears in your reference or in your imagined camera view. The brain insists an arm is “about as long as a torso,” and that knowledge overrides what your eye sees.
- The “shrinking limb” trap: You correctly make the limb shorter but you forget to make the near end larger. The whole thing tapers to nothing and looks like a withered stump instead of a powerful foreshortened cylinder.
- The “disjointed joint” problem: You drew each segment of the limb correctly, but the joints between them broke the silhouette. The result reads as three sausages skewered on a stick rather than one continuous limb.
Once you can name which of these three you’re fighting, the fix becomes mechanical. The rest of this article is essentially a toolkit for diagnosing which trap you’re in and a construction method that prevents all three at once.
The One Rule That Fixes Most Broken Foreshortening
Here is the single counterintuitive insight that solves more failed foreshortening than anything else I teach. When a limb points at the viewer, draw it LARGER, not smaller.
I know that sounds wrong. “Foreshortened” literally means “made shorter.” But the length of a foreshortened limb is only one part of the equation. The other part is the scale of the near end versus the far end. If your arm is pointing at the camera, the wrist is closer to you than the shoulder. That means the wrist should occupy more pixels on your page than the shoulder. A small wrist and a big shoulder reads as a normal arm seen from the side. A big wrist and a small shoulder reads as an arm aimed at you.
Peter Han’s Dynamic Figure Drawing drives this home by showing how a wide-angle camera exaggerates the difference. Pull your camera in close to a friend’s outstretched hand and the hand fills the frame while their shoulder shrinks toward a vanishing point. Pull the camera back and the foreshortening softens. Your pencil can do the same thing: lean into a wide field of view for dramatic foreshortening, or back off the FOV for a subtler effect. Either way, the near end of the limb is the largest thing on the page.
Quick self-test: cover the far half of your foreshortened limb with your thumb. Does the visible near half look like a believable chunky cylinder? If it looks like a thin tube or a stick, the near end is too small. Make it fatter, and the rest of the limb will start reading correctly.
How to Foreshorten Arms: A 5-Step Construction Process
When I draw a foreshortened arm now, I follow the same five steps every time. Some of them are quick sketches, others I spend real time on. The point isn’t to be mechanical; it’s to give my brain a scaffold so it stops overriding what my eye sees.
- Block in the limb as two stacked cylinders. Upper arm and forearm. Don’t worry about contour yet. The shoulder end of the upper arm is the far cylinder face, and the wrist end of the forearm is the near cylinder face. You’re setting up which end is closer to the camera.
- Decide which end is pointing at you, then make that end larger. If the wrist is closer to the viewer, the wrist-side circle of the forearm cylinder is the largest circle on the page. If the shoulder is closer (think of an arm reaching behind the back), the shoulder-side circle is the biggest.
- Draw through both cylinders. Lightly sketch the far end of each cylinder through the near end so you can see the full length of the form, even though most of it will be hidden later. This is the single most powerful trick for avoiding the disjointed-joint problem.
- Add cross-contour curves around the cylinders. These are the ellipses that wrap around the form. Where the limb is closer to the viewer, the ellipses are wider. Where it recedes, they tighten. The cross-contours are what tell the eye “this is a 3D volume, not a flat shape.”
- Connect with gesture and overlap the joints. Finally, sketch the contour lines, making sure the bicep overlaps the shoulder and the forearm overlaps the elbow. If the joints share a single shared line with no overlap, the arm will read as segmented. A small overlap between forms signals continuity.
For comic and illustration work especially, I draw through almost everything. The hidden lines get erased or covered later, but during construction they’re your X-ray vision.
How to Foreshorten Legs: A 5-Step Construction Process
Legs are doing the same job as arms, but they’re load-bearing, longer, and usually clothed, which makes the “shrinking limb” trap sneakier. A pant leg can hide that you forgot to scale the near end. Here is the process I use for foreshortened legs, whether the figure is kicking, lunging, or sitting cross-legged.
- Start with the pelvis-to-knee and knee-to-foot as two cylinders. Mark the hip socket and the heel first; those two anchor points tell you the angle and length of the whole leg. Everything between them is geometry.
- Identify the near and far ends. In a leg kicking toward the camera, the foot is the near end. In a figure sitting with legs crossed and the far knee pointing at you, the far knee is the near end. Mark that point on your sketch and exaggerate its scale.
- Taper the cylinders toward the far end. Legs taper naturally (thigh is thicker than calf, calf is thicker than ankle). When you add perspective on top, the taper compounds. Lean into it: a foreshortened thigh that doesn’t taper will look like a sausage. A thigh that tapers aggressively toward the hip reads as depth.
- Place the foot as a wedge or box, not a flat shape. A foreshortened foot is a wedge with the toe end large and the ankle small, or a box rotated in space. If you draw the foot flat and parallel to the picture plane, the whole leg will pop out of the perspective. Always build the foot as a small 3D form first.
- Use overlap and clothing folds to confirm continuity. Pants wrinkle where the fabric bunches at the hip, behind the knee, and at the ankle. Those wrinkles are visual cues that the leg is one continuous cylinder system. If your wrinkles are fighting your construction, trust the construction and redraw the wrinkles.
One more thing on legs: the foot does a lot of the heavy lifting in foreshortening. A poorly drawn foot will sabotage a beautifully constructed leg, and a strong foot can carry a sketchy leg. Spend extra time on the foot wedge.
Why Foreshortened Limbs Look Disjointed and How to Fix Continuity
Continuity is the difference between a limb that looks like one form passing through space and one that looks like a stack of disconnected shapes. It’s the third trap, and it’s the one that costs most artists the most time because the segments are individually correct but the whole reads wrong.
Three habits will fix continuity almost every time. First, always draw through at construction stage. Seeing the far end of each cylinder behind the near end gives you a continuous form to align everything against. Second, use cross-contour lines that flow across joints rather than stopping at them. A cross-contour ellipse that wraps around the forearm and continues onto the back of the upper arm tells the eye “this is one limb.” Third, overlap joints by a clear margin. The bicep should overlap the shoulder by enough that you can’t see the seam. The forearm should overlap the elbow the same way.
The negative-space trick from Love Life Drawing is a powerful continuity check. Instead of drawing the limb itself, draw the shape of the air around it. The space between the arm and the torso, the gap between the forearm and the thigh, the triangle of background visible through the crook of an elbow. When those negative shapes look right, the limb almost always looks right too, because your brain stops “correcting” the foreshortening.
There’s a fifth continuity tool worth naming separately: silhouette check. Squint at your drawing or flip it upside down. Does the foreshortened limb read as a single confident shape, or does it read as a stack of disconnected blobs? If the silhouette is broken, no amount of internal rendering will save the limb. Fix the silhouette first.
5 Broken-Limb Failure Modes and How to Diagnose Each
This is the diagnostic checklist I wish someone had handed me on day one. When a foreshortened arm or leg looks wrong, run your eye down this list and find the failure mode. Each one has a single specific fix.
- Shrunken stump. The limb is short, but the near end is also thin. Fix: enlarge the near-end circle of the cylinder until it visually outweighs the far end.
- Flat stick. The limb has correct length but no volume, so it looks like a 2D shape. Fix: add cross-contour ellipses, especially around the joints, until you can see the form turning in space.
- Disjointed sausages. Each segment is drawn well but they don’t connect. Fix: redraw the construction with draw-through lines and overlap every joint by a clear margin.
- Twisted spaghetti. The contour lines change direction unnaturally across the limb, like the form is rotating inside out. Fix: reset and rebuild from cylinders; the contour lines should follow the cross-contours, not invent new curves.
- Stubby glove or boot. The hand or foot is drawn at the wrong angle to the limb, so it looks detached. Fix: build the hand or foot as its own small 3D form, oriented in the same perspective system as the limb it’s attached to.
Most artists, myself included, hit failure modes one and three most often. The fix is always the same pair of habits: exaggerate the near end, and draw through everything. The remaining three usually clear up once those two are in place.
5 Foreshortening Exercises to Build the Skill Fast
Theory without practice is just trivia. Here are five exercises in escalating difficulty. I do at least one a week even now, because the skill decays faster than you’d think.
- Cylinder pointing at you. Roll up a sheet of paper into a tube. Hold it at arm’s length pointing at your face. Draw it. Now hold it pointing away from you and draw it. Notice how the near circle of the tube dwarfs the far circle. This single observation is most of the battle.
- Pencil as a foreshortened cylinder. Hold a pencil at arm’s length pointing at you, then draw it in 30 seconds. Repeat from five different angles. Pencils are unforgiving because the proportions are familiar to your hand, so any mistake is obvious.
- Shoe on the floor. Place a shoe on a table. Sit down and look at it from above so the toe is closest to you. Draw it as a wedge. Now move so the heel is closest. Draw it again. The shoe teaches you the same near-versus-far logic as a hand or foot.
- Your own arm in a mirror. Extend one arm toward a mirror so you’re looking at it head-on. Draw the other arm mirroring the pose. Switch arms and repeat. Self-portraiture is brutal feedback, but it works.
- Full foreshortened figure from a 3D pose tool. Use PoseMy.Art, DesignDoll, or a Croquis Cafe reference video to set up a dynamic pose with at least one arm pointing at the camera. Build the figure with cylinders first, then add contour, then render. Time yourself at 20 minutes per pose.
You don’t need to do all five in one sitting. Pick one, do it ten times, move on. The repetition is what builds the eye-hand connection.
Tools and Reference Workflows That Make Foreshortening Easier
You don’t need fancy tools to learn this, but the right ones accelerate the process. Static photo references are fine for gentle foreshortening, but they break down for extreme angles because the photographer has to choose: include the limb or include the rest of the figure. 3D pose tools like PoseMy.Art and Blender solve this by letting you rotate a virtual camera around a posed figure, so you can dial up exactly the angle that breaks your brain.
Croquis Cafe reference videos are another favorite. They cycle through a timed pose every two minutes, which forces you to commit to your construction quickly. The speed strips away your temptation to noodle the contour and trains you to read big shapes first.
For comic and concept work, I lean on wide-angle FOV by default when a limb is aimed at the camera. It exaggerates the foreshortening in a way that reads as dynamic and intentional, rather than accidental. Save the long-lens look for subtle, naturalistic scenes.
One last tool, and it’s the cheapest: a stack of post-it notes. Sketch a foreshortened cylinder on each one and stick them around your monitor. Within a week your eye will recalibrate to the near-end-is-larger rule without you having to think about it.
Foreshortening isn’t only a figure problem, by the way. The same near-versus-far logic applies to a road disappearing into the distance, a table edge receding toward a wall, a coffee mug tilted toward your eye. Train your eye on cylinders in any context and your figure drawing will get better as a side effect.
Frequently Asked Questions
What is foreshortening in art?
Foreshortening is the apparent compression of a form whose long axis points toward or away from the viewer. An arm aimed at the camera looks shorter on the page than its real-world length because perspective makes the near end larger and the far end smaller along the line of sight.
How do you foreshorten arms and legs step by step?
Block the limb as two stacked cylinders, decide which end is closer to the viewer and enlarge that end’s circle, draw through both cylinders to see the full form, add cross-contour ellipses to show volume, then connect with contour lines and overlap every joint. The five steps are: cylinders, scale the near end, draw through, cross-contour, contour and overlap.
Why does my foreshortened arm look broken or like a stub?
Almost always for one of three reasons: you drew the arm the length you know it is instead of the length it appears, the near end of the limb is too small (the shrinking limb trap), or the joints between segments broke the silhouette into disconnected sausages. The fix is exaggerating the near end, drawing through at construction, and overlapping every joint.
Should a foreshortened limb be drawn shorter or smaller?
Both, but the key counterintuitive point is that the near end of the limb should be drawn LARGER than the far end. A small wrist and a large shoulder reads as a normal arm seen from the side; a large wrist and a small shoulder reads as an arm pointed at the viewer. Length compresses while the near end scales up.
How is foreshortening different from linear perspective?
Linear perspective describes what happens to parallel edges of a flat plane as they recede toward a vanishing point, like railroad tracks converging in the distance. Foreshortening describes what happens to a single form that points toward or away from the viewer, like an arm aimed at the camera. They share the same underlying math but show up in different problems.
How do you practice foreshortening exercises?
Start with simple cylinders pointed at your face, then move to familiar objects like pencils and shoes, then your own arm in a mirror, then full figures from a 3D pose tool or Croquis Cafe video. Repeat each exercise from multiple angles and aim for ten quick sketches per object rather than one polished drawing.
What are the most common mistakes when foreshortening limbs?
The most common mistakes are the shrunken stump (near end is too small), the flat stick (no cross-contour volume), disjointed sausages (joints don’t overlap or share construction lines), twisted spaghetti (contour lines that contradict the cylinder), and the stubby glove or boot (hand or foot drawn at the wrong perspective angle to the limb).
When should I avoid foreshortening altogether?
Skip foreshortening whenever the storytelling doesn’t need it. A profile or three-quarter pose can be just as powerful as a dramatic foreshortened shot, and it’s much easier to draw convincingly. Save foreshortening for the moments where a limb aimed at the camera actively sells the action, like a punch, a kick, a fall, or a hand reaching toward the viewer.
Final Thoughts
If I had to compress this whole guide into a single sentence, it would be this: a foreshortened limb pointing at the viewer should be drawn LARGER at the near end and built from cylinders you can see through. Everything else – the cross-contours, the overlap, the continuity fixes, the practice exercises – is in service of that one rule. Print it on a post-it, stick it next to your drawing board, and the broken-limb problem starts fading faster than you expect.