
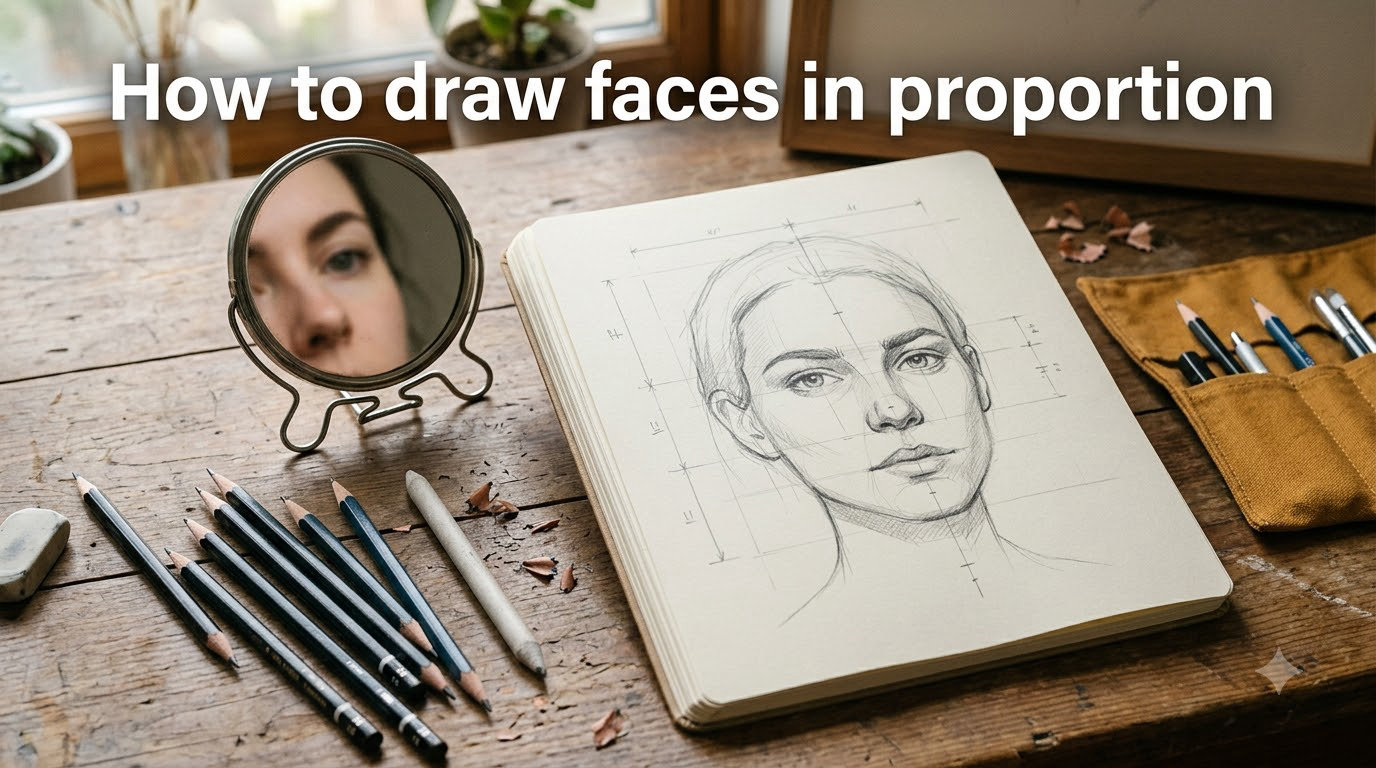
If you have ever finished a portrait and felt something was wrong without being able to say what, the answer is almost always face proportions. Eyes sit a fraction too high, the gap between them is a little wide, the mouth drifts off-center, and the whole drawing reads as off. Learning how to draw faces in proportion is the single biggest fix for that feeling, and it does not require natural talent. It requires memorizing a handful of landmark measurements and applying them with light construction lines before you ever touch a feature.
In this guide, I will walk you through the seven core proportion rules every portrait artist relies on, the Loomis method for putting those rules into practice step by step, and a simple non-Loomis alternative for absolute beginners. You will also get the proportion shifts that happen in profile and three-quarter views, the male versus female differences, the beginner mistakes that quietly wreck most faces, and a set of daily drills to lock the rules into your hand. By the end, you will have a complete face proportions drawing system you can use with reference, from imagination, or from a photo.
Table of Contents
The 7 Core Proportion Rules of the Face
Face proportions are the standard measurements that govern where every feature sits on the head. Memorize these seven rules first, and every portrait you draw afterward will get dramatically more accurate.
- The face divides into three equal horizontal sections. Measure from the hairline to the brow line, the brow line to the bottom of the nose, and the nose to the bottom of the chin. Each of those three zones is roughly the same height. This is the classic one-third face rule.
- The eyes sit halfway down the head. The eye line is the vertical midpoint between the top of the crown and the bottom of the chin. If the eyes are higher than that midpoint, the face will read as a child or a stylized cartoon even when everything else is correct.
- The space between the eyes equals one eye width. The inner corners of the left and right eye are separated by exactly the width of a single eye. This is why the head is roughly five eyes wide from edge to edge.
- The head is about five eyes wide. From the outer corner of one eye to the outer corner of the other is two eye widths. One more eye width fits on each side of the head, totaling five. Use this rule to set the outer boundaries of the face.
- The tear ducts line up with the edges of the nostrils. Drop a vertical line from each inner eye corner and it should touch the outer edge of the corresponding nostril. When this fails, the nose looks misplaced even if it is well drawn.
- The corners of the mouth align with the pupils. Drop a vertical line from the center of each pupil and it should hit the corner of the mouth on the same side. This single rule fixes more off-looking mouths than any other.
- The bottom of the ears lines up with the bottom of the nose. The ears start around the brow line and end roughly level with the base of the nose. This anchors the head’s tilt and the placement of features on the side plane.
These are not rigid laws. Real faces vary, ethnic features vary, and individual likenesses vary, which is why portraits that use these as starting landmarks look right even when the final drawing bends them. Treat them as the skeleton, not the skin.
Face Proportions at a Glance: The Cheat Sheet Table
Here is a single cheat sheet table that condenses all seven rules. Pin this next to your drawing board or screenshot it on your phone. It is the fastest reference you will use.
| Rule | Measurement | Beginner Tip |
|---|---|---|
| Three equal thirds | Hairline to brow, brow to nose, nose to chin are equal | Mark the hairline, brow, nose, and chin first as faint horizontal ticks |
| Eye line at midpoint | Eyes sit exactly halfway from crown to chin | If the face looks cute, the eyes are too high |
| Eye spacing | Distance between eyes equals one eye width | Draw the bridge of the nose to land the inner corners correctly |
| Five eyes wide | Total head width equals five eye widths | Place the outer face line one eye width past each outer eye corner |
| Tear duct to nostril | Inner eye corner lines up with outer nostril edge | Draw a vertical guide down from each inner corner before placing the nose |
| Mouth to pupil | Pupil center lines up with mouth corner | Use a vertical guide from the pupil before sketching the mouth |
| Ear placement | Ear runs from brow line to base of nose | Skip ears until the final pass; place features first |
How to Draw Faces in Proportion: Step-by-Step (Loomis Method)
The most reliable construction technique for portrait drawing is the Loomis method, developed by illustrator Andrew Loomis. It works by turning the head into a sphere plus a jaw wedge, then mapping every facial feature onto that scaffold. Follow these 12 steps for a front-view face in proportion.
- Draw a circle. Lightly sketch a circle for the cranium. Do not press hard; construction lines should erase cleanly later.
- Add a horizontal axis line through the middle. This marks the eye line and the vertical midpoint of the head.
- Add a vertical center line. This splits the face into left and right halves and guarantees symmetry.
- Mark the bottom of the circle. Drop down by about one-third of the circle’s height. This is where the brow line lives.
- Draw the jaw wedge. Sketch two angled lines from the bottom third of the circle down to a soft point. The shape is a wedge, not a square; the chin is rounded.
- Square off the sides of the head. Add a vertical line on each side of the circle, dropping to meet the jaw. This forms the flat planes of the head’s side.
- Mark the five horizontal divisions. Inside the wedge, mark the hairline, brow line, nose line, and chin line. The eye line is already on the circle’s horizontal axis.
- Place the eyes on the eye line. Use the five-eyes-wide rule to set the outer edges and the one-eye-spacing rule to set the gap. Draw both eyes at the same time so they do not drift apart.
- Add the nose. The bridge starts between the eyes at the brow line. The base of the nose sits on the nose line. The wings of the nostrils align with the tear ducts.
- Place the mouth. The mouth sits about one-third of the way from the nose line to the chin. The corners align with the pupils.
- Add the ears. Ears run from the brow line down to the nose line. Draw them last so the rest of the face is not crowded off-center.
- Erase construction lines and refine. Once features are placed, lighten the construction lines and clean up the drawing before any shading begins.
The biggest mistake beginners make in this process is rushing straight to feature detail. Spend at least half your time on the sphere, the jaw wedge, and the four horizontal ticks. Everything else snaps onto that scaffolding.
A Simple Approach for Absolute Beginners (No Loomis)
If the Loomis method feels like too much scaffolding, use this five-step shortcut. It is less rigorous but gets a passable face onto paper quickly, which builds confidence and locks in the basic rules.
- Draw an oval for the face and a soft chin. Skip the sphere and wedge. A simple oval with a tapered chin reads as a head.
- Mark the eye line at the oval’s vertical center. Use a ruler or your pencil as a guide. The eye line is the most important single mark.
- Draw two horizontal ticks for the third divisions. One at the brow line (one-third down) and one at the nose line (two-thirds down). Lightly. They will guide the rest.
- Place features with the seven rules. Eyes on the eye line, spaced one eye apart, five-eye-wide head, nostrils under the tear ducts, mouth corners under the pupils, ears between brow and nose.
- Refine with a mirror flip. Either flip the canvas horizontally (digital) or hold your drawing up to a mirror. Errors in symmetry and proportion appear instantly.
Once this feels easy, graduate to the full Loomis construction. The shortcut is meant to build the habit of marking landmarks before drawing features, not to replace proper head construction.
Side and 3/4 View: How Proportions Shift
The seven rules all apply to the front view, but as soon as you rotate the head, the landmarks shift. Drawing in proportion from a profile or three-quarter angle means understanding which lines move and which stay locked.
Profile (side) view. The eye line is still halfway from the top of the head to the bottom of the chin. The face from forehead to chin is still three roughly equal sections. The bridge of the nose becomes a single strong line, and the lips project forward. The far eye and far side of the mouth are hidden but still exist; they are simply compressed into the silhouette. The ear sits roughly at the side midpoint of the head and tilts back slightly.
Three-quarter (3/4) view. This is the most common angle in real life and the trickiest to proportion. The vertical center line of the face shifts to roughly one-third across the face, not halfway, because the far side is foreshortened. The far eye sits slightly higher than the near eye in the most extreme 3/4 angles, and its width is compressed to about two-thirds of the near eye. The far nostril and far corner of the mouth peek around the curve of the nose and cheek.
The single best exercise for both views is to draw a front view and a profile view of the same head on the same page. The act of comparing them side by side locks the proportion relationships into memory faster than any amount of front-view practice.
Male vs Female Face Proportions: What Changes
The seven rules describe an average face, but male and female faces bend those averages in different directions. Treating both as identical is a common beginner mistake, and it is the reason drawings often look gender-ambiguous.
| Feature | Male Tendency | Female Tendency |
|---|---|---|
| Jaw | Squared, wider, more angular | Narrower, more tapered, softer |
| Brow ridge | Heavier, more pronounced | Smoother, less projection |
| Cheekbones | Flatter, lower on the face | Higher, more prominent |
| Eyes | Sit closer to the brow line | Sit slightly farther from the brow line |
| Nose | Often slightly larger and wider at the bridge | Often slightly smaller and narrower |
| Lips | Thinner, especially the upper lip | Fuller, more defined |
| Chin | Wider, more square | Narrower, more pointed |
These are tendencies, not rules. Real faces of any gender vary widely. Use the table as a starting bias, then adjust for the individual sitting in front of you.
Common Beginner Mistakes and How to Fix Them
Every artist drawing faces from observation or imagination runs into the same handful of proportion problems. Here are the eight most common mistakes, each paired with the rule that fixes it.
- Eyes placed too high. This makes the face look like a child or a stylized cartoon. Fix: redraw the eye line at the exact vertical midpoint of the head, not at the brow line.
- Eyes too close together or too far apart. Breaks the likeness instantly. Fix: measure the inner corner gap against the width of one eye before drawing the second eye.
- Eyes drawn too small or too large. Fix: use the five-eyes-wide rule. If the head width is too narrow for five eye widths, the head itself is too small.
- Nose drifts off-center. Fix: redraw the vertical center line and place the bridge of the nose directly on it.
- Mouth placed too high. Fix: measure one-third of the distance from the nose line to the chin. That is the mouth line.
- Mouth corners not aligned with pupils. Fix: drop vertical guides from each pupil before drawing the mouth.
- Starting with features instead of construction. Fix: spend at least half your time on the sphere, jaw wedge, and horizontal ticks. Details come last.
- Drawing one eye, then the other. The second eye drifts every time. Fix: sketch both eye sockets as a single horizontal band, then refine both eyes together.
Reddit artists in r/learnart and r/learntodraw consistently report that the single biggest improvement to their face proportions came from the sight-size method, not from more Loomis practice. Pair the mistakes above with that measuring habit and accuracy jumps fast.
How to Use a Pencil as a Measuring Tool
The sight-size method turns your pencil into a ruler. Hold it at arm’s length, close one eye, and use the tip of the pencil to mark any distance you want to compare. Then compare that distance against other landmarks without moving your arm.
- Eye spacing. Place the pencil tip at the inner corner of the left eye. Slide your thumb down to the inner corner of the right eye. Now move the pencil over the head and check whether any other distance matches.
- Eye-to-nose distance. Mark the distance from eye line to nose line. That distance should equal the distance from nose line to chin line. If it does not, redraw.
- Head width check. Mark the width from one side of the head to the other. Then count how many eye widths fit inside it. It should be close to five.
- Step back often. Hold your drawing at arm’s length and squint. Proportion errors pop out at distance that vanish up close.
Practitioners across Reddit and ArtFundamentals consistently call this technique the single highest-leverage habit in portrait drawing. It costs nothing, takes ten seconds, and immediately reveals mistakes that are nearly impossible to spot on the page.
Daily Practice Drills to Lock In Face Proportions
Knowing the rules and applying them under pressure are different skills. These five short drills will build the muscle memory so the proportions come out automatically.
- Loomis ghost heads. Spend ten minutes a day drawing Loomis sphere-and-wedge constructions without features. No shading, no detail, just the scaffold. Three to five per session.
- Five-eye ruler. On any reference photo, draw a horizontal line across the eye line. Divide it into five equal segments and label them. This trains the eye to see the five-eyes-wide rule in real faces.
- Flip drill. Draw a face from imagination, then flip the canvas horizontally. Every proportion error jumps out. Fix it, flip again, repeat.
- Symmetry lines. Draw the center vertical line through every reference face you study. Mark the eye line, nose line, and mouth line. Compare against the seven rules.
- Profile-front pairs. Draw the same head twice on one page: once front, once profile. Comparing the two side by side locks in landmark placement across views.
Twenty minutes a day for two weeks is enough to see a measurable jump in accuracy. The artists who improve fastest are the ones who treat proportions as a drill, not a problem.
Frequently Asked Questions
How do you proportion your face when drawing?
Mark the hairline, brow line, nose line, and chin line as four horizontal ticks. Divide that span into three equal sections. Then place the eye line at the vertical midpoint of the head, set the inner eye corners one eye-width apart, and align the nostrils under the tear ducts and the mouth corners under the pupils.
What is the one-third face rule?
The face divides into three roughly equal horizontal sections: hairline to brow, brow to base of the nose, and base of the nose to chin. Each zone is about the same height, which is why the one-third face rule is one of the strongest tools for getting face proportions right.
How do I draw faces more accurately?
Build the head with construction lines first: a sphere for the cranium, a wedge for the jaw, and four horizontal ticks for the hairline, brow, nose, and chin. Only after that scaffold is in place do you draw the eyes, nose, mouth, and ears. Use the seven core proportion rules to place every feature.
What should I draw first when drawing a face?
Start with a sphere for the cranium, then add a horizontal eye-line axis and a vertical center line for symmetry. Mark the bottom of the sphere (the brow line), sketch the jaw wedge, and place the four horizontal ticks for the hairline, brow, nose, and chin. Features come last.
What are the typical dimensions of a human face?
The average adult face is roughly five eyes wide and three eye-heights tall (crown to chin). The eyes sit at the vertical midpoint, the space between the eyes equals one eye width, the corners of the mouth align with the pupils, and the nostrils align with the tear ducts.
What are the most common mistakes when drawing faces?
Placing the eyes too high, spacing the eyes too close or too far apart, drawing the mouth too high, drifting the nose off-center, starting with feature details before construction, and drawing one eye at a time so the second drifts away from the first. Each one has a proportion rule that fixes it.
What is the 4-8-8 drawing method?
The 4-8-8 method is a quick proportion system where you divide the head height into 4 units from the eye line to the chin and 8 units across the head width, with the nose and mouth placed at specific points along those units. It is a fast alternative to the Loomis grid for sketching faces from imagination.
What is the 50 percent rule in art?
The 50 percent rule says that the eye line sits exactly halfway between the top of the crown and the bottom of the chin. It is one of the most reliable face-proportion anchors because breaking it makes the face look child-like or stylized.
How to Draw Faces in Proportion: The Takeaway
Drawing faces in proportion is not about natural talent. It is about memorizing seven landmark rules, marking them with construction lines before any feature touches the paper, and practicing the drills until the scaffold feels automatic. Start with the Loomis sphere and wedge, place the eye line at the midpoint of the head, and let the rest of the proportions fall out of that scaffold. From there, sight-size measuring and the mirror-flip habit will tighten your accuracy faster than any amount of feature work. Pick one drill from this guide, do it for twenty minutes today, and your next portrait will look noticeably more like the person sitting in front of you.