
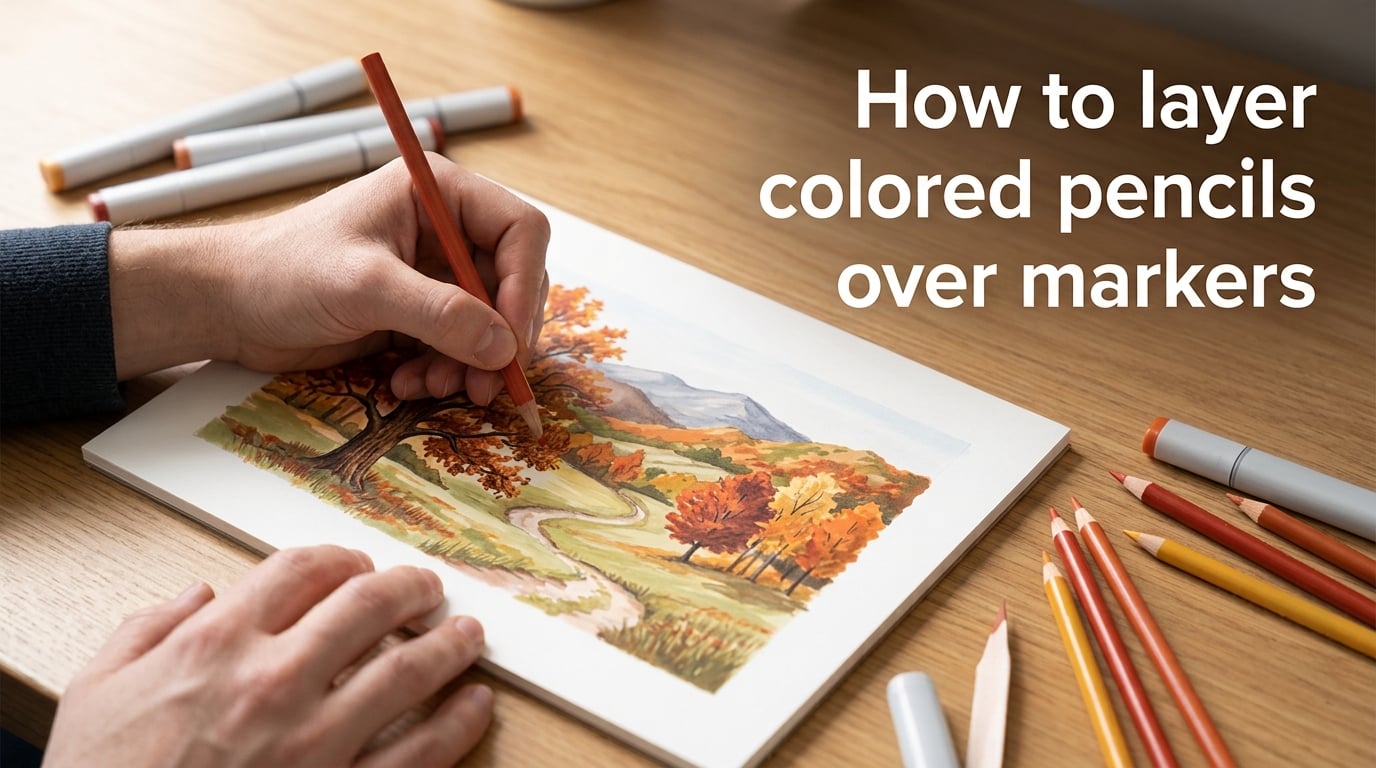
Yes, you can absolutely layer colored pencils over markers, and it is one of the most rewarding mixed-media techniques you can learn. The process starts with markers as your base layer, then colored pencils go on top to add details, deepen shadows, and sharpen edges. In this guide, I walk you through exactly how to layer colored pencils over markers — from choosing the right paper to avoiding common mistakes that ruin your underpainting.
I have spent years combining these two mediums in illustration and coloring work. What I can tell you is that the technique is simple once you understand the why behind each step. Let me show you how it works.
Table of Contents
What Is Underpainting and Why Markers Go First
An underpainting is a base layer of color applied before your main detail work. In this technique, markers serve as your underpainting. They lay down smooth, vibrant color quickly, covering large areas in seconds.
Markers go first because they are a wet medium. They need direct contact with the paper to bind properly and dry flat. If you try to apply marker over colored pencil, the wax or oil in the pencil repels the marker ink. The result is streaky, uneven color that refuses to blend.
Once your marker layer dries, it creates a thin film on the paper surface. Colored pencil pigment grabs onto the paper tooth through that film. This gives you the best of both worlds: the speed and vibrancy of markers plus the control and detail of pencils.
Materials You Need for Layering
Getting the right combination of marker, pencil, and paper makes or breaks this technique. Here is what I recommend based on years of testing different combos.
Markers: Alcohol-Based vs Water-Based
Alcohol-based markers like Copic, Ohuhu, and Prismacolor are the standard for this technique. They dry faster, blend more smoothly, and produce a thinner film on the paper. This thin film lets colored pencil pigment grab onto the paper tooth underneath.
Water-based markers can work, but they behave differently. They tend to sit on top of the paper more, creating a thicker, sometimes slightly tacky surface. Pencil does not layer as cleanly over water-based ink. If you are just starting out, stick with alcohol-based markers.
Colored Pencils: Wax-Based vs Oil-Based
Both wax-based and oil-based pencils work over alcohol markers, but they feel different on the page. Wax-based pencils like Prismacolor Premier glide on smoothly and blend easily. They are the most popular choice for layering over markers among forum colorists. The downside is wax bloom — a hazy, waxy film that can appear over time if you layer too heavily.
Oil-based pencils like Faber-Castell Polychromos and Caran d’Ache Luminance are scratchier but build up faster. They do not produce wax bloom, which means your colors stay crisp longer. Many experienced artists prefer oil-based pencils for detailed work over markers because they hold a sharp point better.
Paper: What Works and What Does Not
Paper choice is the single biggest factor in how well this technique works. You need a surface with enough tooth to hold pencil pigment, but smooth enough that markers do not bleed.
Bristol Vellum is the most recommended paper by professional artists. It has a slight texture that grabs pencil while staying smooth enough for marker. Strathmore 300 Bristol Vellum is a popular budget option. Bristol Smooth is even better for markers but offers less tooth for pencil layering.
X-Press It Blending Card is another excellent choice. It is designed for alcohol markers and handles pencil layering well. Canson Marker Paper also works, though it can be thinner and may buckle with heavy marker use.
Avoid mixed media paper. Professional illustrator Amy Shulke explicitly warns against it. Mixed media paper has too much texture for clean marker work, causing bleeding and uneven color. Standard sketch paper is also too thin and will buckle or pill when you layer both mediums.
How to Layer Colored Pencils Over Markers Step by Step
Here is the process I follow every time I combine these two mediums. Follow these steps in order for the best results.
Step 1: Test Your Colors on Scrap Paper
Before touching your final piece, test your marker and pencil combinations on a scrap of the same paper. This lets you see how the colors interact and prevents surprises. Sarah Renae Clark’s color swatch testing step is consistently praised by artists because it saves so much frustration.
Step 2: Apply Your Marker Underpainting
Lay down your marker base layer with broad, even strokes. Work in sections if you need to blend colors. Keep the marker layer thin — one or two passes is enough. Do not over-saturate the paper, or the pencil will not stick properly.
Step 3: Let the Marker Dry Completely
Wait at least 60 seconds, and preferably longer, before touching the marker with pencil. The marker needs to be fully dry. If you layer pencil over wet or tacky marker, you will drag the ink and create muddy, smeared color. This is the number one mistake beginners make.
Step 4: Layer Colored Pencil with Light Pressure
Start with light pressure and build up gradually. The pencil should glide over the dried marker. Use small, controlled strokes to add details, refine edges, and deepen shadows. You can always add more layers, but removing pencil over marker is nearly impossible.
Step 5: Build Up Layers for Depth
Continue layering to build color intensity. Work light to dark in most cases — this preserves your highlights and lets you control the tonal range. Each pass of pencil adds more pigment and reduces the paper tooth, so plan your layers carefully.
Step 6: Add Finishing Touches
Use a white pencil or white gel pen for highlights. A colorless blender can smooth transitions between pencil strokes. For the brightest highlights, white gouache applied with a fine brush works over both pencil and marker.
Light-to-Dark vs Dark-to-Light: Which Order Works Best?
Most artists work light to dark, and for good reason. Starting with lighter colors preserves your paper tooth for the darker layers on top. This approach gives you more control over the final tonal range and makes it easier to adjust as you go.
Dark to light is less common but has its uses. If your underpainting already established the dark areas with markers, you can use lighter pencils on top to add dimension. This is useful when you want to brighten specific areas without re-applying marker.
The decision comes down to your subject. For portraits and landscapes, light to dark usually works best. For objects with strong highlights, starting with mid-tones and building both darker and lighter on top can be more efficient.
Common Mistakes and How to Fix Them
Here are the most common problems artists run into when layering colored pencils over markers, along with fixes for each one.
Wax Bloom
Wax bloom appears as a hazy, white-ish film over pencil layers. It happens when you apply heavy layers of wax-based pencil. To prevent it, use lighter pressure and fewer layers. If bloom appears, gently wipe the surface with a soft cloth. Switching to oil-based pencils eliminates this problem entirely.
Layering Too Soon
If your marker is not fully dry, the pencil will drag the ink and create muddy color. Always wait at least 60 seconds. In humid conditions, wait two to three minutes. The marker should feel completely dry to the touch before you proceed.
Pencil Looks Dull Over Dark Marker
This is one of the most frustrating issues. When the marker is heavily saturated, the pencil pigment seems to disappear. The fix is to build up multiple light layers instead of pressing harder. Pressing harder just crushes the paper tooth. You can also try a lighter pencil shade on top of the dark marker to create a tonal shift rather than fighting the saturation.
Smearing the Underpainting
Smearing happens when your hand or pencil drags wet marker across the surface. Work from top to bottom if you are right-handed, or bottom to top if left-handed. Use a piece of scrap paper under your drawing hand to protect the work surface.
Paper Pilling
Cheap or overly textured paper will tear when you layer pencil over marker. If this happens, your paper choice is the problem, not your technique. Switch to Bristol Vellum or X-Press It Blending Card. These papers handle repeated pencil layers without pilling.
Finishing Touches: Highlights and Final Details
The last step is what brings your piece to life. Highlights and fine details add the realism and polish that set mixed-media work apart.
A white colored pencil works well for soft highlights over dark areas. Press firmly to lay down opaque white over the pencil and marker layers. For sharper highlights, a white gel pen like the Uni-Ball Signo gives you crisp, bright lines that pop.
For the strongest, most opaque highlights, white gouache applied with a fine brush is unbeatable. It sits on top of everything and gives you a clean, bright accent. This technique is used by professional illustrators like Amy Shulke and the Virtual Instructor.
Frequently Asked Questions
Can you use colored pencils over marker?
Yes, you can layer colored pencils over markers. The marker goes down first as an underpainting, and once it is fully dry, colored pencils are applied on top to add details, shadows, and highlights. This works best with alcohol-based markers and either wax-based or oil-based colored pencils.
Should I use markers or colored pencils first?
Markers should always go first. Markers are a wet medium that needs direct contact with the paper to bind and dry properly. Colored pencils layer on top of the dried marker, grabbing the paper tooth through the thin marker film. Applying marker over pencil causes streaking and uneven color.
How long should I wait before layering pencil over marker?
Wait at least 60 seconds after applying marker before layering colored pencil on top. In humid environments or with heavily saturated areas, wait two to three minutes. The marker must be completely dry to the touch to avoid smearing and muddy color.
What are the best colored pencils to use with alcohol markers?
Prismacolor Premier and Caran d’Ache Luminance are the most recommended colored pencils for layering over alcohol markers. Prismacolor (wax-based) glides on smoothly and blends easily. Caran d’Ache Luminance and Faber-Castell Polychromos (oil-based) hold a sharp point better and avoid wax bloom.
Can you layer colored pencil over acrylic markers?
Yes, but acrylic markers behave differently from alcohol markers. Acrylic markers dry to a thicker, slightly textured film. Colored pencils can layer on top, but the texture may be uneven. Alcohol-based markers are the preferred choice for this technique because they create a thinner, smoother base layer.
What does rubbing alcohol do to colored pencils?
Rubbing alcohol can dissolve and blend wax-based colored pencil pigment, creating a painterly effect. It is sometimes used as a blending tool for colored pencils on their own. However, it will not help with layering over markers and can damage the marker underpainting if applied too aggressively.
Can I use colored pencils on mixed media paper?
You can, but it is not recommended for layering colored pencils over markers. Mixed media paper has too much texture for clean marker work, causing bleeding and uneven color. Bristol Vellum or X-Press It Blending Card are much better choices because they balance marker smoothness with enough tooth for pencil.
What is the Prismacolor technique?
The Prismacolor technique refers to layering and blending with Prismacolor Premier colored pencils, which are wax-based. These pencils are known for their soft, creamy cores that glide easily over surfaces. When used over alcohol markers, they create smooth, rich layers with a slightly waxy finish that can be polished with a colorless blender.
Wrapping Up
Learning how to layer colored pencils over markers opens up a whole new range of creative possibilities. The technique is straightforward: markers create a vibrant base, and colored pencils add the detail and refinement on top. Once you understand the underpainting concept and get your paper choice right, the rest is practice.
Start with Bristol Vellum, alcohol-based markers, and either Prismacolor Premier or Polychromos colored pencils. Test your colors on scrap paper first, let your marker dry fully, and build up pencil layers with light pressure. The results will surprise you.